What is the Right Way of Formatting the Hard Drive on Windows System?

|
Summary: Hard drive is used in computers or laptops for storing all types of data. There are some scenarios when you need to format the hard drive. In this blog, we will cover all the scenarios and the right way of formatting the hard drive so that no one can recover data from the formatted hard drive. |
|---|
Table of Contents
Scenarios in Which you Need to Format the Hard Drive
Formatting the hard drive is not a tough task but formatting it in the right way is more important. There are many situations when formatting of the hard drive becomes necessary. Let’s take a look at some of these situations.
इस पोस्ट को हिंदी में पढ़ने के लिए यहां क्लिक करें
- Re-installing OS: If you are reinstalling the OS, then you need to format the C Drive of your computer before OS installation.
- Making New Partition: When you create a new partition on your hard drive, then you can format the partition before saving files.
- Selling your Computer: If you are planning to sell your old computer or laptop, you need to format the hard drive.
- Virus Attack: When your external hard drive is infected with the virus, then you need to format the hard for using it in the non-infected machine.
- Changing File system: When you need to change the file system of your hard drive, then you have to format the hard drive.
Note: The purpose of formatting the drive is different in each scenario. For data privacy and avoiding data breaches, you should format (erase) the drive with certified drive eraser software.
How to Format the Hard Drive?
Simply formatting the hard drive doesn’t permanently delete the data from the device. Instead, it removes the files references so that the files become inaccessible and hidden to you. All the deleted files remain on the hard drive. Here, we will discuss different methods of securely formatting the hard drive.
Warning: Take a backup of your data before formatting the drive. Formatting will erase all the data on the drive. You can restore your data from the backup.
Formatting Hard Drive Partition in Windows
- Click on the This PC/My Computer desktop icon. You will see all the drive partitions.
- Right-click on the drive partition you want to format.
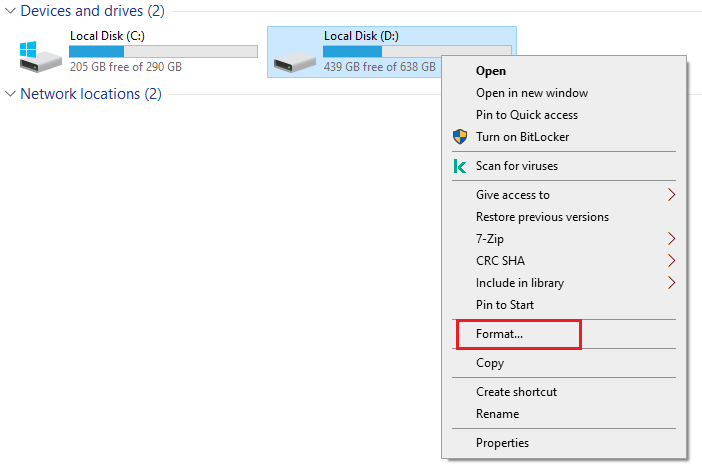
- Select Format from the list.
- Choose the file system. If the drive is used in the Windows system, then select NTFS. If the drive is external, then select FAT32 or exFAT.
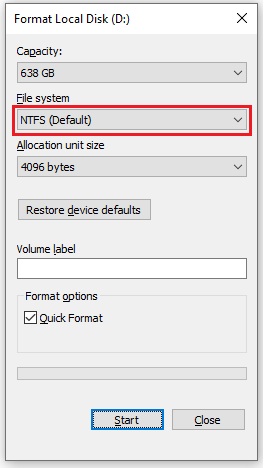
- Select Quick Format. Quick Format will take a few seconds to format the partition.
Note: Data can be recovered after a quick format of the hard drive. For secure wiping, use certified data wiping software.
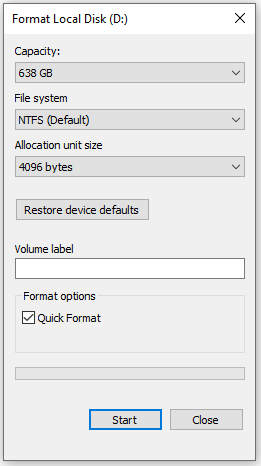
- Click on Start and then click on OK to confirm the formatting of the partition.
Format Hard Drive using Disk Management
- Press Windows and R keys together. Type diskmgmt.msc in the Run dialog box. This will open the Disk Management screen.

- Now, select the drive you want to format.
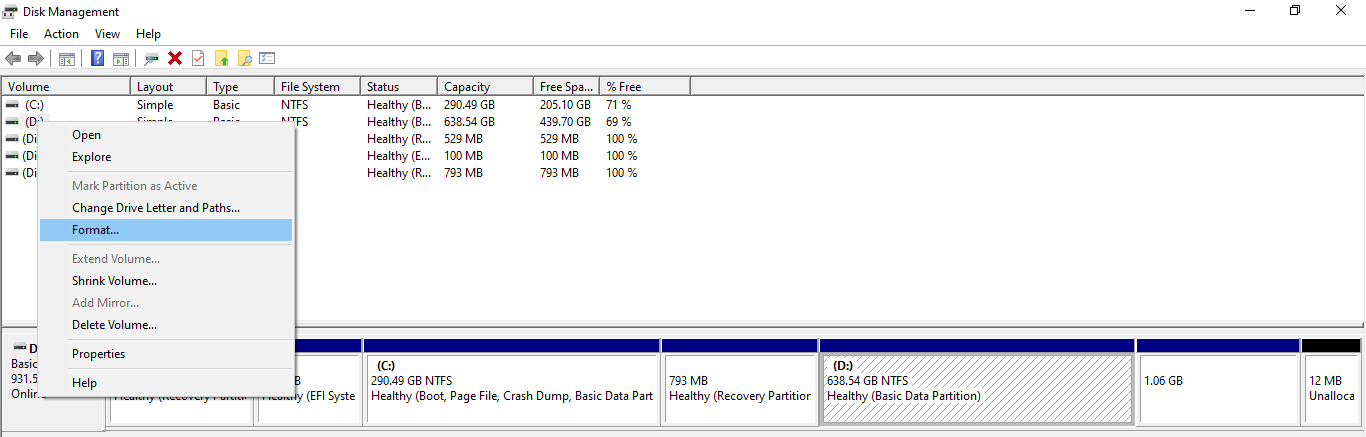
- A Format box will appear. Choose the volume label, file system, and allocation size (Use default settings).
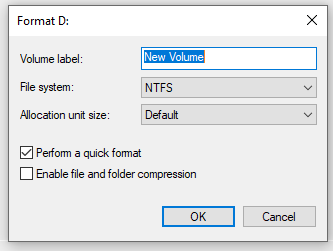
- Click OK to format the selected drive.
Note: The above method is only applicable to format the secondary partition in the Windows system. If you want to format the primary partition, then you need to boot the system and require an OS installation drive.
Format the Hard Drive’s Primary Partition (C: Drive)
- Insert Windows installation boot device (CD or USB drive) into your system.
- Reboot your system.
- The Windows setup app will come up automatically. If not, then press any key to boot.
- Select suitable language and time from the setup wizard and click Next.
- Click on Install now and wait for the process to complete.
- Choose your desired version of Windows and accept the terms.
- Select the primary partition (C: drive). Click on Format and then OK on the message screen.
- Now the drive is formatted and you need to re-install the OS.
- Reboot your computer.
Secure Formatting of the Hard Drive
Important: After formatting/wiping the hard drive securely, there is no option to recover the data from the drive. For wiping the hard drive in a more secure way, you need to install certified data wiping software, such as BitRaser Drive Eraser.
BitRaser Drive Eraser is a DIY tool for securely wiping your hard drive beyond the scope of data recovery. BitRaser is NIST tested and approved software that supports 24 International erasure standards, including DoD, NIST, HMG, CESG, etc. Follow the steps given below to use BitRaser Drive Eraser:
- First, you need to purchase a BitRaser Drive Eraser license from the official website.
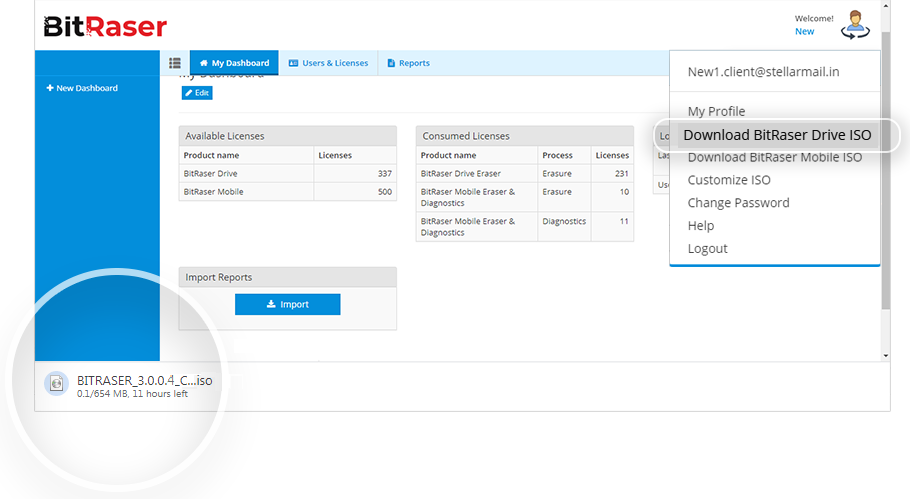
- Log in to a cloud account, click on the user profile icon and download the BitRaser Drive Eraser ISO image.
- Download and install Rufus software to create a bootable USB drive.
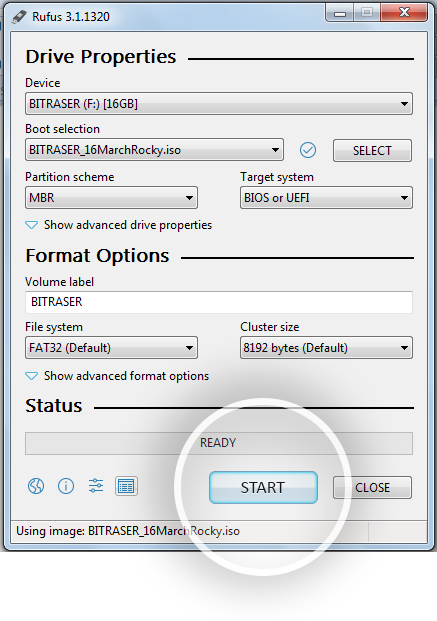
- Connect the bootable USB drive to the computer or laptop.
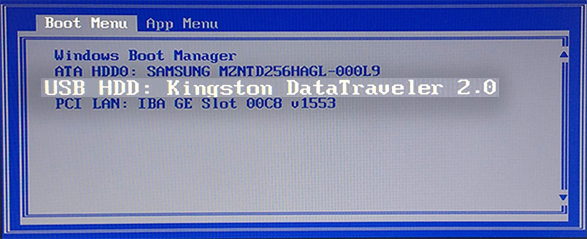
- Power on the laptop or PC and press the function key to boot your PC or laptop.
- Select your bootable USB drive.
- Select BitRaser and press Enter to initialize BitRaser Drive Eraser.
- Connect the host machine to the internet and log in to your cloud account.
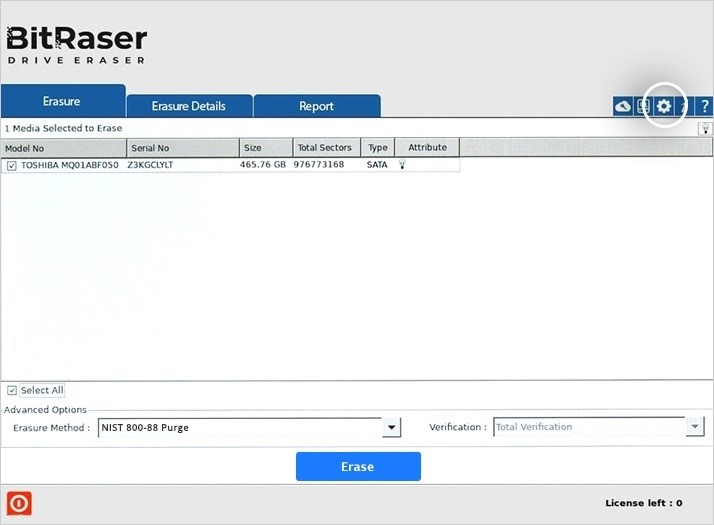
- Click on the Settings icon from the home screen.
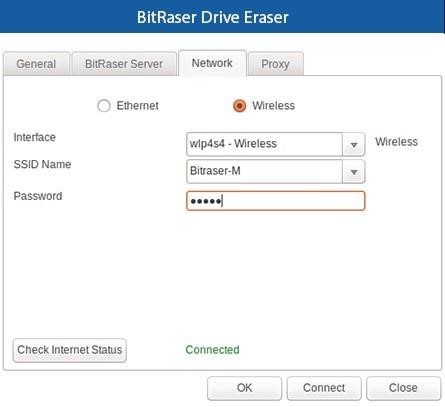
- Select the Network tab and select the desired internet connection option from the screen.
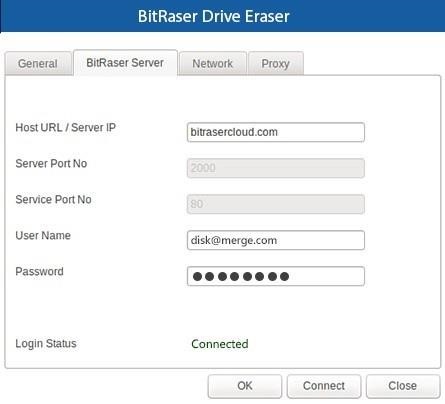
- Click on the BitRaser Server tab and enter the login credentials to log in to your BitRaser cloud account.
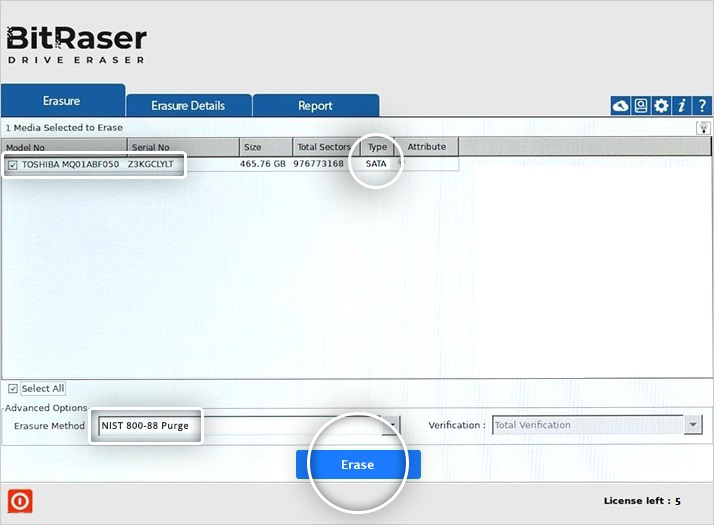
- Tick on the checkbox to select the drive and click on Erase to wipe the hard drive.
After wiping the drive, it will generate tamperproof digitally signed erasure reports for all the erased drives and save them automatically on your BitRaser Cloud account.
Conclusion
In this blog, we have discussed different methods of formatting the hard drive. To wipe data permanently beyond the scope of recovery, you need to use a certified and secure data wiping software, like BitRaser Drive Eraser. It will also generate a data erasure certificate for data security compliance.
About The Author

Girish is a blogger and writer. He has over 6 years of experience in Data Recovery and Data Eraser technology. In his free time, he writes about technical tips and tutorials.