| Summary: Your iPhone is the repository of your life’s data trail. Don’t leave it vulnerable. Wipe it securely when you don’t need it anymore. In this guide, we explain how to wipe your iPhone data beyond recovery. |
|---|
Table of Contents
- Data loss scenario in iPhone
- Guide on iPhone data wiping
- Wipe iPhone data with BitRaser Mobile Eraser
- What is a secure way for iPhone data wiping
Imagine this scenario. You’ve sold your old iPhone. However, you’ve forgotten to delete all the information you’ve had on the phone.
Now all your data is vulnerable to theft – your private chats, personal photos, most visited location, and whatnot. You panic while you ask yourself why didn’t you wipe your iPhone data before handing over the mobile.
Never be the person mentioned above. Play smart and wipe iPhone data securely before you sell your iPhone or lose it somehow.
Now you have questions. How can I wipe iPhone data? What’s the most secure way to wipe iPhone data? What tools do I have to take care of it?
Don’t worry. This article will offer the answers. In the next five minutes, learn all about how you can wipe iPhone data securely. This complete guide will discuss:
- How to securely wipe iPhone data using the phone settings option
- How to securely wipe iPhone data using a computer
- How to securely wipe iPhone data using the BitRaser mobile eraser software
By the time you finish reading this article, you’ll know everything about the topic.
Without further ado, let’s begin.
Wipe iPhone data securely – a complete guide
Use the settings option from your iPhone
Check out the steps below:
- Open the settings option.
- Go to General > Reset > Erase all content and settings.
- Click on erase now in the dialogue box.
- Enter the Apple ID password and passcode when prompted.
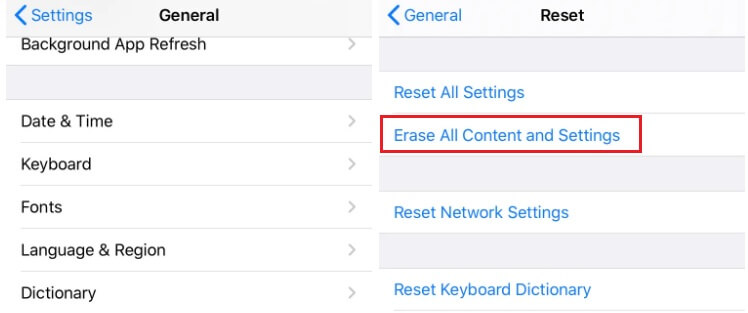
The process will erase all data from the iPhone while turning the device off. Afterward, when you turn on the iPhone again, you’ll see all the data is deleted including apps, contacts, photos, and videos.
Use a computer to wipe iPhone data
You can use either a Mac or a Windows PC to wipe all data and settings from your iPhone. Furthermore, the process will restore the iPhone to factory settings and install the latest iOs version.
Wipe iPhone data using a Mac
Check out the steps you need to take to achieve the same:
- Connect the iPhone to the computer with a USB or USB-C cable.
- Turn the iPhone ON.
- If you’re using a computer with macOS 10.15 or later, click the Finder icon in the Dock to open a Finder window. Go to the Finder sidebar (below locations) and click on the iPhone button. Afterwards, click General at the top of the window and click on Restore iPhone.
Wipe iPhone data using a Windows computer
If you’re using a computer with macOS 10.14 or earlier or a Windows PC you’ll need the latest version of iTunes. Here’s what to do next:
- Open iTunes
- Click the iPhone button.
- Click summary.
- Click on Restore iPhone.
That’s it. The data has been securely wiped.
Use BitRaser mobile eraser and diagnostics software
Check out the steps you need to take to wipe iPhone data with the software:
- Log into the BitRaser cloud console by entering the user id and password. You’ll receive the user id and password after purchase.
- Go to the user icon on the BitRaser cloud dashboard. Click on download the BitRaser Mobile Eraser and Diagnostics ISO.
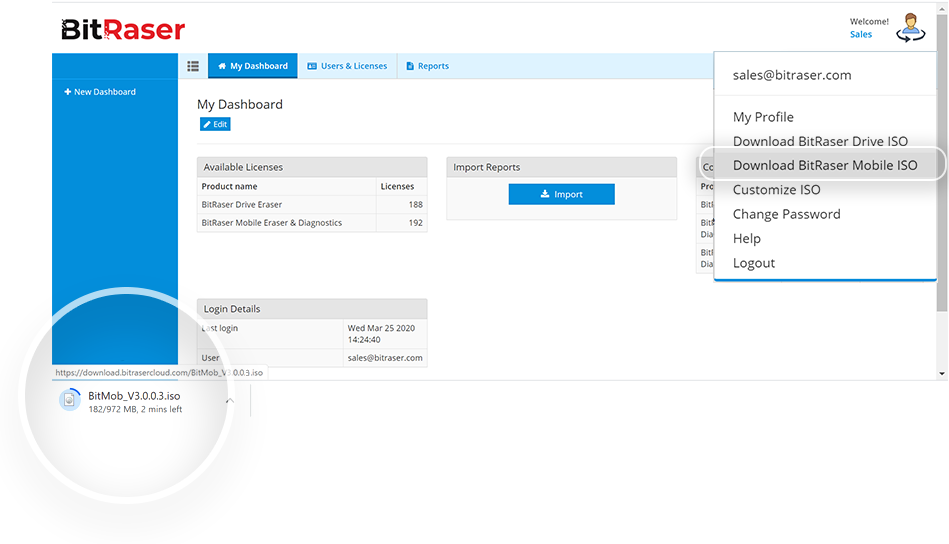
- The ISO file will be downloaded to your system.
- Mount this download ISO onto a USB drive. You can do the same by using the free rufus application to create a bootable USB drive in Windows PC. All you need to do is go to https://rufus.ie and download the latest version of the app.
Note: Mac users can download the Etcher application from https://www.balena.io/etcher/ to create a bootable USB drive
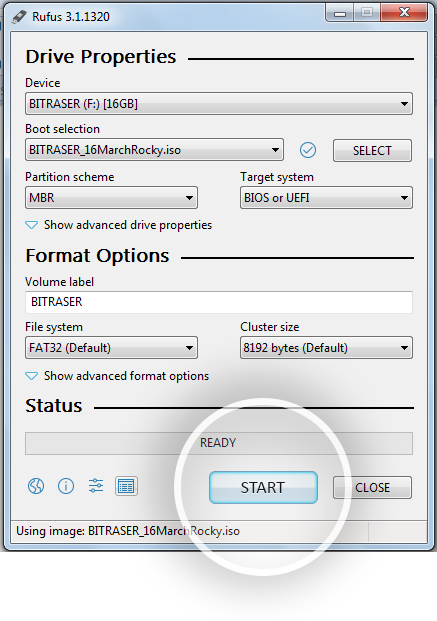
- Launch the application.
- Connect a USB drive to burn the BitRaser mobile eraser and diagnostic software ISO.
- Select the ISO file. Click start. Click yes. Click OK.
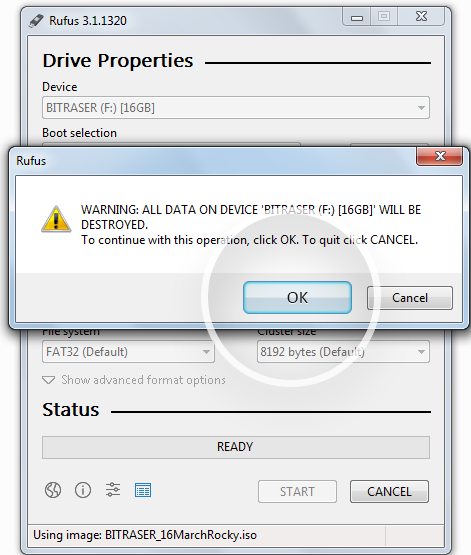
- You now have an installation USB of BitRaser Mobile Eraser and Diagnostic software. Install the software to any PC using the USB drive.
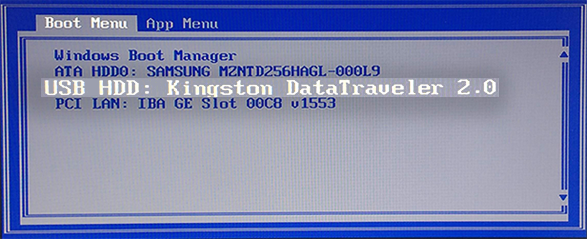
- Turn on the computer and open the boot menu of the computer.
- Select the USB drive from the available options and press enter.
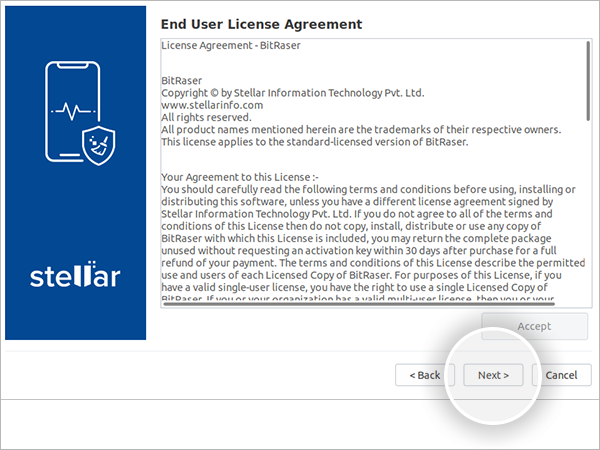
- The software installation wizard will show up on the screen. Click on Accept and agree to the end-user license agreement.
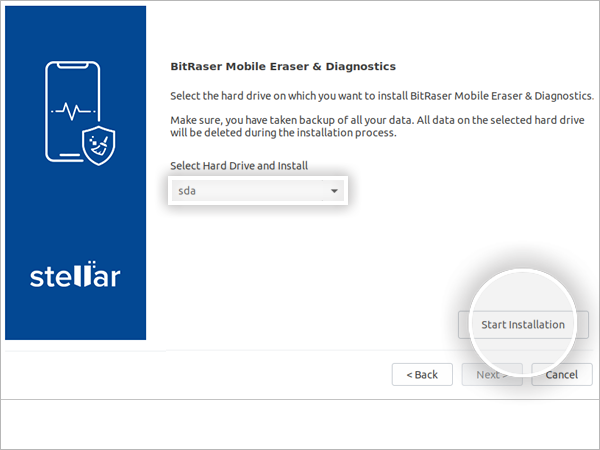
- You’ll now see the backup data dialogue box on the screen. Make sure you have backed up all the data.
- Select the hard drive and click on start installation.
- After the installation is complete, remove the USB drive and click on reboot.
- After the PC has rebooted, create a new user by filling up the details.
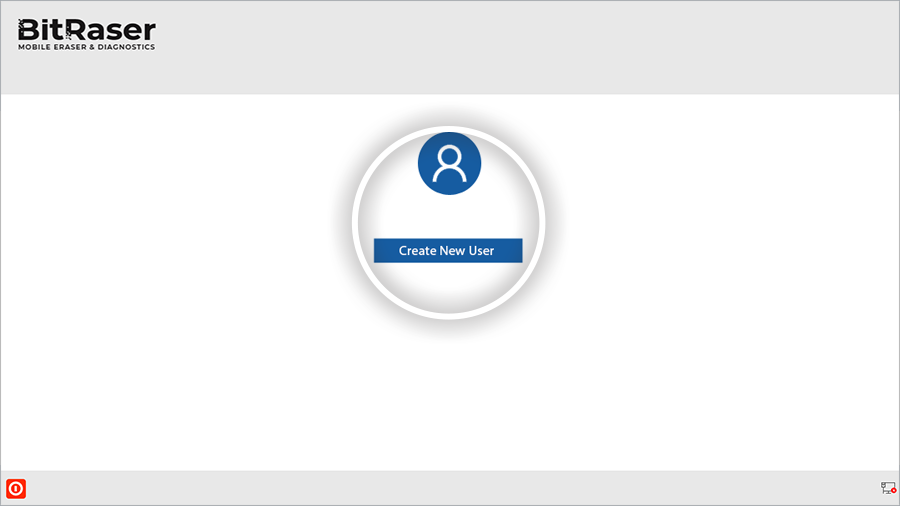
- Log in to the BitRaser software.
- Connect the Software with the Internet and BitRaser cloud account.
- Connect the iPhone to the host PC.
- Select the iPhone and the eraser standard from the list. NIST purge is the best option for secure wiping.
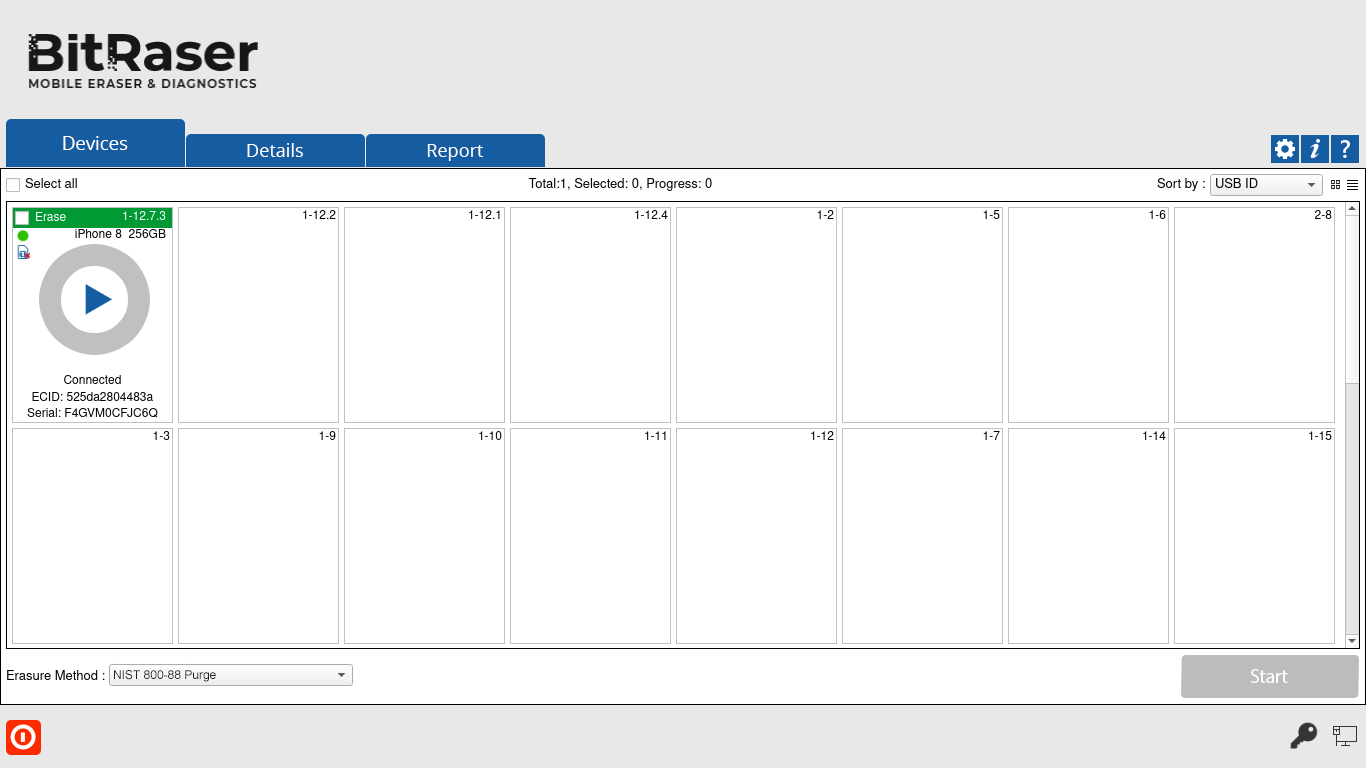
- Initiate the eraser process following the prompts.
- The latest firmware will get downloaded on the iPhone.
- The eraser process will begin and complete on its own.
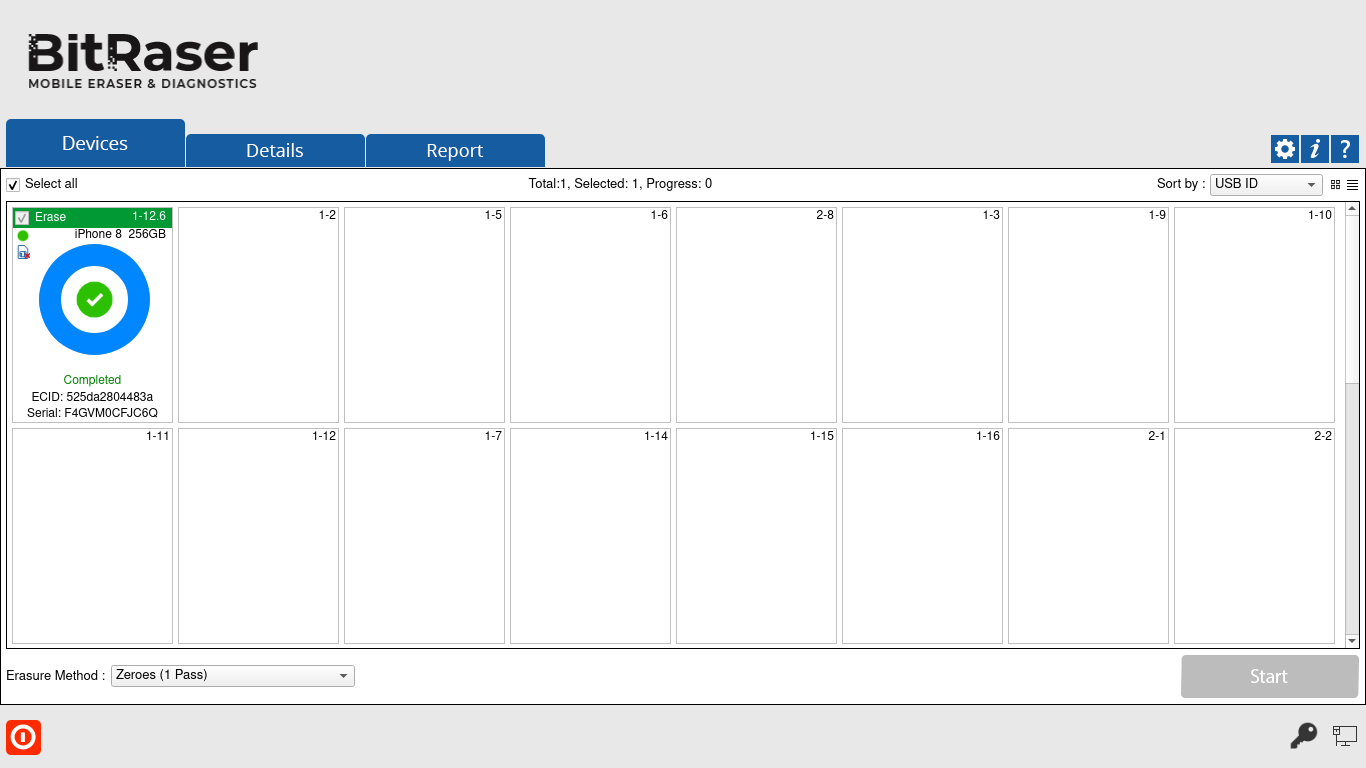
- You’ll find a digitally signed eraser report in your BitRaser cloud account.
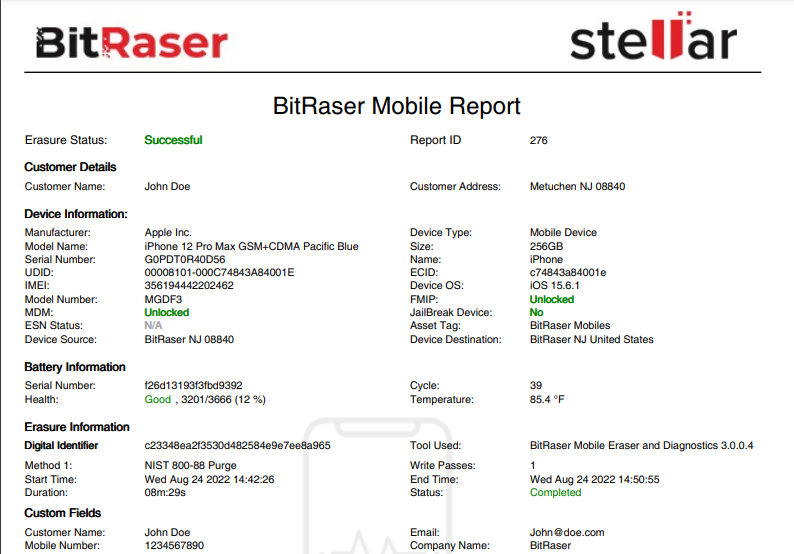
Note that the software can securely wipe the data from iPhones with iOS version 7 and above.
Wipe iPhone data securely – BitRaser is the best way to wipe iPhone data securely
We have shared all the information you need about how to wipe iPhone data securely. Among these choices, we recommend BitRaser the most.
Don’t take our word for it. Check out the reasons below why you should use BitRaser:
- The software makes sure to securely wipe iPhone data permanently. The software achieves the same as the data-wiping efficacy tested by NIST.
- BitRaser offers ISO customization which comes with an automated and customized erasure process. The process helps save both time and money.
- BitRaser offers a single cloud dashboard for mobile, drive, and file erasure software. Furthermore, the software allows individuals and companies to retrieve past data-wiping reports through this dashboard as well.
- The software generates and stores tamper-proof reports and certificates automatically on a secure cloud repository. The storage is especially beneficial when you perform audits and compliance checks.
Now that you know how to securely wipe iPhone data, the knowledge will help you make the most informed decision.
Additional Reading: Things You Need To Do Before Exchanging Mobile


