Guide: How to use Stellar Data Recovery for Mac?

| Summary: In this guide, you’ll get to know the complete working of the software – how to download, install, activate, and use it to recover lost or deleted data.
Stellar Data Recovery Professional for Mac is one of the most trusted data recovery software. It supports macOS Ventura 13.0, macOS Big Sur 11, Catalina 10.15, Mojave 10.14, 10.13, 10.12 & 10.11. The software is widely used to recover files, folders, documents, photos, videos, audio, etc., from HDDs, SSDs, external USB drives, and optical media. You can restore data from completely crashed and unbootable systems as well.
|
|---|

How to Download, Install & Activate Stellar Data Recovery for Mac?
-
To Download Stellar Data Recovery Professional for Mac
- If you want to try the software before making a decision to purchase it, Try the Free demo version of the software.
- If you’ve already made a decision and want to download a full version of the software, click Buy Now. You’ll be redirected to another page from where you can purchase the software. Once purchased, you’ll receive an activation key at your registered email address.
2. Steps to install the software:
- Double-click the downloaded StellarDataRecoveryProfessional.dmg.zip file to extract the .dmg file
- Double-click the extracted disk image (dmg) file StellarDataRecovery.dmg to mount a virtual volume
- Drag the application from the mounted virtual volume to the Applications folder
This installs Stellar’s data recovery software successfully on your Mac.
3. Steps to Activate the Stellar Data Recovery for Mac:
| [NOTE]: You need not activate the software if you’ve downloaded and installed the free demo version of the software and simply want to ascertain its effectiveness.
You can also read: How to Activate Stellar Data Recovery for Mac? |
|---|
- Open the Applications folder and double-click the recovery software/application to launch it
- Accept the License Agreement, You’ll be presented with an Activation dialog box.
- On the Activation dialog box, enter the activation key you’d received on your registered email address, and click Activate button
- Click OK on the activation success message box
How to Recover Data by Using the Software?
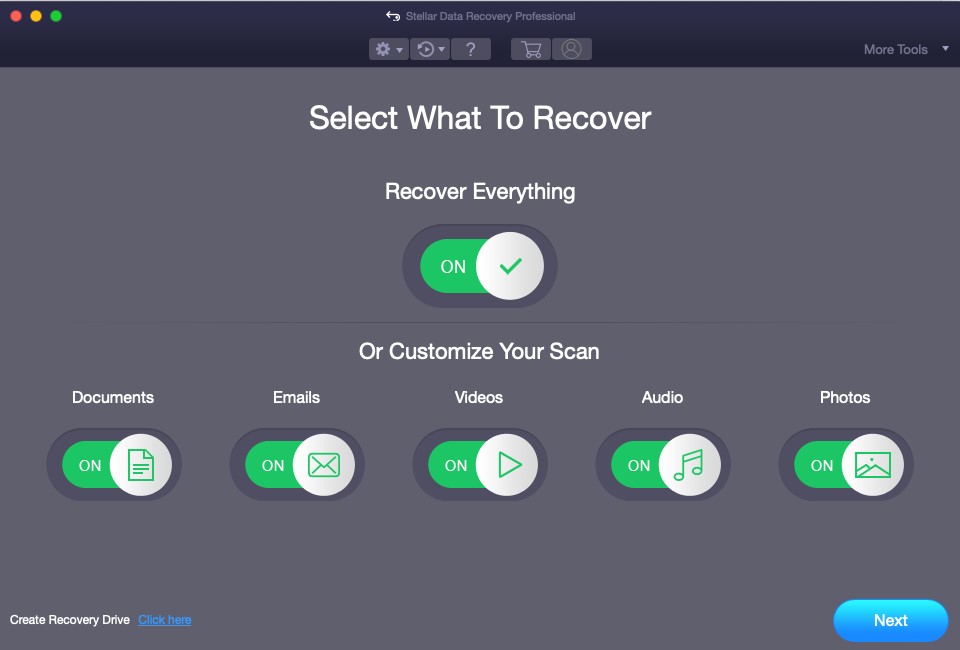
- Launch Stellar Data Recovery Professional for Mac (if not already launched)
- From the main interface, select the type of files you want to recover by using the toggle switches, and click “Next”
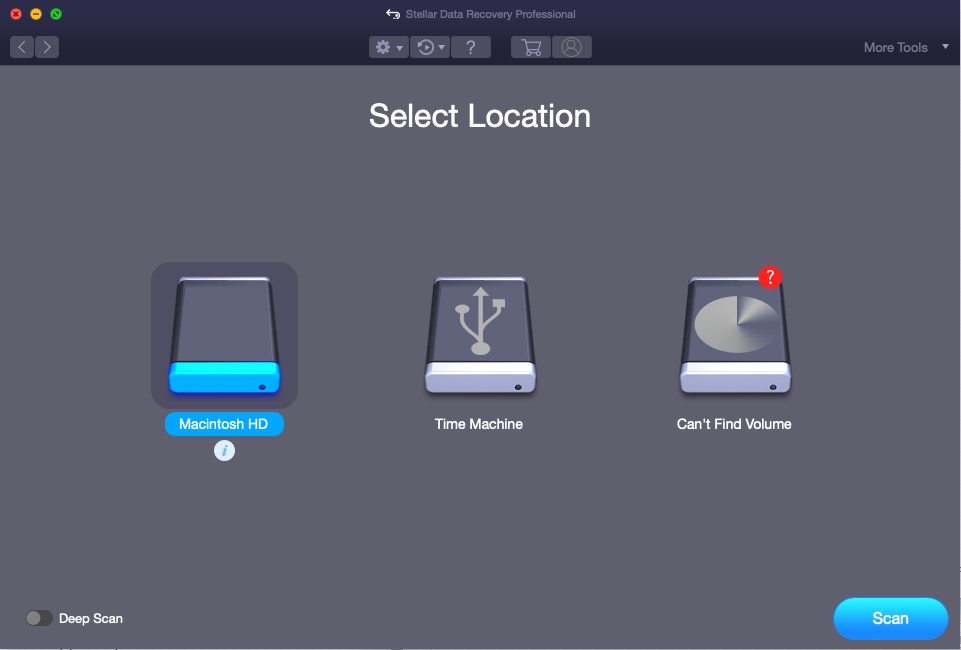
- On the ‘Select Location’ screen, select the volume you want to search for the lost data and click “Scan”.
If you don’t see your required files, toggle ON the “Deep Scan” switch at the bottom. Deep Scan is a comprehensive file signature-based search for maximum recovery in tough data loss cases such as drive formatting, corruption, etc.
- When the Scanning process completes, click “OK”
- To preview the recoverable files found after scanning, select one of the views –
Classic List, File List, or Deleted List – from the left-hand pane.
Expand the tree structure, click the desired folder; and double-click any file on the right pane to preview it.
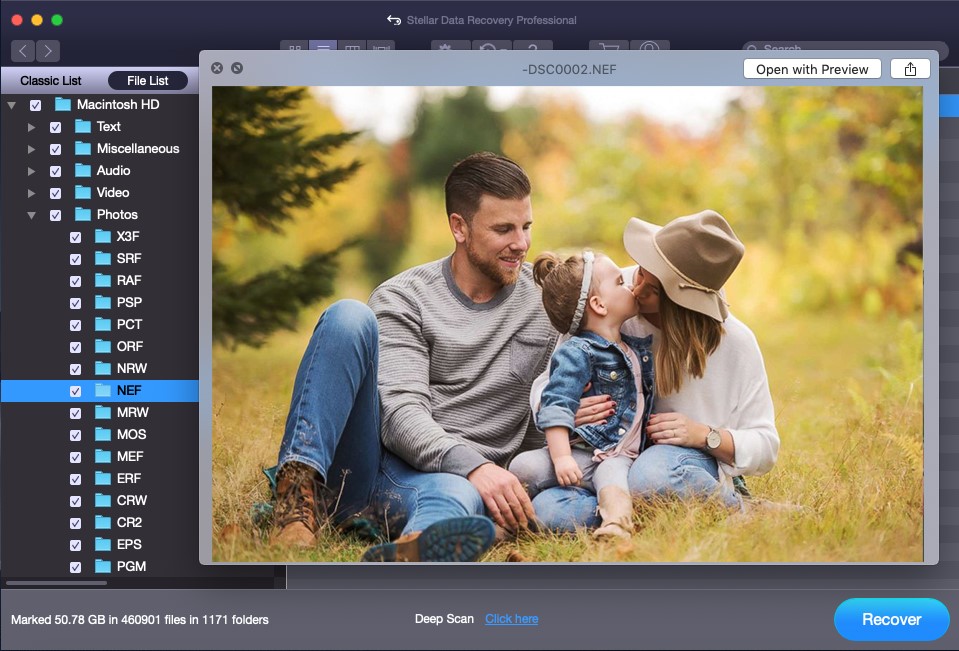
- Select the files you want to recover, and click Recover
| [NOTE]: If you’re using a demo version of the software or haven’t activated the software, you’d be prompted to activate the software as soon as you click Recover. To continue and save the recoverable data, enter the activation key, or click Get it now to purchase the software and get the activation key on your registered email address. |
|---|
- When prompted, click Browse and select the desired location to save the files
- Click Save to initiate the saving process
This will save the recovered data at your selected location.
The Drive Monitor Feature
The software has a ‘Drive Monitor’ feature, which allows you to view the overall health of your disk in real-time.
Steps to use Drive Monitor:
- Launch the Stellar Data Recovery Professional software
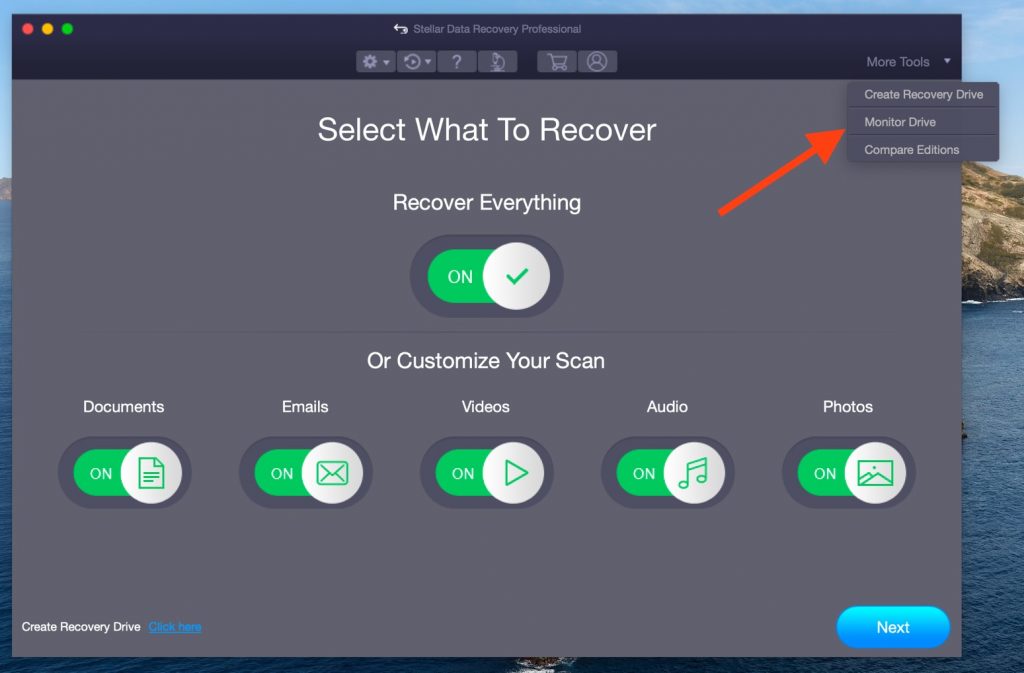
- From the main interface click More Tools (at the top-right corner) > Monitor Drive
This opens an interface from where you can select a disk connected to your Mac and check its disk status, SMART status, and disk partition details.
The Drive Monitor window has the following options. You can click on any as per your requirement:
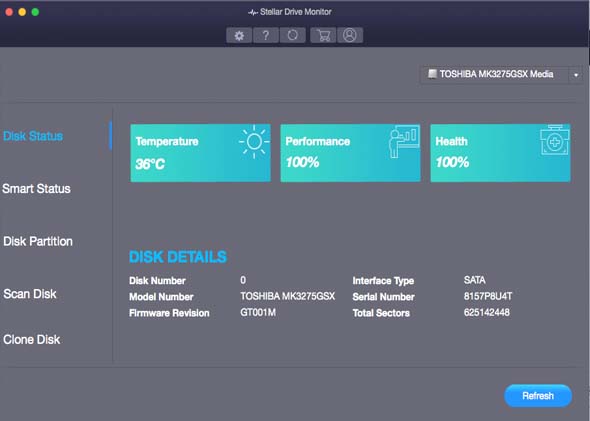
- Disk Status: When you click Disk Status, you’ll be able to view the temperature, performance, health, and details of the disk such as model number, serial number, the total number of sectors, etc.
- Smart Status: SMART Status option shows SMART attributes of the drive such as throughput performance, end-to-end error, etc. Based on these details, it also shows the overall SMART status of the drive as passed or failed.
- Disk Partition: By choosing this option, you’d be able to see the disk’s partitions with details such as partition’s drive letter, file system, status (Healthy/Failed), capacity, and free space.
- Scan Disk: Scan Disk module in the drive monitor utility scans & reports bad sectors on the disk to help assess the need for cloning.
- Clone Disk: If the disk is severely corrupt or has too many bad sectors, you can use this option to clone the disk to a target/another disk. This helps in restoring data from the clone in case you lose data due to disk failure.
Conclusion
This guide mentioned the complete working of Stellar Data Recovery Professional for Mac software that recovers lost or deleted data from any Mac device or storage media. It explained in detail the process to download, install, and activate this advanced data recovery software on your Mac device. Also, this guide outlined the step-by-step process to recover lost, deleted, and inaccessible data by using the software.
About The Author

Meenakshi is a technical blogger with experience in writing data recovery tips and tutorials. She knows her way around the data loss problems and is always looking for ways to help out people.