| Summary: The easiest way to Fix MSVCR71.dll Not Found Error is to install the latest .NET redistributable package. If however, somewhere along the way you have lost data, you will need a specialized recovery software such as Stellar Data Recovery. |
|---|
So you decide to open up a game on your computer, and are faced with this:
This is just the most common msvcr71.dll error — there are about seven of them in total.
Luckily, the two fixes that we cover in this article will be able to fix the Msvcr71.dll was not found error, as well as all the other msvcr71.dll error messages as well.

Table of Content:
- Types Of Msvcr71.dll Error Messages
- How To Fix MSVCR71.dll Not Found Error?
- Recover Data After The Msvcr71.dll Error Has Been Fixed
- Why Stellar?
- Things To Remember- Fix MSVCR71.dll Not Found Error
Types Of Msvcr71.dll Error Messages
Before we begin, here are the most common Msvcr71.dll file error messages that you will come across:
| Most Common Msvcr71.dll Error Messages | Most Common Cause |
|---|---|
| The Msvcr71.dll File Was Not Found Error | Corrupted System Root Files |
| The Application Did Not Start As The Msvcr71.dll File Wasn’t Found. Reinstalling May Fix The Issue. | Application Packaging Or Installation Issue |
| The Application Can’t Start Because The Msvcr71.dll File Is Not On Your Computer. | Windows Registry Errors |
| Cannot Find [Enter Path Here]\Msvcr71.dll | Windows Registry Errors |
| The Msvcr71.dll File Is Missing From Your Computer | Corrupted System Root Files |
| Cannot Start [Program Name]. Msvcr71.dll, A Required Component Could Not Be Found | Possible Malware (Rare) |
| Msvcr71.dll Needed To Start [Application Name] is missing from your system. | Corrupted System Root Files |
And now, let us learn how to fix the Msvcr71.dll was not found error.
How To Fix MSVCR71.dll Not Found Error?
We have listed the two ways that you can fix the msvcr71.dll was not found error in the order that we recommend you try them.
1. Download The File Manually- Fix MSVCR71.dll Not Found Error
The fastest (not easiest) way you can fix the msvcr71.dll was not found error is to re-download the missing DLL *Dynamic link library) file manually yourself.
Here is how you can go about doing just that:
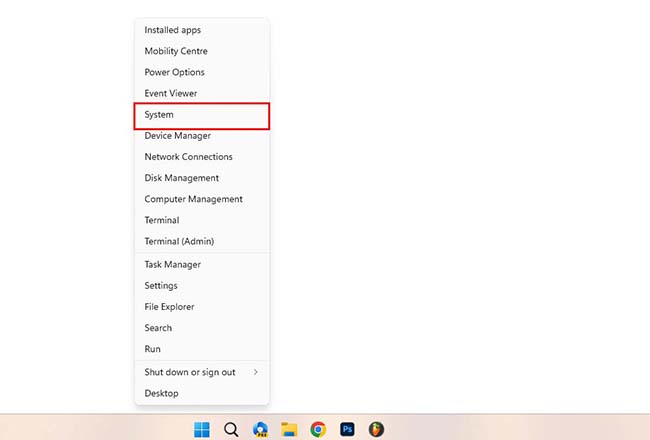
- The first step is to find out whether you are running a 32-bit or a 64-bit system. Click Windows + “X” and navigate to “system”.
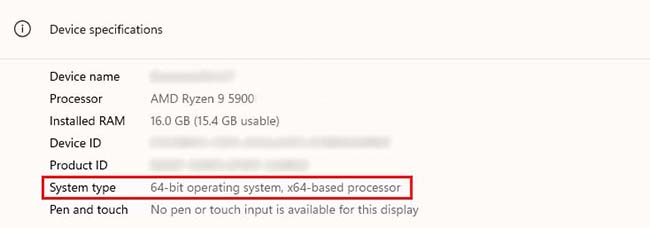
- Here you will be able to see whether you are on a 32-bit architecture or on a 64-bit machine. You don’t need to know what these are, only the number is important. Remember the number as this will be crucial if you want to fix the msvcr71.dll was not found error permanently.
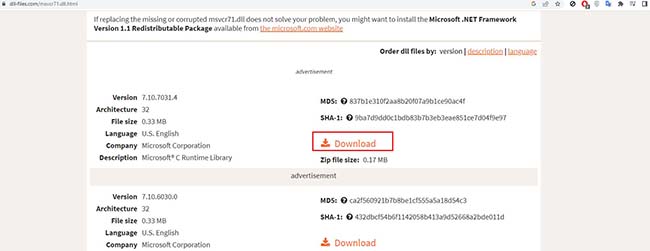
- Navigate to https://www.dll-files.com/msvcr71.dll.html and download whatever version of the file is right at the top. This is the latest available version.

- Right click the downloaded file, and click on extract all.

- Copy the file.

- Then, navigate to File Explorer > This PC > C Drive > Windows > System 32. Right click and paste the file inside the system 32 folder. The process for 32 bit machines ends here, skip to step 8.
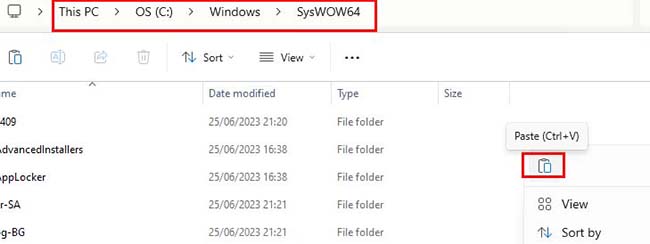
- If you are on a 64-bit machine, there is one more step. Navigate to File Explorer > This PC > C Drive > Windows > SYSWOW64, and paste the file inside this folder as well.
- Next, you need to close down all active programs and restart your computer.
- Once your computer has finished restarting, try opening the problematic application again. This method should be able to fix the msvcr71.dll was not found error permanently
And that was how you could manually fix the msvcr71.dll was not found error.
2. Reinstall The Whole .NET Package
The quickest way however, the “for dummies” method, if you will, is to simply redownload the entire Microsoft .NET framework as a whole.
The reasoning? The .NET redistributable package made available by Microsoft has all of the necessary DLL files needed for programs to function properly.
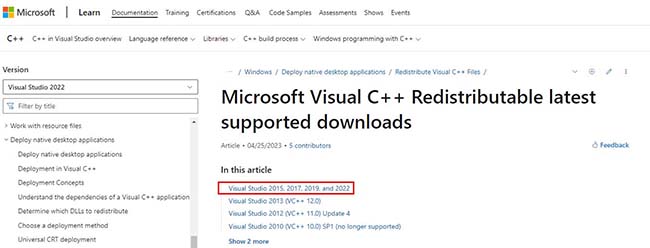
- Navigate to the official Microsoft Redistributable download center. Download the latest version that is available for you, as all versions are backwards compatible.

- Click on the download link and wait for the download to finish.
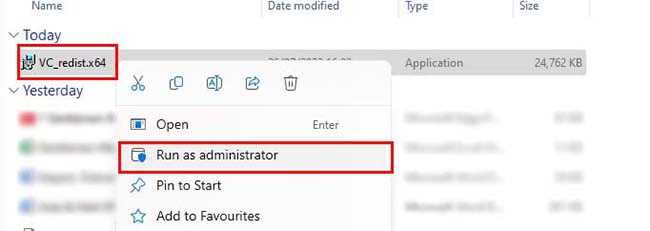
- When done, navigate to wherever you saved the downloaded installer and run it as an administrator. Click “Yes” when asked if you’d like to allow changes. Enter an administrator password for the device if prompted to do so.
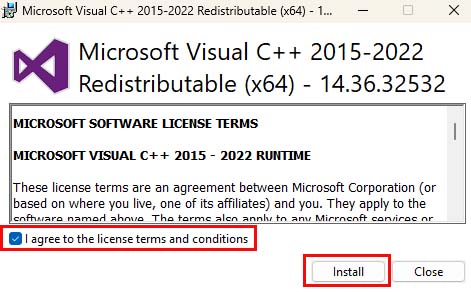
- Accept the terms and conditions by checking the box next to the relevant option, and then click “install”.
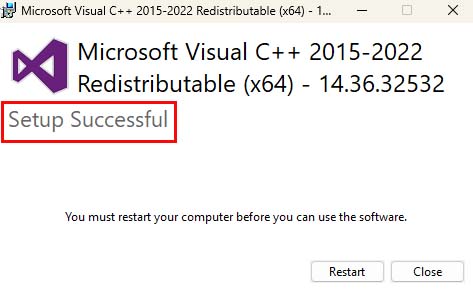
- When the program has finished installing the .NET redistributable, you will get a “Setup Successful” prompt in a pop-up from the installer.
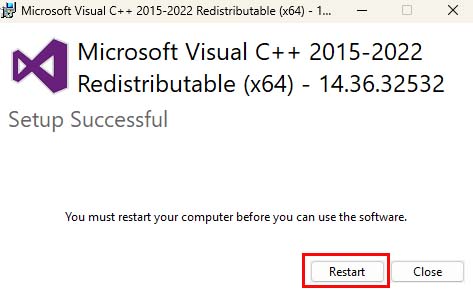
- You must restart your device. You can do this immediately by clicking the restart button, or by clicking “close” and restarting manually later.
Once you have successfully restarted your computer after the installer has completed, try running your problematic application again, and it should have been able to fix the msvcr71.dll was not found error.
Recover Data After The Msvcr71.dll Error Has Been Fixed
Despite your best efforts, it is incredibly easy to have lost data, and not everyone is able to make backups.
If you need to recover data, then you will need to use a specialized program, such as Stellar Data Recovery.
Also Read: Complete Working of Stellar Data Recovery Professional Explained
Here is how you can use Stellar Data Recovery:
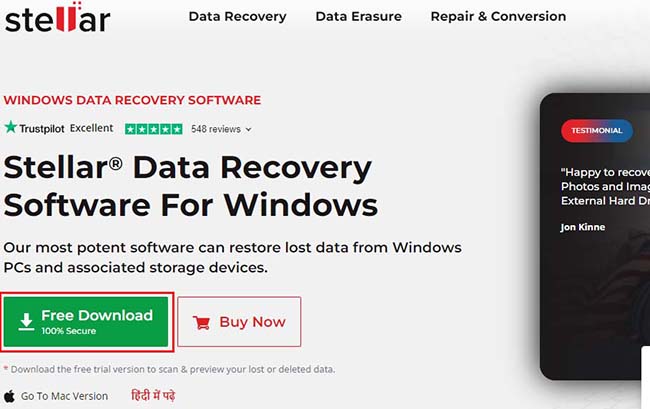
- Navigate to the Stellar Data Recovery Download page and hit the download button.

- Navigate to wherever you have saved the downloaded file and run it as an administrator.
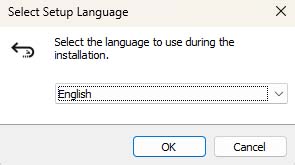
- From the drop down menu, select your language.
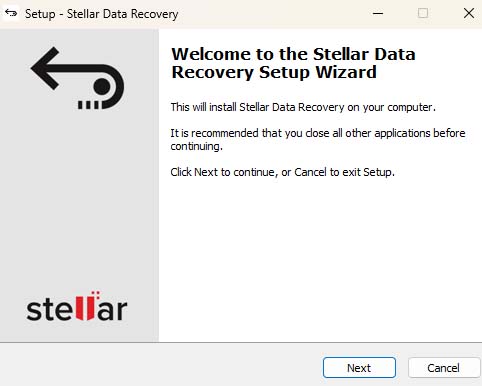
- The installation wizard will now open. Click “Next”.

- Accept the Terms And Conditions of the license agreement and then click the “next” button.
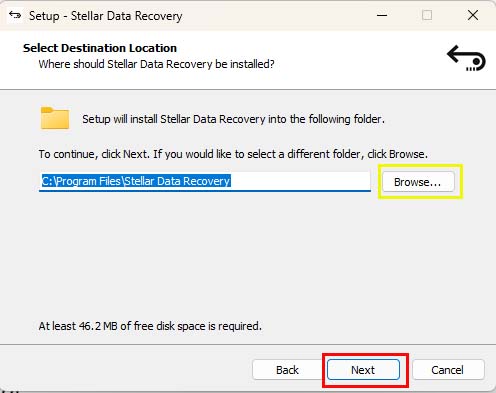
- Specify where you want the program to be installed by clicking the “Browse” button (highlighted in yellow). You could also click “Next” (highlighted in red) to continue with the default install location.
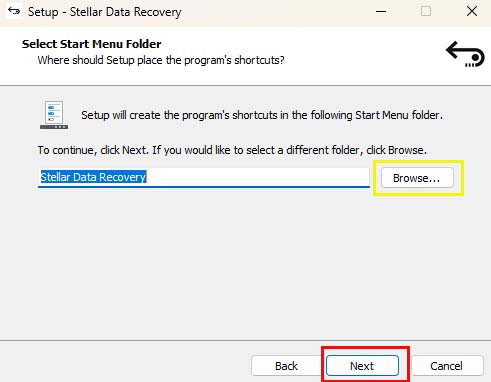
- Click “Next” (Red) to install program shortcuts in the default places, or click “browse” (Yellow) to specify the shortcut location manually.
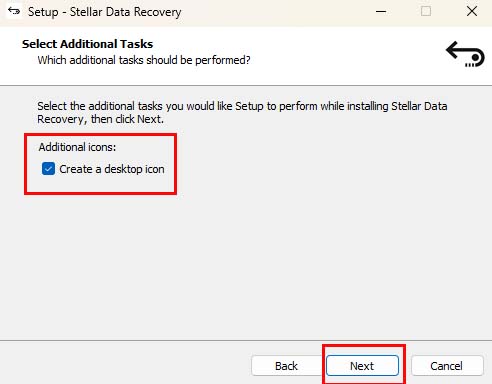
- Click “next”, and depending on whether you want it, check or uncheck the box next to the “Create A Desktop Icon” option.
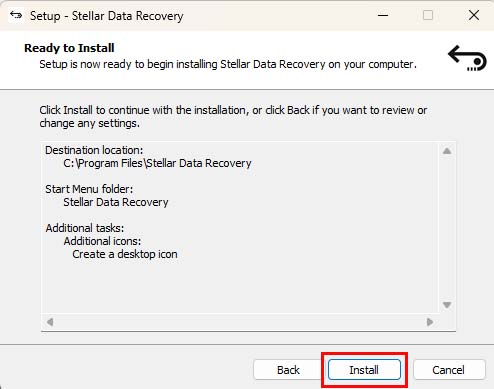
- You are now ready to install Stellar Data Recovery. Click “install”.
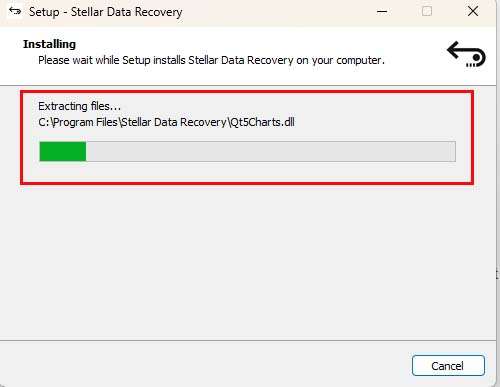
- Wait for the download to finish.
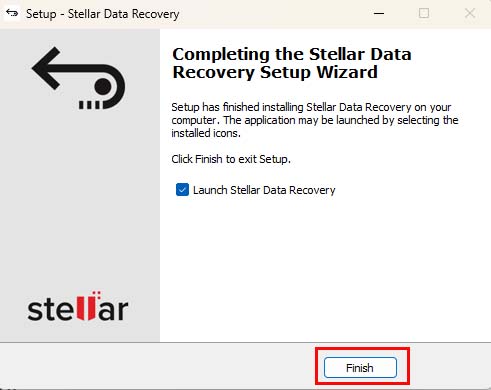
- Click on the “Finish” button in the pop-up. Stellar Data Recovery will now run.
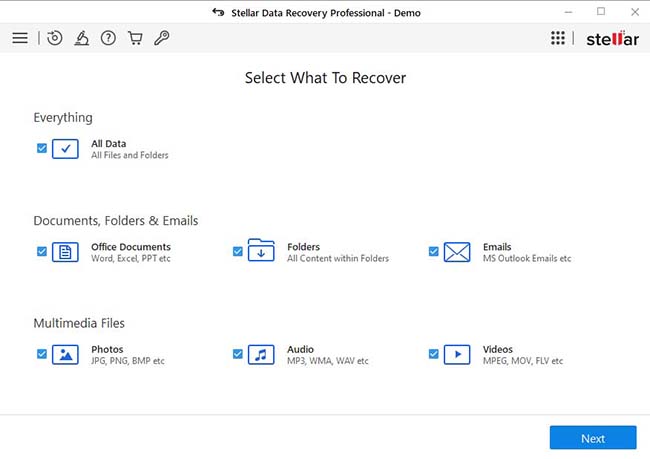
- Select the types of data that you wish to recover. Click “Next”.

- Select the hard drive/ other connected storage media where you want to recover the data from. Click “scan”.
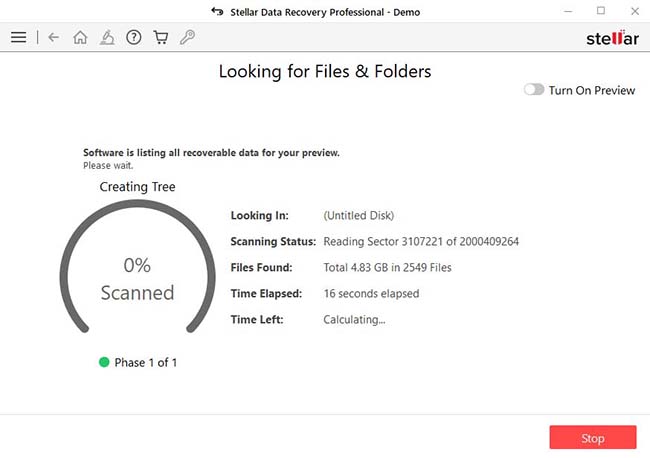
- Wait for the scan to complete. Depending on the size and age of your drive, this could take anywhere from ten minutes to several hours.
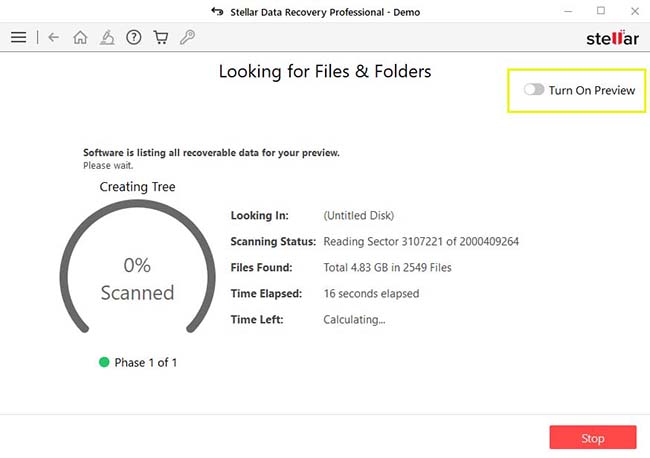
- You can toggle the “Preview” button in the top right.
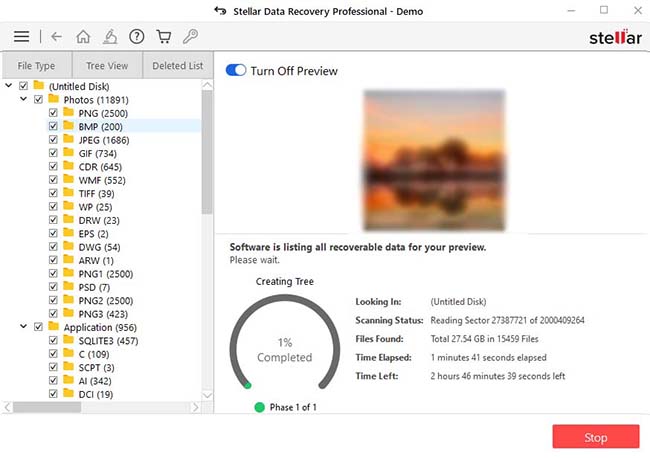
- This will give you access to the preview item window, which will open up on the left.
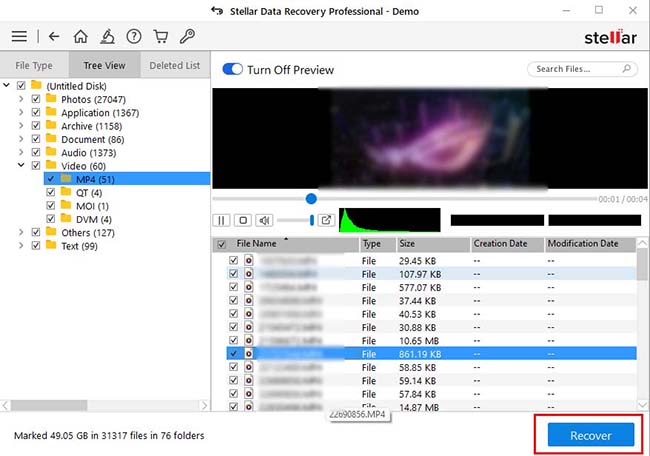
- Click on a file to preview it. If you have found a file you wish to recover, you will need to purchase a license, available at this link. click the “Recover” button in the bottom right.
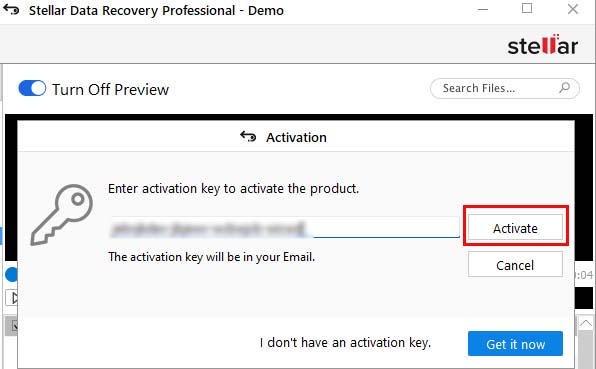
- Enter the activation key that you will have received after purchasing a license, specify a location, and let Stellar Data Recovery work its magic.
Also Read: Get Stellar Data Recovery Activation Key
Why Stellar?
Experience:
For over three decades, we have been honing our skills and knowledge in data recovery and data care.
Trusted Partnerships:
We are proud to serve some of the most prestigious Fortune 500 companies, such as HDFC Bank, Infosys, Hindustan Unilever, HCL, Dell, Sony, FedEx, and Genpact.
Recognition:
Our software has received generous praise as ‘best in category’ by esteemed reviewers.
Customer Base:
We are grateful to have more than 3 million happy customers in our global family.
Innovation:
Our devoted team of 100+ R&D engineers work relentlessly to create innovative and superior quality solutions.
Global Reach:
Our network spans the globe with 8000+ partners and branches in several Indian cities.
Data Security:
We guarantee and maintain 100% data security and privacy in all our services.
Global Leadership:
We are thankful for our recognition as a global leader in data recovery, with our presence reaching 190 countries.
Also Read: Download Free Data Recovery Software Full Version
Things To Remember- Fix MSVCR71.dll Not Found Error
Even if you do everything right, you will not be able to fix the msvcr71.dll was not found error until and unless you restart your computer.
This is because of the way that DLL (dynamic link library) files are built to operate, and a clean install of a new DLL file requires a system reboot to be fully “unpacked”.
All things considered, surely you will agree that both the ways to fix the msvcr71.dll was not found error were not complicated at all.
We hope that you now know how to fix the msvcr71.dll was not found error, in addition to understanding how Stellar Data Recovery works, and we’ll see you in our next “how to” guide.
Also Read: How Does Stellar Data Recovery Software for Windows Work?


