How to Recover SQL Server Database with Corrupt Log File?
-
Written By Sapna Trivedi
-
 Updated on October 10, 2025
 -
 Min Reading 5 Min
 - Share

| Summary: This post outlines reasons that may turn a SQL database transaction log file corrupt. It also discusses how to recover the SQL database with corrupt log files manually and using a SQL recovery tool. |
|---|
Corruption in SQL database transaction log file (.ldf) can make the database inaccessible. Also, it may result in errors, like ‘file activation error’, ‘logical consistency-based I/O error’, etc. The best and most effective solution to recover an SQL database with corrupted log files is to restore the database from the most recent, valid backup. This means restoring the Full, Differential, and Transaction log backups to the point in time before the corruption happened. If there is no backup or it is corrupt, repair and rebuild the log file for database recovery. Before troubleshooting the issue, let’s take a look at the reasons behind log file corruption.

What Causes Log File Corruption?
Some common reasons that may lead to corruption in the transaction log files are as follows:
- The log file has exceeded its configured size limit
- Log file is damaged due to virus or malware attack
- System terminated without cleanly shutting down the database
- Log file gets corrupt due to hardware failure
Solutions to Recover Database with a Corrupt Log File
Follow the given solutions to repair and recover the SQL Server database with the corrupt log files.
Solution 1 – Repair and Rebuild the Log File
Try to repair the corrupted .ldf file by following these steps:
- Bring the database online by putting it in the EMERGENCY state. For this, run the below query:
| USE master GO ALTER DATABASE [DB_Name] SET EMERGENCY |
- Next, put the database in SINGLE_USER mode to prevent users from making any changes to the database during the repair process.
| ALTER DATABASE [DB_Name] SET SINGLE_USER |
- Run DBCC CHECKDB using REPAIR_ALLOW_DATA_LOSS
Execute the following DBCC CHECKDB command to check consistency errors in the database and use the REPAIR_ALLOW_DATA_LOSS option to fix the corrupted log file.
| DBCC CHECKDB (DB_Name, REPAIR_ALLOW_DATA_LOSS) WITH NO_INFOMSGS, ALL_ERRORMSGS; |
This command will repair the corrupted database file. But, it may result in data loss.
Also Read – How to Repair Corrupted SQL Database?
Some of you may receive SQL error 824 after executing the DBCC CHECKDB command with the repair option. This means that the transaction log file is still corrupt. In such a situation, try to attach the database, and here’s how:
- Take the database offline.
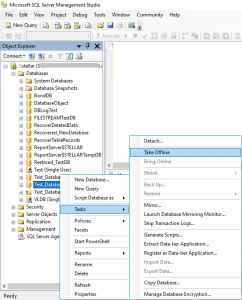
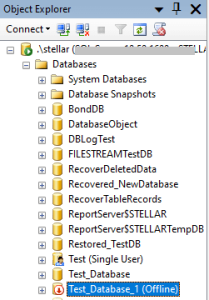
- The database will be set to Offline mode.
- Rename the corrupted log file.
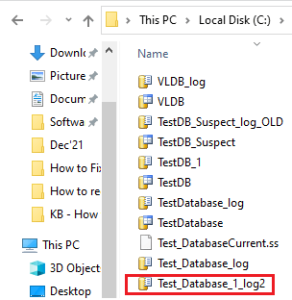
- Now rebuild the log file by executing the ALTER DATABASE command with the ‘REBUILD LOG’ option, as follows:
| ALTER DATABASE [Test_Database_1] REBUILD LOG ON |
| (NAME= logicalname, FILENAME=’C:\Program Files\Microsoft SQL Server\MSSQL10_50.STELLAR\MSSQL\DATA Test_Database_1_log.ldf’) GO |
This query will rebuild the LDF file with a message recommending to check database consistency by running the DBCC CHECKDB command.
The corrupted transaction log file will get fixed now. However, if there is still some issue with the log file, try the following solution.
Solution 2 – Use a SQL Recovery Tool
You can use a SQL recovery tool, such as Stellar Repair for MS SQL to recover the database. The software repairs the MDF file and rebuilds the LDF file without data loss. It recovers tables, deleted records, keys, indexes, triggers, stored procures, and other database objects. You can download the free demo version of the SQL database recovery software to verify the repaired file data before saving it.

Steps to Repair Database MDF File using Stellar Repair for MS SQL
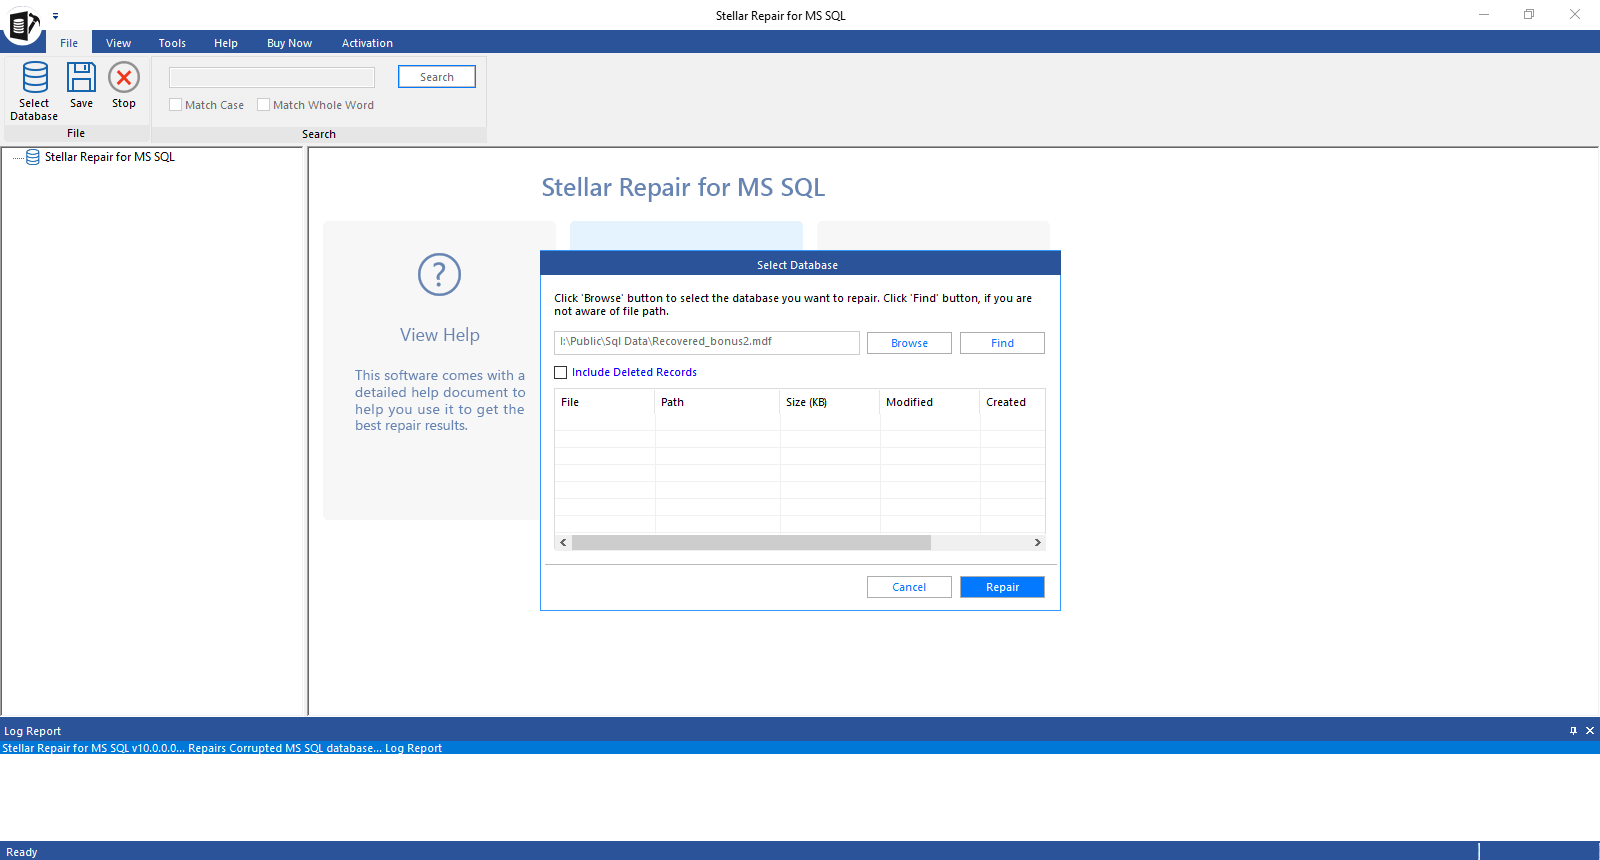
- Launch the Stellar Repair for MS SQL software.
- Select the corrupt database by using the ‘Browse’ or ‘Find’ option.
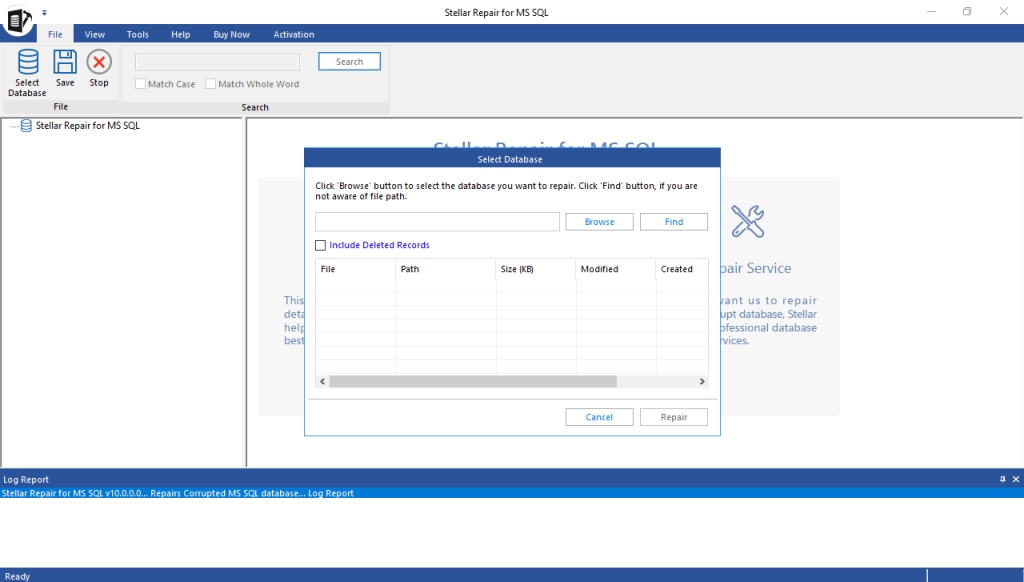
- After selecting the file, hit the ‘Repair’ button.

- Choose the ‘Standard Scan’ or ‘Advanced Scan’ option to proceed with the repair process.
- A ‘Repair Complete’ message box opens after the completion of the repair operation. Click ‘OK’.
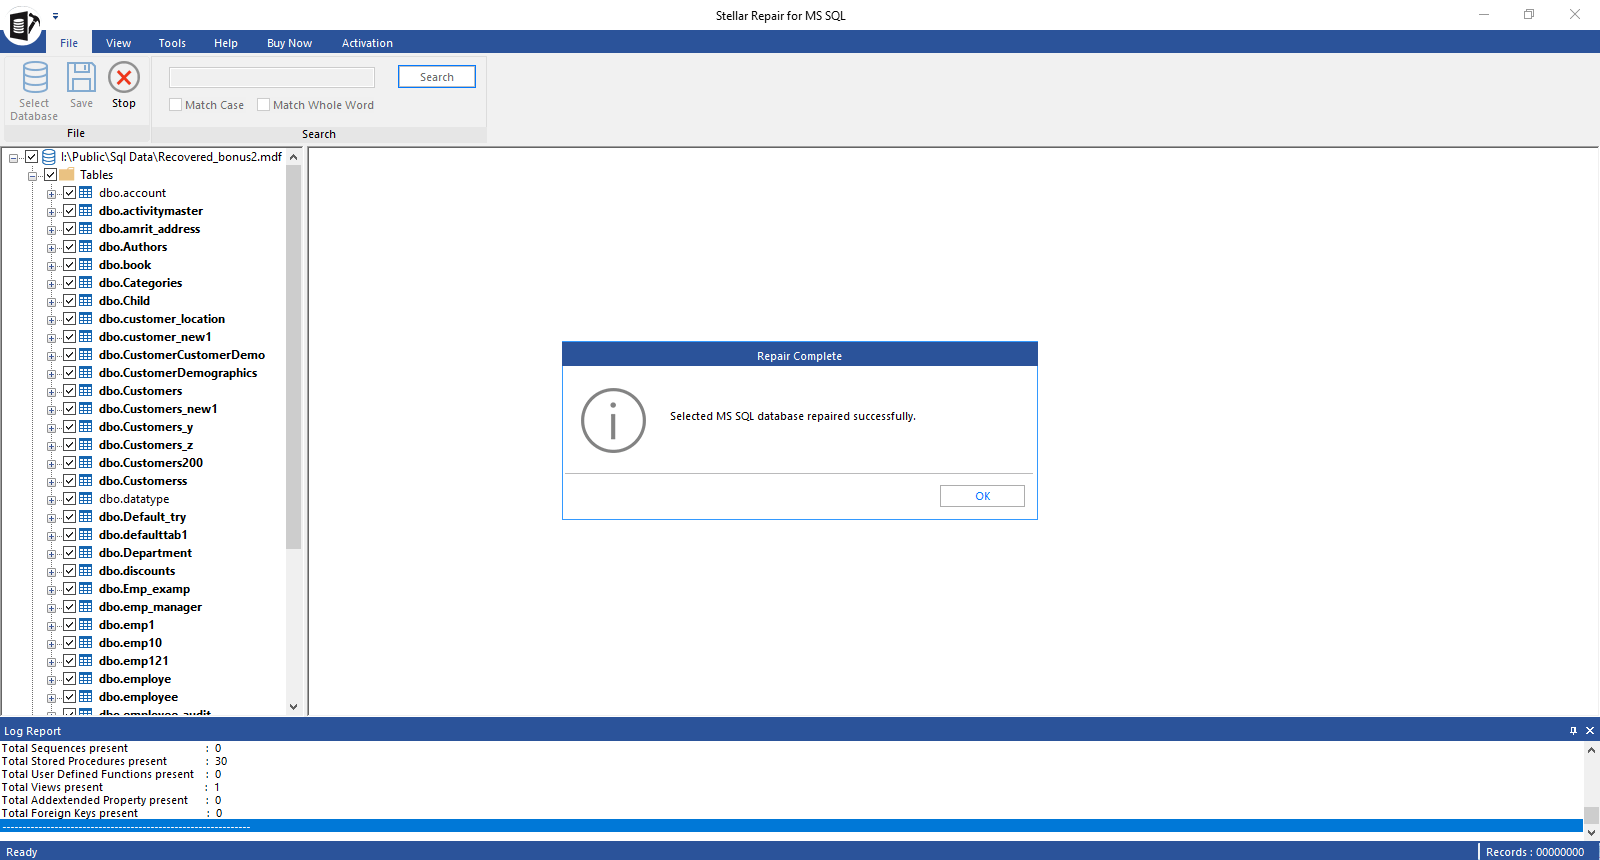
- The software displays the repaired file items in a tree-like structure in the left pane. Click on any item to view its data in the right pane.
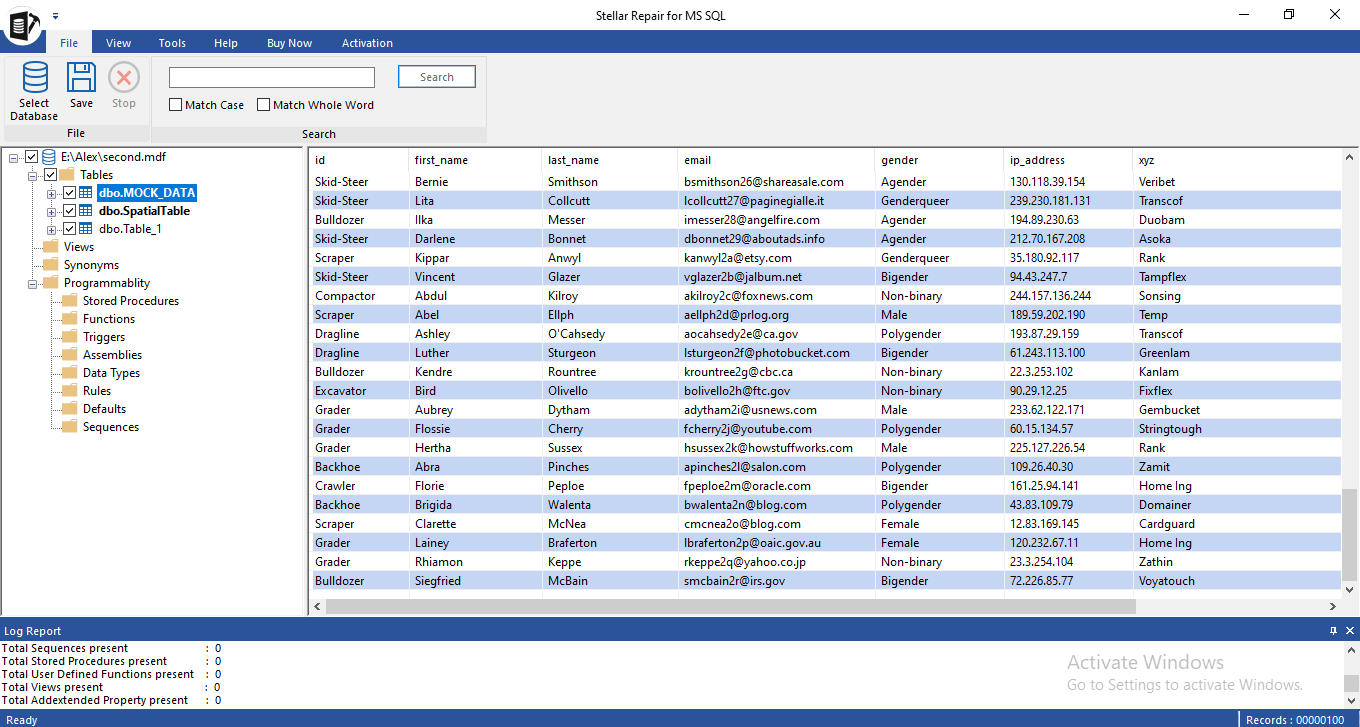
- Select all or specific items you want to restore, then click ‘Save’ on the ‘File’ menu.
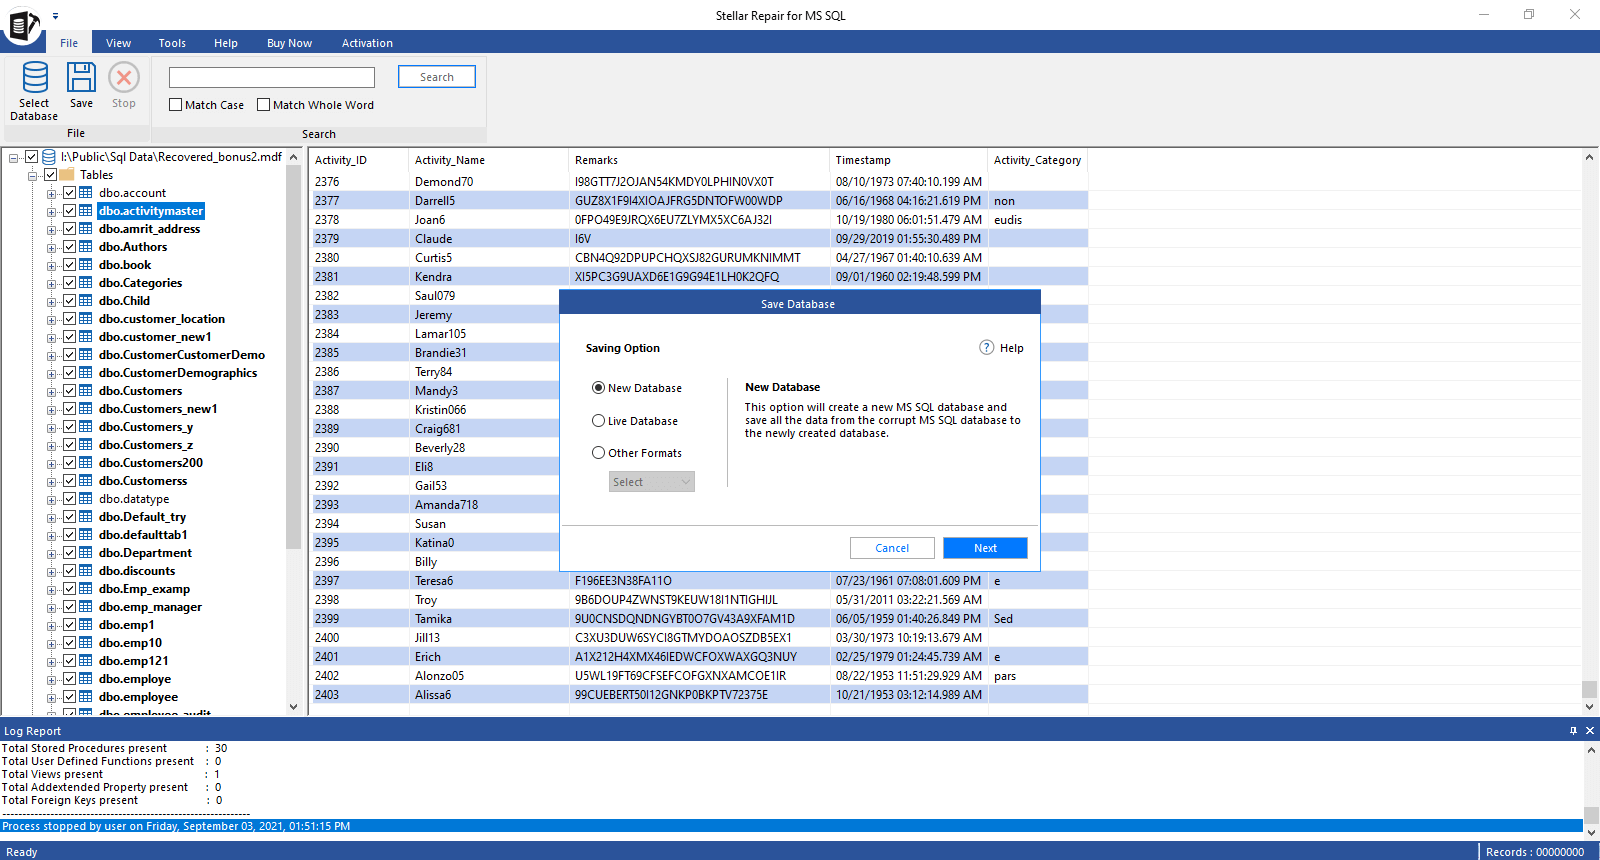
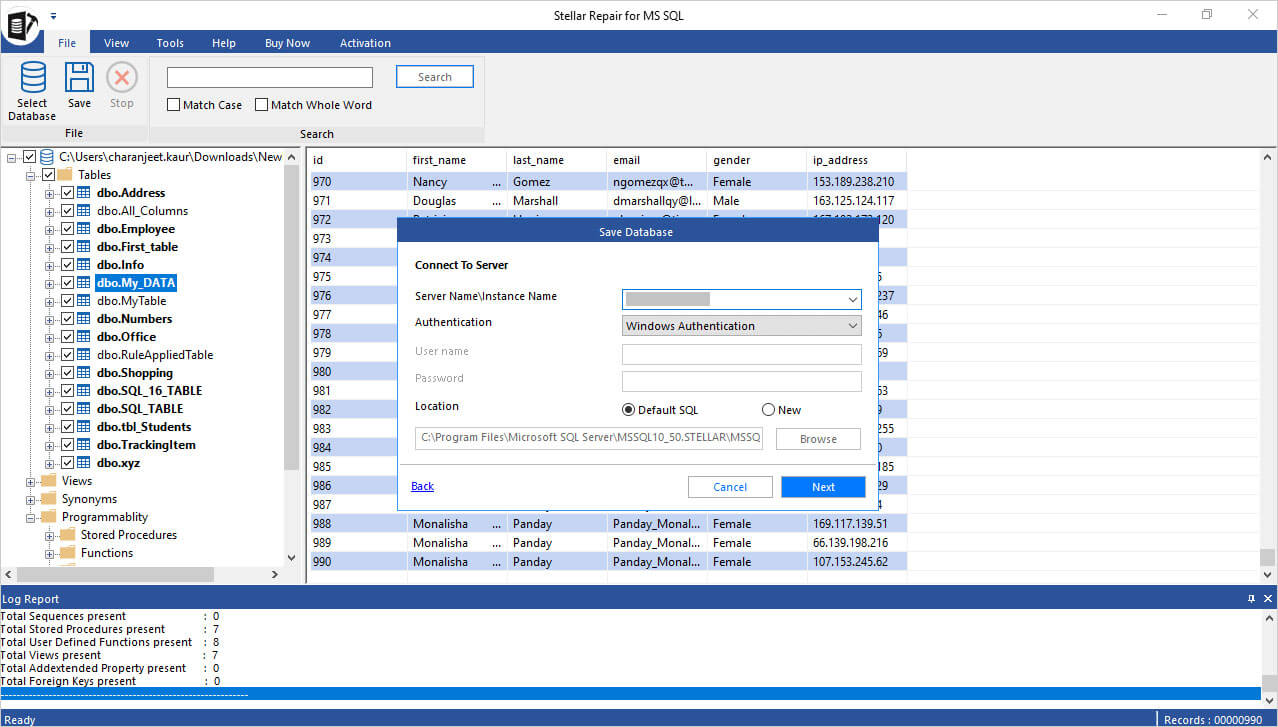
- Choose an appropriate option to save the file, such as ‘New Database’, ‘Live Database’, or ‘Other Format’. Press the ‘OK’ button.
- Enter details to connect to your SQL Server instance, then click ‘Next’.
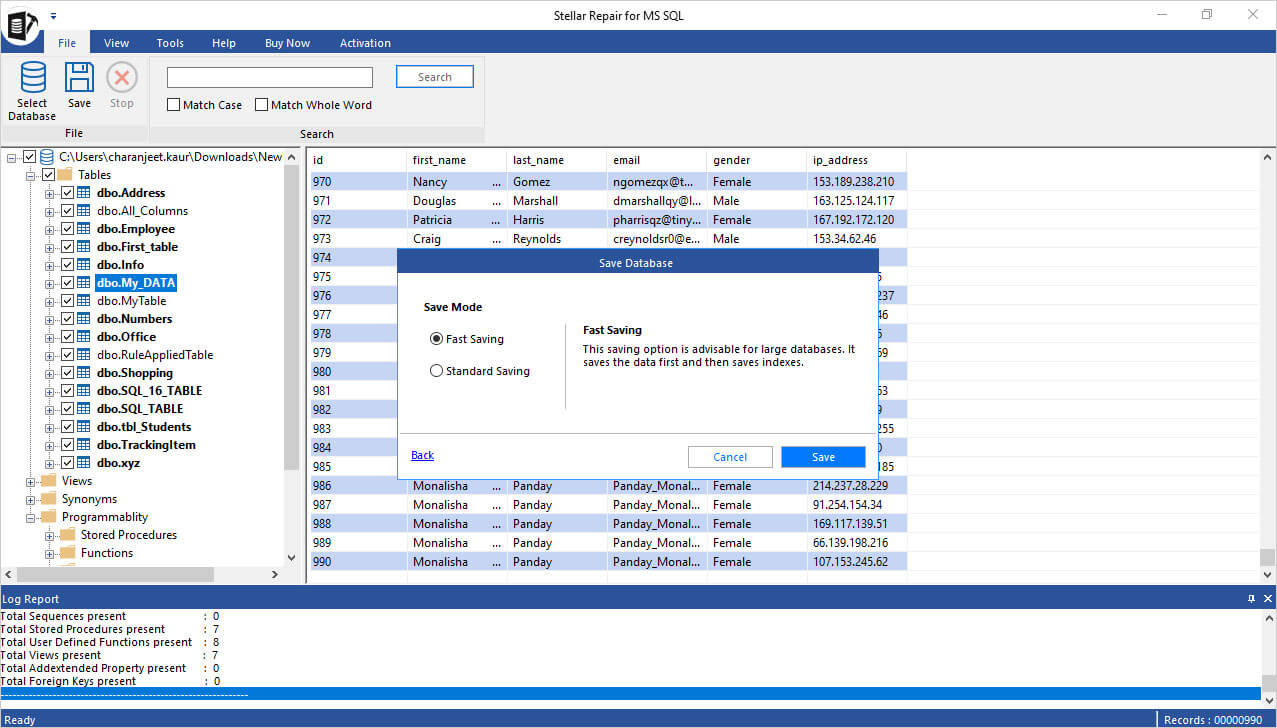
- Select ‘Fast Saving’ option to perform faster recovery of large databases, as it allows to save data first and indexes later. But, if you need to save the table’s data and indexes simultaneously, choose the ‘Standard Saving’ option. Click ‘Save’.
- The status of repairing SQL database tables is displayed as ‘Completed’, ‘Processing’, or ‘Pending’.
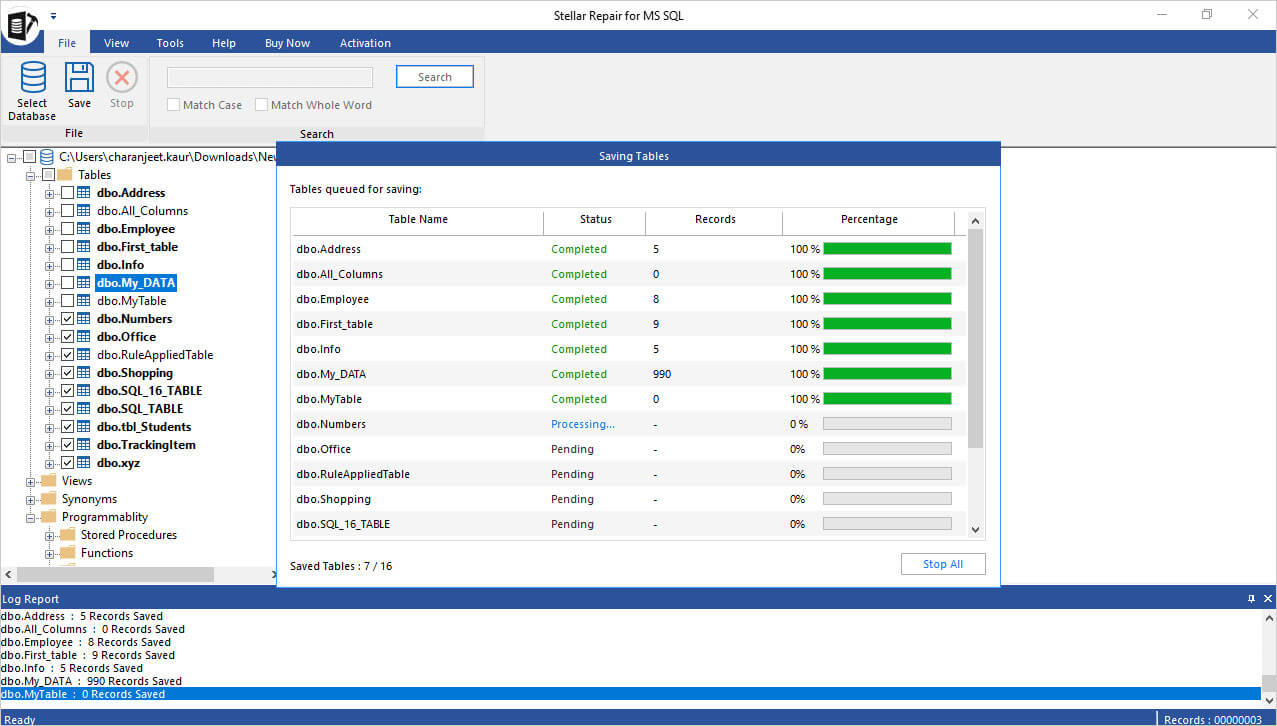
Once all the tables are processed and repaired, a message confirming the ‘file is saved’ appears. Now navigate to the location where the repaired database file is saved. You will also find the log file in the same location.
Conclusion
Several reasons can turn SQL Server transaction log files corrupt, including large log file size, malware attacks, faulty hardware, etc. Corruption in the log file makes the database inaccessible. To make the database accessible, restore it from an updated backup. If there is no backup, try to repair and rebuild the log file manually by following the steps discussed in the blog. However, you may lose data by repairing the database using the DBCC CHECKDB command with REPAIR_ALLOW_DATA_LOSS. A better alternative is to use Stellar Repair for MS SQL software. The software helps repair the SQL primary database file (MDF) and rebuild its transaction log file keeping all the data intact.
Related Blog Post: How to Restore Database in SQL Server?
About The Author

Sapna Trivedi is a Sr. Online Marketing Executive at Stellar. She has more than 5 years' of experience in the data recovery industry. Specifically, she has knowledge of data recovery services, photo recovery software, and SQL Repair software. She has always been a learner and she loves to implement her technical & marketing skills in her professional career. She has been successful in creating a blend of her hard skills and soft skills and utilize it effectively in her domain area of expertise.