How to Recover Lost Photos after Installing Sonoma?
-
Written By Vandita Jain
-
 Updated on July 18, 2024
 -
 Min Reading 7 Min
 - Share

| Summary: Many people have reported that their pictures went missing after upgrading to Sonoma. However, it is possible to recover lost photos after upgrading to macOS Sonoma. In this blog, we will walk you through the step-by-step process to recover lost photos after installing Sonoma. We’ll explore both in-built tools and external Mac data recovery software.
|
|---|

Table of Content:
- How to Recover Lost Photos after Installing Sonoma?
- What is the ‘Lost Photos after Installing Sonoma’ Issue?
- What Causes Missing Photos after macOS Sonoma Update?
- How to Recover Lost Photos after Installing Sonoma using Built-in Tools?
- How to Get Back Photos on Mac after macOS Sonoma Update using Mac Data Recovery Software?
- How to Prevent the ‘Lost Photos after Installing Sonoma’ Issue?

How to Recover Lost Photos after Installing Sonoma?
On September 26, 2023, Apple released the macOS Sonoma. It is the most recent update to the operating system that powers Apple computers (Macs).
The update came with several features.
However, many users have noted that they lost photos after installing Sonoma. If you are facing a similar issue, don’t panic. It is possible to recover lost photos after upgrading to macOS Sonoma.
Also Read: How to Recover Data after macOS update?
What is the ‘Lost Photos after Installing Sonoma’ Issue?
Several Mac users have reported that they lost their photos after the macOS Sonoma update. The photos seem to disappear from the Photos app, particularly those from the last year or so.
The exact cause isn’t confirmed, but it appears to be a glitch in Sonoma.
Note: Not everyone who installs Sonoma experiences this issue.
Also Read: How to Recover Deleted Chrome Bookmarks on Mac?
What Causes Missing Photos after macOS Sonoma Update?
Usually, all your files are kept safe during software upgrades. Only certain system settings, pre-installed software and certain functions undergo updates.
However, a few reasons why you might notice lost photos after installing Sonoma include:
- Update glitches
Sometimes the update process itself can glitch, accidentally deleting or moving your photos.
- Library migration
Sonoma might migrate your photos to a new location within the Photos app or even a different app altogether.
- Software conflicts
In rare cases, conflicts between Sonoma and other software on your Mac could lead to photo loss.
- Accidental deletion
It’s also possible you accidentally deleted the photos around the time you updated.
- Downloading Sonoma from untrusted sources
Fake macOS Sonoma might be infected with viruses and malware causing lost photos after installing Sonoma
Official source for downloading the macOS Sonoma.
The issue is also not unique to Sonoma. The issue can also occur with other versions like Sierra.
How to Recover Lost Photos after Installing Sonoma using Built-in Tools?
macOS offers a couple of built-in tools you can try to recover lost photos after installing Sonoma.
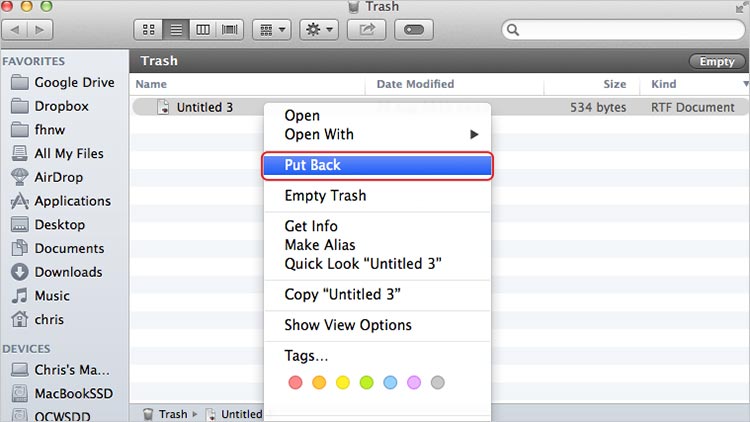
Method 1: Check Trash
If you feel your photos have been deleted, this is the simplest and most common method to recover lost photos after macOS Sonoma update. Here’s what to do:
Step 1: Open Finder → in the sidebar, click on “Trash.”
You can also use the icon on your Dock.
![]()
Step 2: Look for your missing photos.
Step 3: If you find them, right-click and select “Put Back” to restore them to their original location.
Method 2: Check the Photos Library
Sometimes, Sonoma might migrate your photos to a new library within the Photos app. Here’s how to check for lost photos after installing Sonoma in a new library
Step 1: Open the Photos app.
Step 2: In the menu bar, go to “Photos” > “Preferences.”
Step 3: Click on the “General” tab.
Step 4: Look for the location mentioned next to “Library Location.”
Step 5: Check if there’s a new library file at that location containing your missing photos.
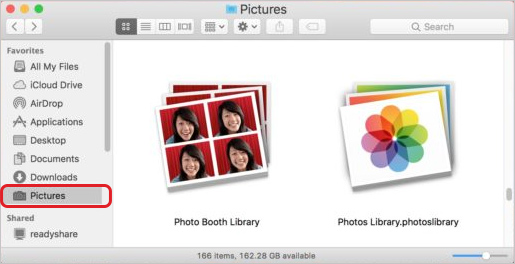
Method 3: Use the Time Machine Backup
If you have Time Machine enabled for backups, you might be able to restore your photos from an earlier version before the update.
Step 1: Quit Photos app if it’s open.
Step 2: Connect your Time Machine backup disk.
Step 3: Launch Time Machine (menu bar icon or Applications folder).
Step 4: Navigate to the date with the desired photos.
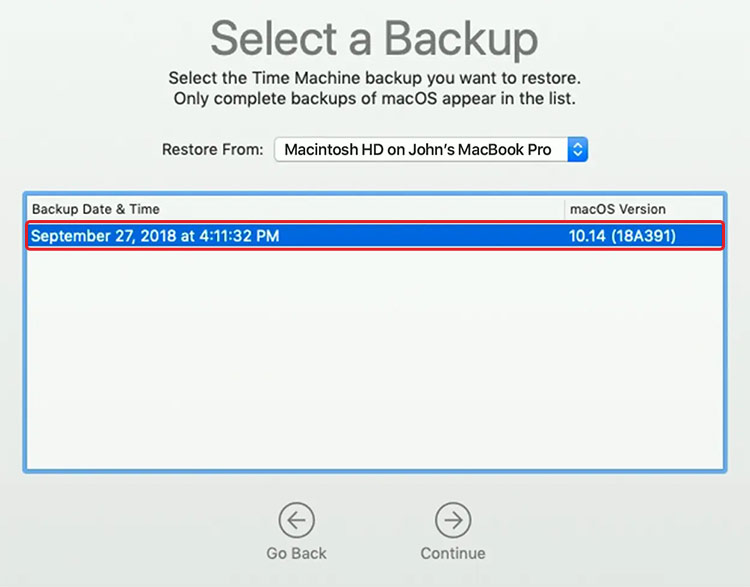
Step 5: Find your Photos Library (usually “Photos Library.photoslibrary” in Pictures).
Step 6: Select and Restore the Photos Library (consider copying it first).
This will restore the library to its state on that date. You can then access the photos through the Photos app.
Method 4: Use the iCloud
Use this method if your photos were previously synced to iCloud and you accidentally deleted them after updating to macOS Sonoma. Here’s how to recover them:
Step 1: Go to iCloud.com
Step 2: Enter your Apple ID and password to log in.

Step 3: Scroll down the page and look for “Data Recovery” or click the dots in the top right corner and select it.
Step 4: In Data Recovery, you should see an option to recover photos (and possibly other data types). Choose the date range for when you might have deleted the photos.
Step 5: Select the photos you want to recover and choose a location on your Mac to save them.
Remember: This method only works if you had iCloud Photos enabled before you deleted the photos.
These built-in tools are a good first step to try and recover lost photos after installing Sonoma. But they might not work for all scenarios. If you’ve exhausted these options and still can’t find your lost photos after installing Sonoma, consider using Mac data recovery software.
Also Read: Fix the macOS Could Not Be Installed on Your Computer Problem
How to Get Back Photos on Mac after macOS Sonoma Update using Mac Data Recovery Software?
To recover lost photos after installing Sonoma, you will need a data recovery tool like Stellar data recovery professional for Mac.
The process usually involves 3 steps:
Step 1: Select the type(s) of files that you wish to recover
Step 2: Select the folder/drive to scan
Step 3: Preview and recover the lost photos after installing Sonoma.
Also Read: How to Upgrade/Reinstall Mac OS Without Losing Data?
How to Prevent the ‘Lost Photos after Installing Sonoma’ Issue?
The best way to prevent losing photos after installing Sonoma is to back up your Mac before the update. You can either use the Time Machine backup or upload your photos to iCloud.
Having a backup ensures that you can restore your photos if anything goes wrong during the Sonoma update.
Here are some additional tips:
- Before upgrading to Sonoma, make sure your Mac meets the system requirements for Sonoma. Find the information here.
- Ensure you have enough storage space on your Mac for the update. Insufficient space can lead to data corruption.
If you’re still not sure, consider waiting a bit as Apple will address the ‘lost photos’ and other initial bugs reported by users.
FAQs about How to Recover Lost Pictures after macOS Sonoma Update
1. Should I upgrade to Sonoma?
A lot of people have reported that their photo albums disappeared after macOS Sonoma update. However, that doesn’t mean you shouldn’t upgrade to Sonoma.
The choice should depend on several factors. You should definitely upgrade, if:
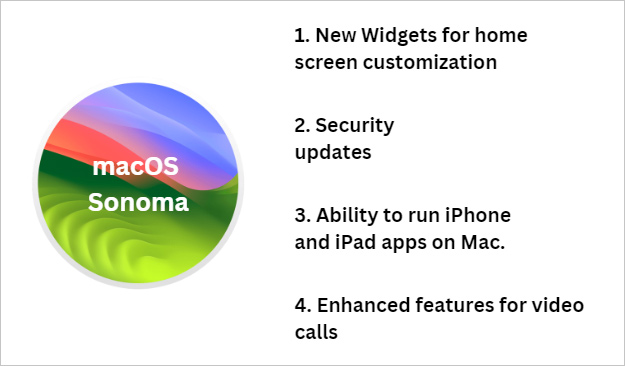
- You want access to the latest features (widgets, iPhone apps on Mac, better video calls)
- You prioritize security (Sonoma gets the newest security updates)
However, you can hold it off if:
- You are comfortable with your current macOS setup
- You have an older Mac device (Sonoma might slow it down)
- You work with apps that may not be compatible with Sonoma yet.
Also Read: Why is Mac Safari not Working after Update?
2. Can Sonoma cause data loss in other file types besides photos?
There have been several reports of missing photos after macOS Sonoma update. But there haven’t been as many resorts about data loss in other file types.
However, it is best to follow Sonoma installation best practices, which can help avoid data loss,
Also Read: Mac Documents Folder Emptied Suddenly – How to Recover Data?
3. How long does it take to recover lost photos after macOS Sonoma update using Mac data recovery software?
The time required to recover lost photos after macOS Sonoma update depends on several factors.
Some of these factors include:
- The size of your drive and photos. Bigger drives and more photos take longer to scan.
- Which Mac data recovery software you use to restore lost photos after macOS Sonoma update. Different software solutions have varying scan speeds.
- Type of data loss. Simpler recovery (like deleted photos) is faster than complex recovery (overwritten data).
So while it is not possible to give an exact time estimate to recover photos after macOS Sonoma update, generally it could range from minutes to several hours.
4. Can I recover photos if I’ve accidentally deleted them after installing Sonoma?
Yes. If you find your pictures missing after upgrading to Sonoma and feel that you might have accidentally deleted those. You can still get the photos back.
Here are two simple methods to restore lost photos after macOS Sonoma update:
- Deleted photos often go to the Trash bin first. Open Finder and go to the Trash. Look for your photos and drag them back to your desired location.
- Use Mac data recovery software. If the photos aren’t in Trash, data recovery software might help. These programs scan your storage for recently deleted files.
Also Read: How to Recover Emptied Trash on Mac without Software?
5. Can fragmented or corrupted files be recovered successfully after installing Sonoma?
If you notice pictures missing after upgrade to Sonoma and suspect fragmented or corrupted files to be the issue, here’s what you can do:
- Run “Disk First Aid” in Disk Utility to check and potentially fix disk errors that might be affecting your files.
- Use a Mac data recovery software like Stellar data recovery professional for Mac
Important: Extensive fragmentation or corruption might require professional data recovery services. Instead of using DIY solutions, talk to experts.
Have more questions about how to recover lost photos after macOS Sonoma update? Drop them in the comments below and we’ll answer those.
Also Read: How to Recover Notes on Mac Lost after Upgrade?
About The Author

Vandita Jain is a Technology Writer at Stellar. She is a tech enthusiast with over two years of experience in the Data Recovery domain. Vandita loves researching and providing DIY solutions, tips, and tricks to solve Windows technical issues. She is also an avid learner, constantly exploring the latest advancements in technology. Besides, she enjoys traveling and trekking.