How to Recover VHD Files?

| [SUMMARY]: A VHD file is just like a physical hard disk that has elements like, a boot record, disk partitions, file systems, saved data, etc. Corruption or loss of one such file means losing the entire data stored on the VHD. Here’s everything you might want to know about how to repair or recover VHD Files. |
|---|
Since VHDs stored on your computer, they can get corrupt or even get deleted. Different factors that can render them non-functional include:
- Virus Attacks
- Storage Media Failure
- Human Errors
- Improper System Shutdown
Let’s have a look at the VHD Recovery/Repair methods given below:
How to Repair or Recover VHD Files?
VHD file recovery by using Hyper-V Manager
You can recover VHD by using Hyper-V Manager—a Windows 10 utility to create and manage Virtual Machines and VHDs
Here are the steps that you need to follow:
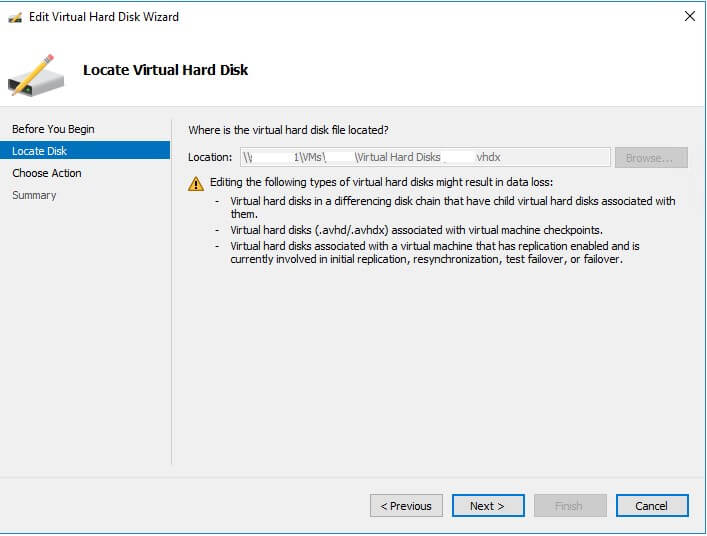
1. Launch the Hyper-V Manager and click Edit Disk.

2. Select Locate Disk at the left pane, Browse the affected VHD or VHDX file and click Next.
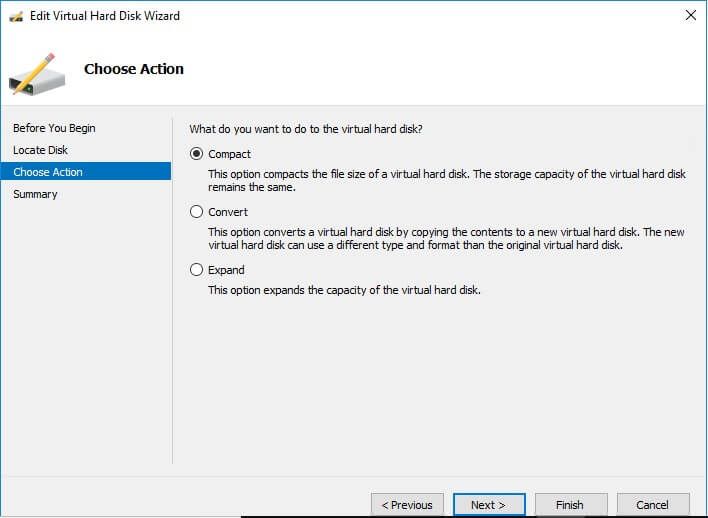
3. Select Compact to free-up the unused space. If you couldn’t see the Compact option, the Virtual Machine to which the VDH is attached is turned ON, or the affected VHDX file is a Fixed Disk VHD.
4. Click Finish once the Compact process is complete.
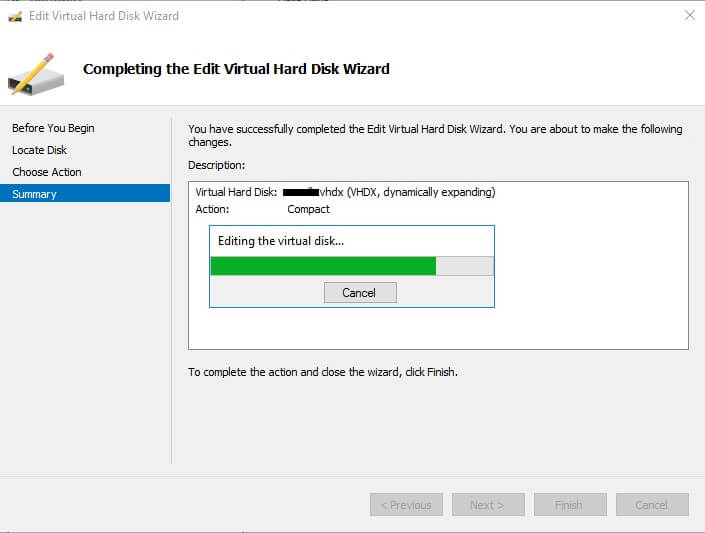
5. Rename the VHD file.
VHD recovery by using DiskPart Utility
You can use Windows in-built utility to recover the VHD file.
Follow the steps to repair VHD:
- Click the START button and type cmd.
- Right-click on Command Prompt.
- Click on Run as Administrator to launch command prompt as an Admin.
- Type DiskPart and hit Enter
- Type select vdisk file=”d:\folder\vdisk.vhdx” and hit Enter. Where d:\folder\vdisk.vhdx is the complete path of the corrupt VHD file.
- Type attach vdisk readonly and hit Enter
- Write compact vdisk and hit Enter
- Type detach vdisk and hit Enter
- Type Exit.
Recover VHD file using Windows PowerShell
This method utilizes Windows PowerShell to repair the VHDX file.
- Launch Windows PowerShell as an Admin (Run as administrator).
- Type Mount-VHD –path d:\folder\vdisk.vhdx –ReadOnly and hit Enter.
- Then type Optimize-VHD –path d:\folder\vdisk.vhdx -Mode Full and hit Enter.
- Type Dismount-VHD –path d:\folder\vdisk.vhdx and hit Enter.
Where, d:\folder\vdisk.vhdx is the complete path of the corrupt VHD file.
| [NOTE]: The affected VHD must be disconnected, or the Virtual Machine to which it’s attached must be powered-off before performing the steps in all of the above methods. |
|---|
Professional Data Recovery Service for VHD Recovery
If the above-mentioned methods didn’t work for you, it means the corruption is severe and needs to be taken care of by a Professional Data Recovery Service provider. Their help could not only repair the VHD file but also recover the deleted VHD file. You can get back your deleted VHD file by either availing our In-Lab Data Recovery Service or Remote Data Recovery Service.
Conclusion
VHDs play an essential role—whether you want to use them as a system image backup or as a different computer on a Virtual Machine.
In this blog post, we discussed various methods to recover VHD files. We emphasized the need for a Professional Data Recovery Service provider because there are no manual methods to recover a lost VHD file. Moreover, experts have solutions for almost any level of corruption.
If the given methods in this blog didn’t work for you, then don’t panic. As the Professional Data Recovery Service providers can quickly recover your VHD file.
About The Author

Girish is a blogger and writer. He has over 6 years of experience in Data Recovery and Data Eraser technology. In his free time, he writes about technical tips and tutorials.