Stellar Data Recovery Software
How to Fix Windows Update Error 0xc1900223?
-
Written By Vandita Jain
-
 Updated on January 14, 2025
 -
 Min Reading 8 Min
 - Share

| Summary: Windows updates are essential for system security and functionality. Error 0xc1900223: indicates issues in the update process, posing potential security risks. This article outlines methods to fix the error, including troubleshooting steps and using Stellar Data Recovery Software for any data loss.
|
|---|

Error 0xc1900223: How To Fix This Windows Update Issue?
The Windows operating system is quite robust. To maintain the smooth operation, it downloads updates. These are software fixes, security patches and at times important changes to the operating system.
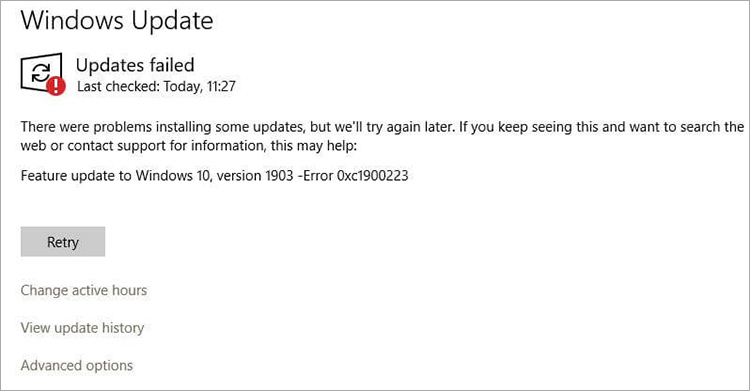
If the update fails it shows a splash message – Updates Failed error 0xc1900223.
What to do when you find error 0xc1900223 has happened? How do you fix it? You certainly cannot proceed without an update to the computer. It is unsafe.
We share the various ways you can get past Windows Error 0xc1900223.
Table of Content:
- What is Windows Error 0xc1900223?
- How To Fix Error 0xc1900223?
- How to Recover Lost Data With Stellar Data Recovery for Windows?
- Why Do We Recommend Stellar Data Recovery for Windows for Safe and Assured Data Recovery?

What is Windows Error 0xc1900223?
Windows error 0xc1900223 occurs during the installation of Windows updates. This error suggests that the computer is unable to connect to Microsoft’s Update servers.
Common causes include:
- Unstable or weak internet connection
- Network hardware problems (e.g., router or modem issues)
- VPN settings causing connection blocks or conflicts
- Corrupted Windows Update files
- Issues with the Software Distribution folder
- Service interruptions in Windows Update services
Also Read: How to Fix Error 0xC1900101 on Windows 11?
How To Fix Error 0xc1900223?
Error 0xc1900223 during Windows updates can be frustrating, but there are several steps you can take to resolve it. Here are some methods you can try:
1. Run Windows Update Troubleshooter [Error 0xc1900223]
This tool fixes trouble with updates.
To run the Windows Update Troubleshooter, follow these steps:
- Press the Windows key + I to open the Settings app.
- Click on “Update & Security”
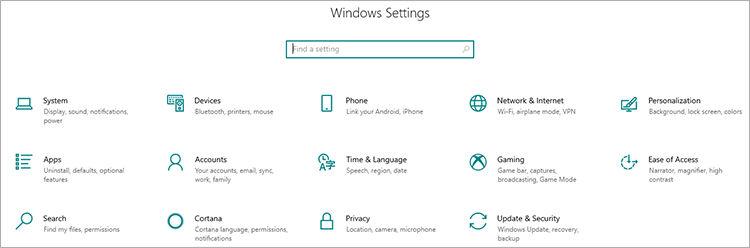
- Select “Troubleshoot” from the left sidebar.
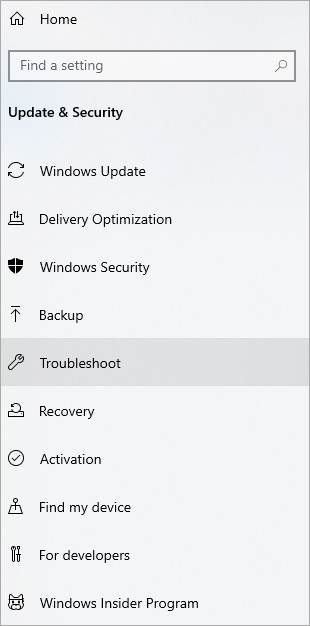
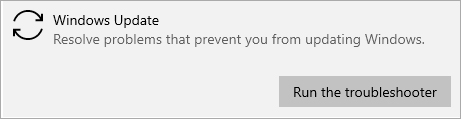
- Scroll down and find “Windows Update” under “Get up and running.”
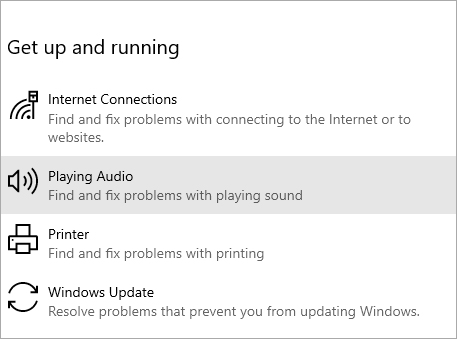
- Click on “Windows Update” and then select “Run the troubleshooter.”
- Follow the on-screen instructions provided by the troubleshooter to detect and resolve any issues.
Once the troubleshooting process is complete, restart your computer to apply any fixes made.
Also Read: How to Fix the Windows Update Error 0x80070002?
2. Flush DNS Cache
A DNS cache is like a memory bank for your computer or device when it comes to accessing websites. Flushing removes all information from it.
To flush the DNS cache, follow these steps:
- Press the Windows key + R to open the Run dialog box
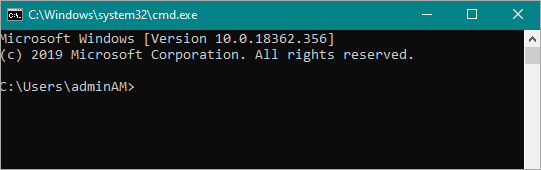
- Type “cmd” and press Enter to open Command Prompt
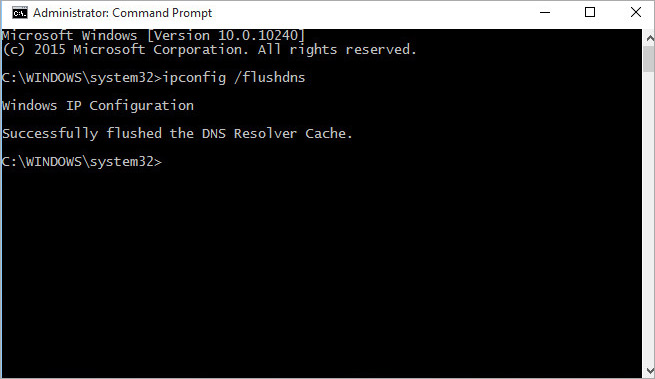
- In Command Prompt, type “ipconfig /flushdns” and press Enter
- Wait for the process to complete.
- Once the DNS cache has been successfully flushed, you’ll see a message indicating the operation was successful.
Close Command Prompt and restart your computer to ensure the changes take effect.
Also Read: Windows 11 March 2023 Update Issues: (KB5023706)
3. Run SFC Scan
SFC or System File Checker is a tool that tests the integrity of operating system files.
To perform an SFC scan, follow these steps:
- Press the Windows key + X to open the Power User menu
- Select “Command Prompt (Admin)” from the list
- In the Command Prompt window, type “sfc /scannow”
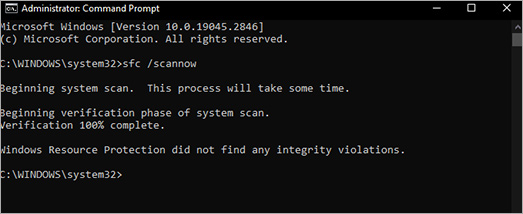
- Press Enter
- The System File Checker (SFC) will begin scanning your system files for errors and repairing any corrupted files it finds.
This process may take some time to complete, so be patient and let it finish.
Once the scan is complete, you’ll see a message indicating whether any issues were found and repaired.
If prompted to restart your computer, do so to apply the repairs.
After restarting, check if the issue you were experiencing has been resolved.
Also Read: How to Fix Windows Update Error 0xc1900401?
4. Run DISM
This has to follow Run SFC. DISM stands for DISM (Deployment Image Servicing and Management) tool.
- Press the Windows key + X to open the Power User menu.
- Select “Command Prompt (Admin)” from the list.
- In the Command Prompt window, type the following command DISM /Online /Cleanup-Image /RestoreHealth
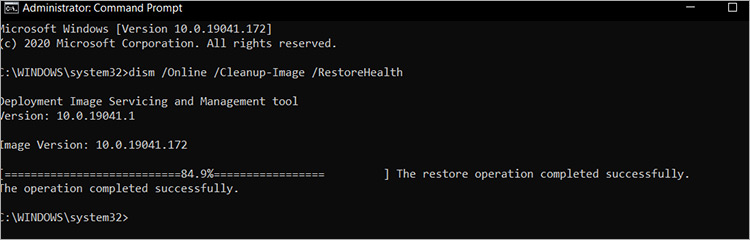
- Press Enter
- The DISM tool will begin scanning your system image and repairing any issues it finds.
- This process may take some time to complete, so be patient and let it finish.
- Once the scan is complete, restart your computer to apply the repairs.
After restarting, check if the issue you were experiencing has been resolved.
Also Read: How to Fix the Pink Screen of Death on Windows 11?
5. Manually Install the Update [Error 0xc1900223]
If the error 0xc1900223 happens you can of course try to update manually.
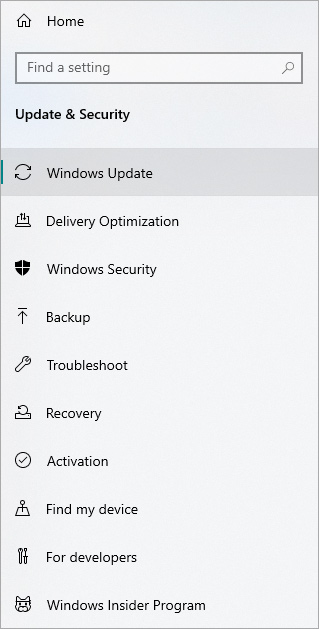
- Press the Windows key + I to open the Settings app
- Click on “Update & Security”
- Select “Windows Update” from the left sidebar
- Click on “Check for updates” to see if there are any available updates for your system
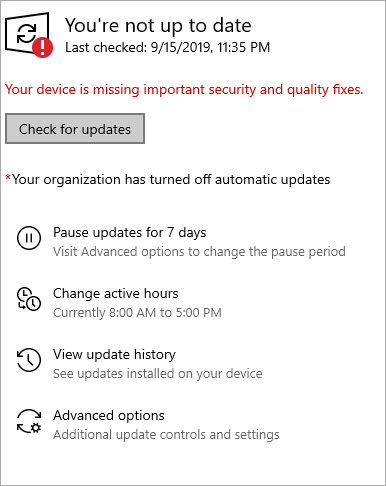
- If updates are available, they will be listed on the Windows Update page
- Click on the “Download” button to start downloading the updates
- Once the updates are downloaded, click on the “Install” button to begin the installation process
- Windows will install the updates automatically
After the updates are installed, you will be prompted to restart your computer to apply the changes. Click on “Restart now” to restart your computer immediately or “Restart later” if you prefer to restart at a later time.
Also Read: How to Fix Windows Boot Error 0xc0000098?
6. Change DNS Settings
DNS is like an internet phonebook. You can typically choose which DNS servers your device uses. By default it is provided by the ISP but you can change to public DNS.
To change DNS settings on your Windows computer, follow these steps:
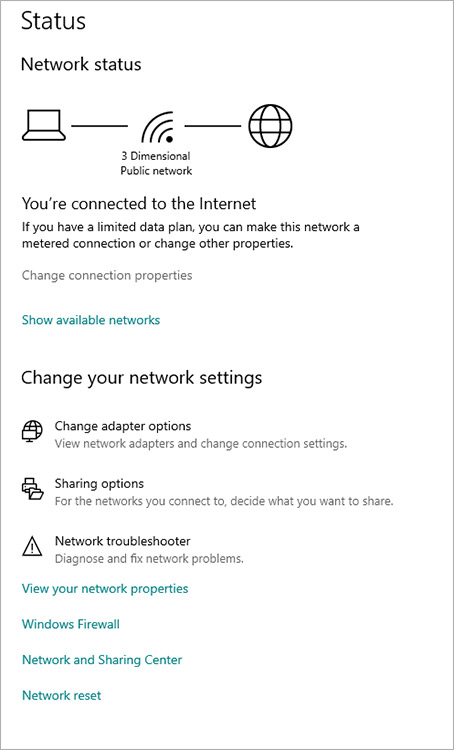
- Open Settings and go to Network & Internet
- Click on “Change adapter options”
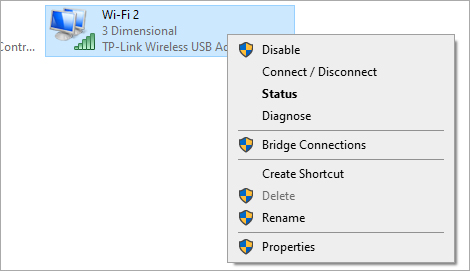
- Right-click on your network connection and select “Properties”
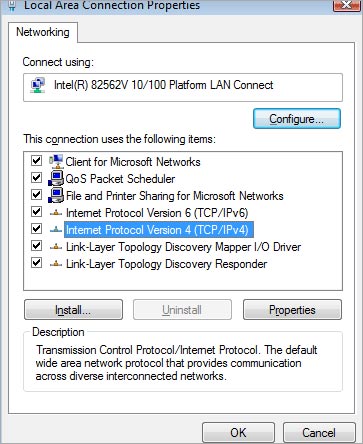
- Select “Internet Protocol Version 4 (TCP/IPv4)” and click “Properties”
- Choose “Use the following DNS server addresses” and enter the preferred DNS server addresses (Google Public DNS 8.8.8.8 and alternate DNS is 8.8.4.4)
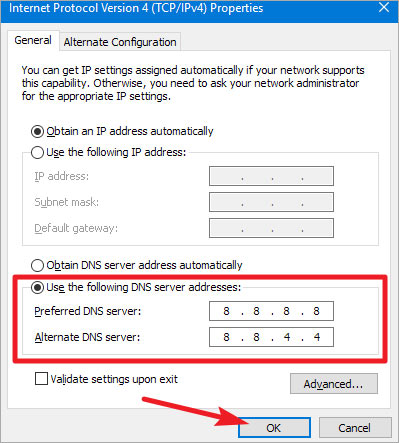
- Click “OK” to save the changes
Now, we know the steps to fix the Error 0xc1900223. At this stage, it’s important to consider the safety of your data during such errors.
Sometimes, despite best efforts, data loss can occur. This is where Stellar Data Recovery for Windows comes into play. Our software offers a reliable solution for recovering lost or inaccessible data. This ensures peace of mind even in the face of unexpected errors.
Also Read: How to Fix Blank White Screen of Death on Windows 11/10?
How to Recover Lost Data With Stellar Data Recovery for Windows?
What happens if Windows Update Error somehow causes damage to your hard drive. You cannot refuse to update your operating system. But there is a chance however small that your data is inaccessible afterwards.
You need robust data recovery software such as Stellar Data Recovery for Windows.
Our software is trusted by millions worldwide since it offers unparalleled results in retrieving lost or inaccessible files from your computer hard drive.
With its user-friendly interface and unique features, Stellar Data Recovery ensures a seamless restoration of your valuable data.
Note: Get up to 1 GB data recovered for free, with Stellar Data Recovery for Windows.
Also Read: Download Free Data Recovery Software Full Version
Why Do We Recommend Stellar Data Recovery for Windows for Safe and Assured Data Recovery?
- Stellar Data Recovery recovers lost data from formatted, corrupted, and encrypted drives.
- It addresses data loss due to accidental deletion, virus attacks, and hard disk damage.
- The software supports recovery from lost partitions and Recycle Bin deletions.
- It is capable of retrieving over 1000 file types including photos, videos, and documents.
- The recovery process involves simple steps: select, scan, and recover.
- Compatible with various storage devices like hard disks, SD cards, and USB drives.
- Offers a preview of recoverable files before actual data restoration.
- Ensures a secure recovery process, maintaining data integrity.
- Compatible with Windows 11, 10, 8, and 7.
- Recognized for its effectiveness and user-friendly interface by tech experts.
Say goodbye to data loss worries and experience peace of mind with Stellar Data Recovery for Windows.
Also Read: Fix Windows Update Error Code 0x80245006
FAQs
1. What should I do if I encounter an error during Windows Update?
There will be an error code such as Error 0xb1698. Note the error code and use it to find specific troubleshooting steps online. If you can find no details at Microsoft Community then contact Microsoft support.
Also Read: The Computer Won’t Wake Up From Sleep on Windows 11: How to Fix the Issue?
2. Can Windows Update affect the performance of my computer?
Yes, it can. There have been numerous instances when wrongly designed updates have upset user experience. In such cases within a week or two a new update overrides the troublesome one.
Also Read: Windows Update Error 0x80240017
3. Why do I need to adjust DNS settings?
You might need to swap DNS if you find it takes you too long to access the internet and there is a significant time for a website to load.
DNS converts website names to IP address such as google.com to 142.250.181.78
DNS has to work quickly for a smooth internet connection. ISP provides a DNS address like (for example) 2.2.7.7
But they might not always work well.
Swapping with a public DNS like 8.8.8.8 or 1.1.1.1 helps in such cases.
Also Read: How to Fix Windows Update Error 0x800700d8?
4. How does Stellar Data Recovery for Windows work?
Data Recovery for Windows works by scanning storage devices, such as hard drives or memory cards, for traces of lost or deleted files.
During the scanning process, the software identifies file signatures or headers that indicate the presence of specific file types, such as documents, photos, videos, or archives. It uses these signatures to locate and reconstruct deleted files.
Also Read: How to Get Stellar Data Recovery Activation Key?
5. How long does it take?
The time it takes for Stellar Data Recovery for Windows to complete depends on various factors, including:
- Size of the Storage Device: Larger storage devices typically require more time to scan and recover data compared to smaller ones.
- Speed of the Computer: Faster computers can process data recovery tasks more quickly than slower ones.
- Extent of Data Fragmentation: If the data is heavily fragmented, it may take longer to piece together and reconstruct the files.
- Specific Recovery Settings: Different recovery settings and methods may impact the time taken for recovery.
Also Read: How to Fix Error Code 0x80072f8f Windows 11/10?
About The Author

Vandita Jain is a Technology Writer at Stellar. She is a tech enthusiast with over two years of experience in the Data Recovery domain. Vandita loves researching and providing DIY solutions, tips, and tricks to solve Windows technical issues. She is also an avid learner, constantly exploring the latest advancements in technology. Besides, she enjoys traveling and trekking.