| Summary: The easiest way to format an SD card is to use your phone. If you need to recover data once the format has completed, use a tool like Stellar Photo Recovery. |
|---|
An SD card is an extremely convenient medium to store data. It is very popular in any industry that works with cameras.
If you work with them in any way, shape, or form, then you will eventually need to format SD cards.
However, the process to format SD cards varies, depending on what device you are using to format it, and also what you will be using it for.
That is where this article will help you.
Table of Content:
- Why Does It Matter?
- Reasons Why You May Need To Format An SD Card
- Different Ways To Format SD Cards
- Why Stellar?
Why Does It Matter?
You cannot simply choose to format SD cards any which way you want.
The device you are using, and where you will eventually end up using the SD card will dictate how you format SD cards.
Short Read: Upfront Summary
To cut a long story short, here is a table outlining a formatting guide, with respect to the different formatting methods available to format SD cards:
| Formatting Type | When To Format SD Cards With This Particular Type |
|---|---|
| FAT | Older generation SDHC SD cards |
| FAT32 | SD cards that have a capacity of less than 32 gb |
| exFAT | SD cards that have a capacity of more than 32 GB |
| NTFS | If you only work with Windows devices, and do not move your SD card around too often. |
| MS DOS (FAT) | If you need the equivalent of FAT32 on MacOS Devices |
With that, let us get into a more in-depth explanation of things.
Reasons Why You May Need To Format An SD Card
Here are several of the most commonplace reasons why you may find yourself needing to format SD cards:
- Your SD card is full and you need to format it in order to reuse the card.
- Your devices are unable to read your SD cards, and you need to format them.
- You are facing slow read and write speeds with the SD cards in question.
- You would like to change the file systems on your SD cards, which can only be done by formatting SD cards.
- The SD card was previously formatted incorrectly or has developed logical errors
Different Ways To Format SD Cards
Here are the different ways that you can format SD cards, depending on the end use case and the devices that you are using.
1. Format SD Cards With The Windows File Explorer.
This is the easiest method to format SD cards and is also one of the most stable. As always, connect the SD card or the micro SD card to the computer.
- Hit the Windows + E keys to open up File Explorer.

- If you are on Windows 11, navigate to “This PC” (available in the left hand side menu pane of the file explorer. If you are on a Windows 10 device, it will be called “This Computer”. If you are on an older release of Windows, then navigate to “My Computer” instead of to the Windows File Explorer.
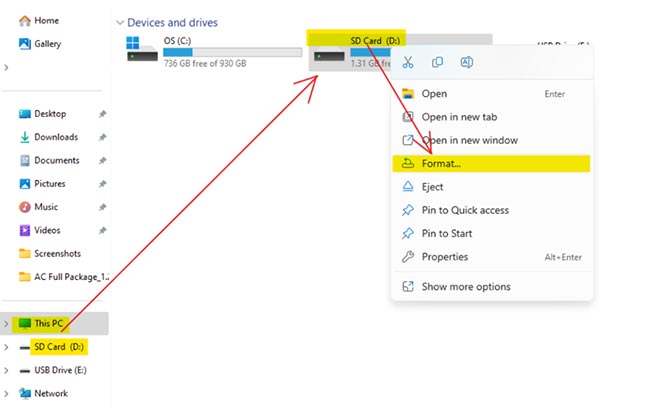
- Select your SD card by left-clicking it once, and then right-clicking it once. Then, click on “Format”.
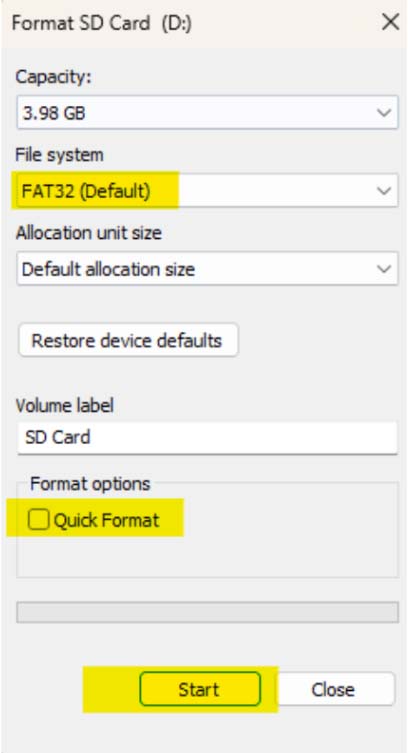
- Like we’d shown you in the “Short Read” section above, choose the relevant File System that the card will be formatted to.
- We recommend that you change the allocation size to “default allocation size” before proceeding, especially if your SD card has a capacity of less than 32 GB.
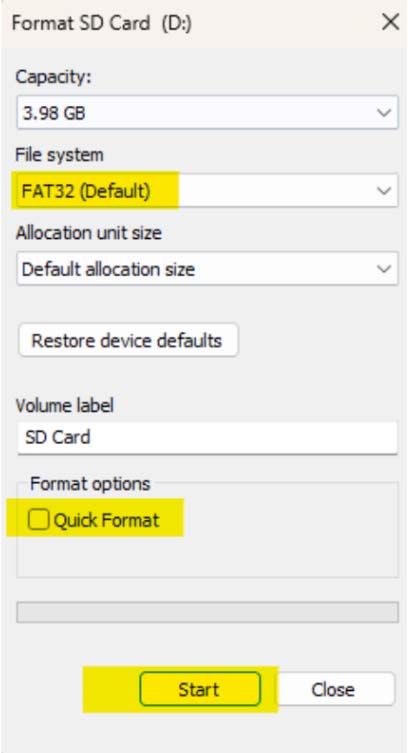
- If you want a proper, clean format, then we recommend unchecking the box next to “Quick Format”. This will take significantly longer to format than if you leave the box checked, but it is a far more secure option.
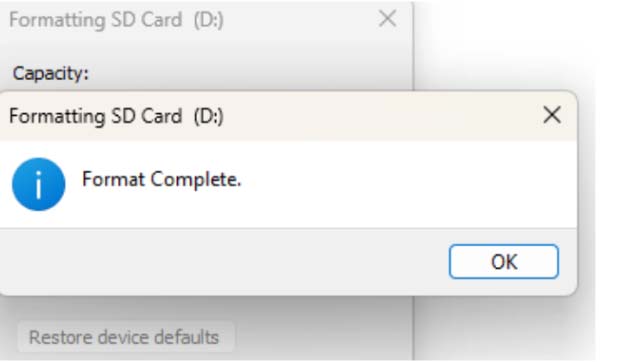
- Click the “Format” button, and wait for Microsoft to work her formatting magic.
2. Format SD Cards With The Disk Part Utility.
If you plan to format a number of SD cards, either one by one, or at once (if you have multiple readers connected to your computer), then this is a better method to format SD cards.
Also, if for some reason you do not have access to a GUI (Graphical User Interface), then this is pretty much the only method you can use to format SD cards.
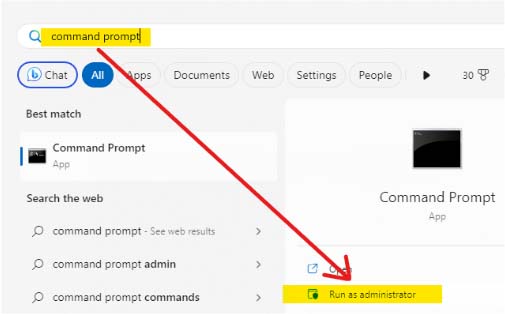
- Open up any CLI (Command Line Interface) as an administrator. Examples of popular CLIs on Windows are the Command Prompt, Terminal, and Windows PowerShell. For our example, we have used the Command Prompt.
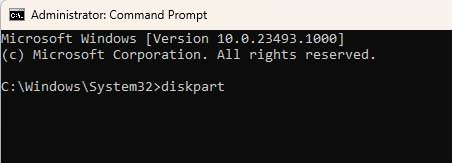
- Next, you want to type in the following command: “diskpart” without the quotation marks.
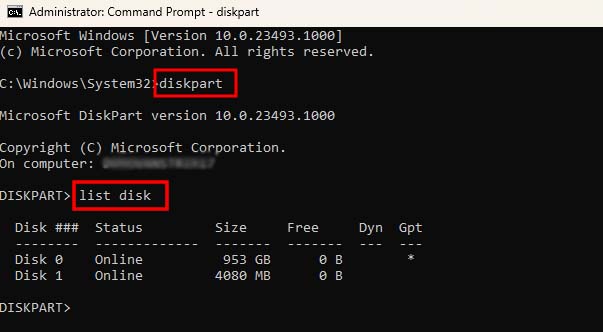
- Next, type in the following command: “list disk” without the quotation marks. This will bring up a disk directory.
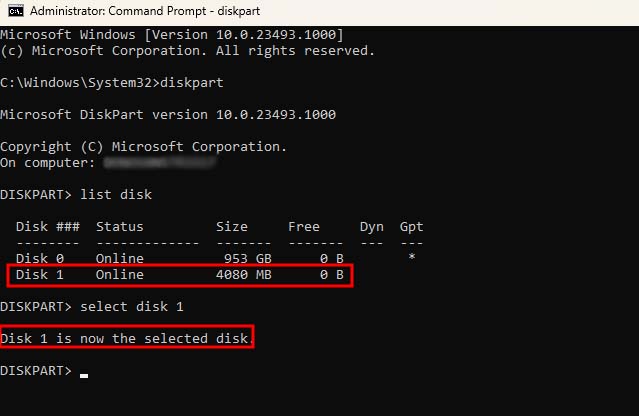
- Next, type in the following command: “select disk D” without the quotation marks. Here, replace “2” with the drive number of the SD card you want to format, as seen in the disk directory after you wrote “list disk”.
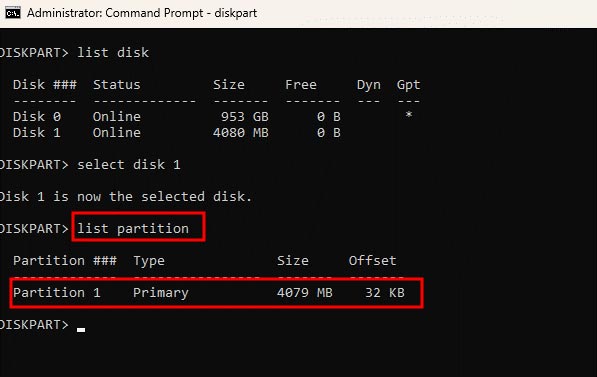
- Next, type in the following command: “list partition” without the quotation marks.
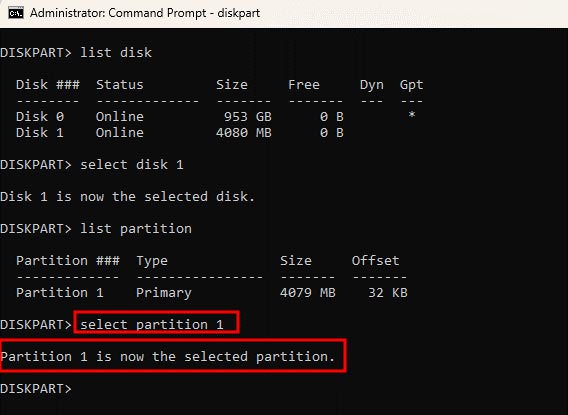
- Next, type in the following command: “select partition 1” without the quotation marks.
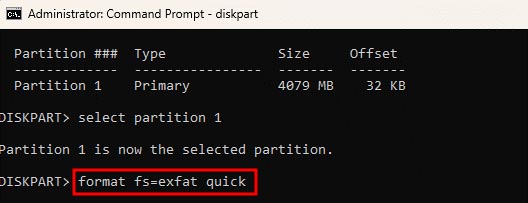
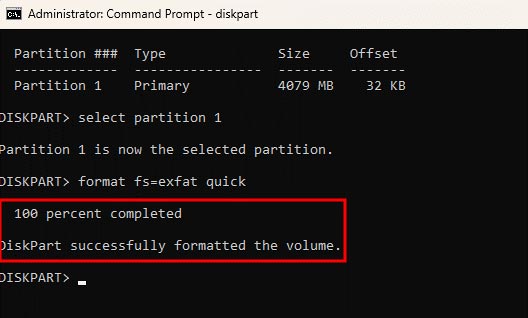
- Next, type in the following command: “format fs=exfat quick” without the quotation marks. You can replace “exfat” with “fat32” or “NTFS”, as per your requirements.
- Like we’d shown you in the “Short Read” section above, choose the relevant File System that the card will be formatted to, whether that is exFAT, FAT32, or NTFS.
- When the diskpart utility is done formatting the SD card, then it will give you the output message that “DiskPart successfully formatted the volume”.
3. Format SD Cards on MacOS Devices.
If you are looking to format micro SD cards or SD cards on MacOS devices, the process is a little different. Here are the steps to format micro SD cards and SD cards on Macs:
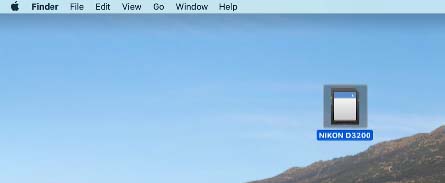
- After connecting your SD card to your mac, make sure that your mac detects the SD card. You are now ready to go.
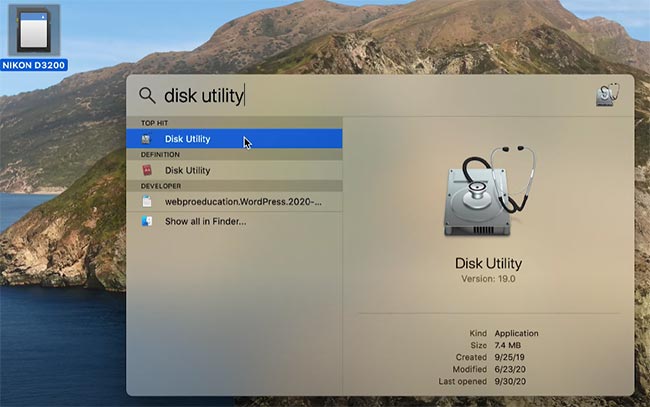
- Next, you want to use the spotlight search to go to disk utility. You can press command + Space to open spotlight, or click the magnifying glass in the top right. Type in “Disk utility” and double click on it.

- Now with the Disk Utility open, select your SD card from the list of devices on the left hand menu pane.
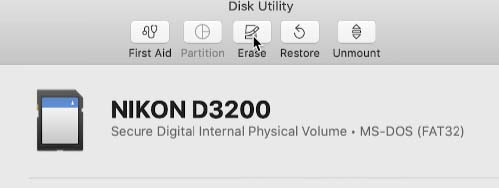
- Once the SD card is selected, click on the “erase” button in the center of the top menu bar.
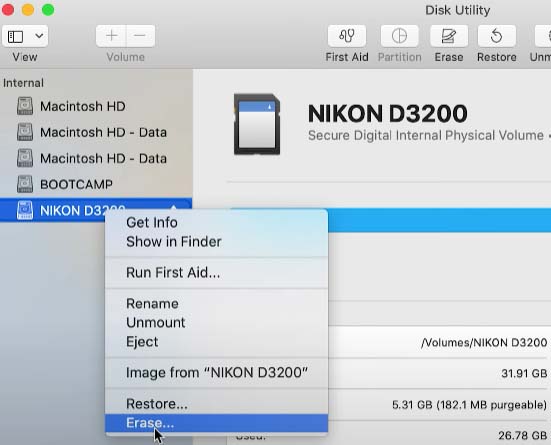
- You can also just right click the SD card you want to format from the device list and click “Erase”.
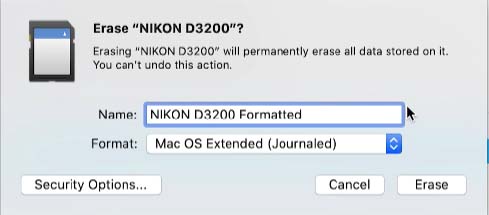
- Clicking either “Erase” option will give you this pop up menu. Here, you can rename the SD card if you want, and also select the file system that it will be formatted to.
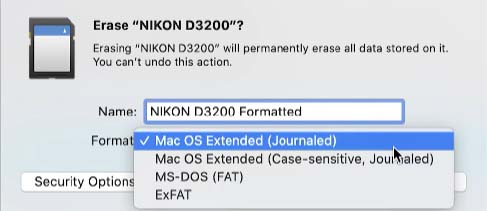
- You can select the file system by clicking the drop down menu, next to the “Format” cell. For most people, we recommend MacOS Extended, or exFAT if you also plan to use the card with a Windows device.
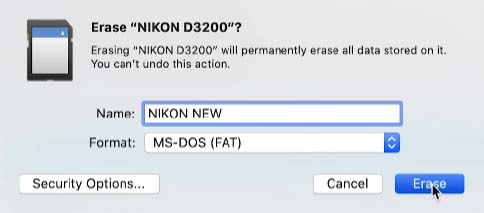
- Once you’ve selected the proper file format system, click on erase.
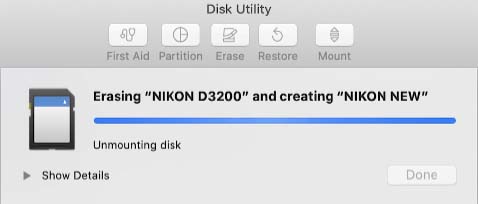
- Wait for the Disk Utility application to format your SD card.

- When the process is complete, you will get this message. You are now free to remove the SD card and use it.
4. Format SD Cards On Android Devices.
Different phone manufacturers will have different “flavors” (yes, they’re called that) of Android.
This means that the process to format SD cards will vary by manufacturer, but should be pretty similar to what we’ve outlined here.
This method works for Android 8.0 and above, all the way up until Android 13 (Tiramisu).
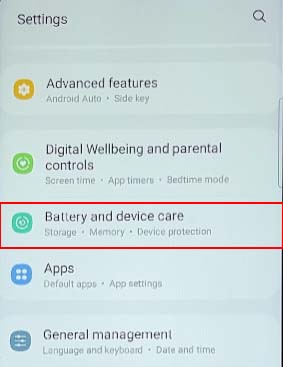
- Open the settings app on your phone. Scroll down and tap on “Battery And Device Care”.
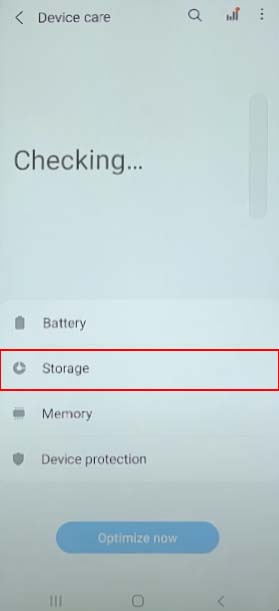
- Next, tap on “Storage”.
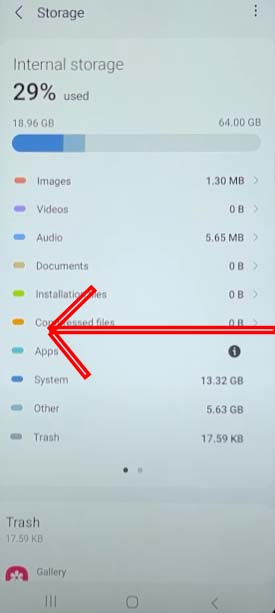
- Now, you have to swipe from the right side of your screen to the left side.
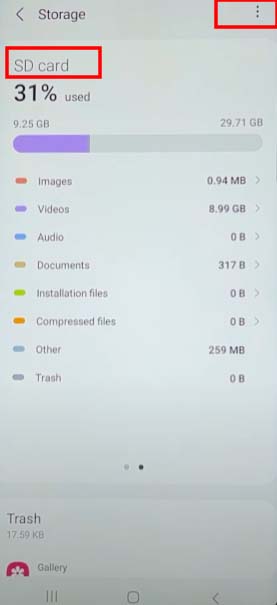
- Tap on the three dots in the top right corner of the phone.
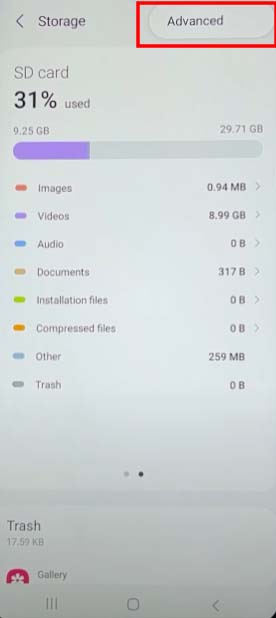
- Tap on “Advanced”.
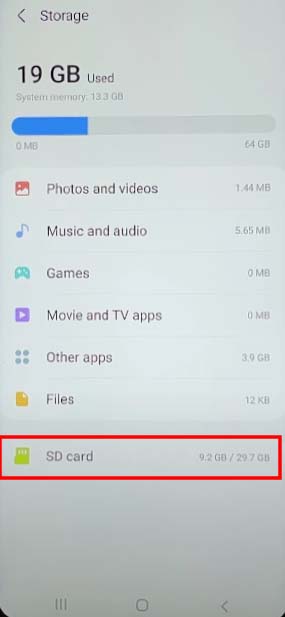
- Tap on “SD Card”.
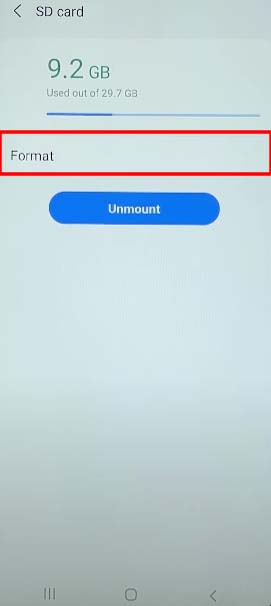
- Tap on “Format”.
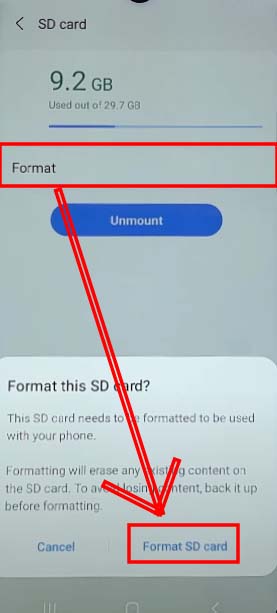
- Tap on “Format SD Card” In the Pop-Up Warning Dialog Box.
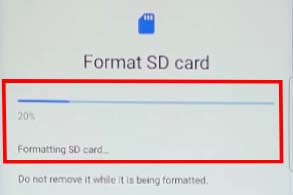
- Wait for the process to complete. You are now free to remove the SD card from your phone and use it in other devices.
5. Recover Data From A Corrupted SD Card
If you needed to format SD cards because they were corrupted, you may be surprised to learn that the data on them may still be usable.
Here is how you can recover photos from the formatted SD card. Of course, before you begin, make sure that the SD card is plugged into the computer.
- Step one if you want to recover photos from the formatted SD card is to download Stellar Photo Recovery.

- Now, navigate to wherever you saved the file. Open the file, and click “Yes” in the subsequent pop-up.
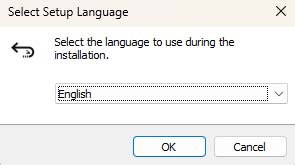
- Choose your desired language from the drop down menu and click “OK”.
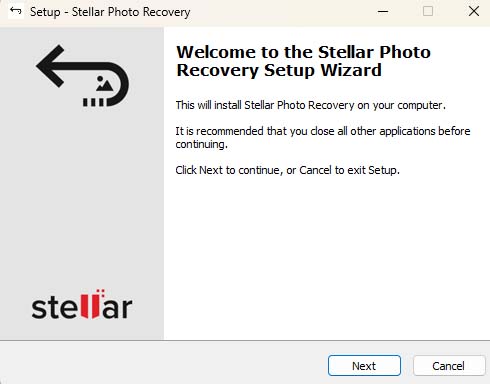
- The wizard will now run. Click “Next’.
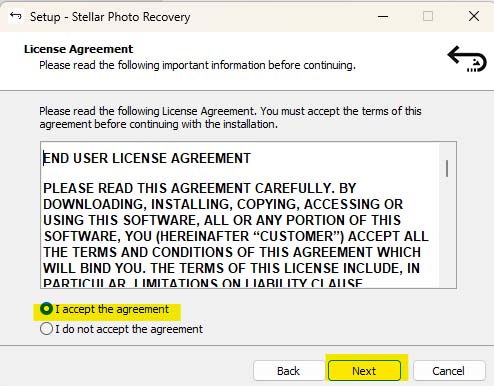
- Click on the “I accept” button and click “Next”.
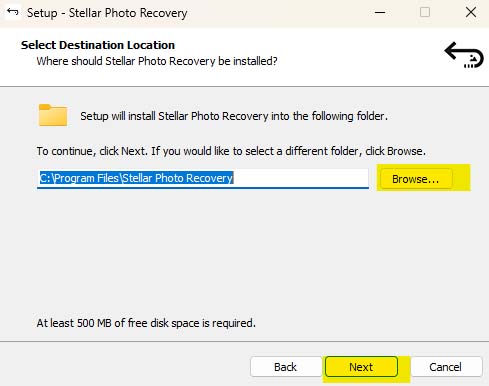
- Click “Next” to proceed auto-magically, or click “browse” to choose where you want the software installed.
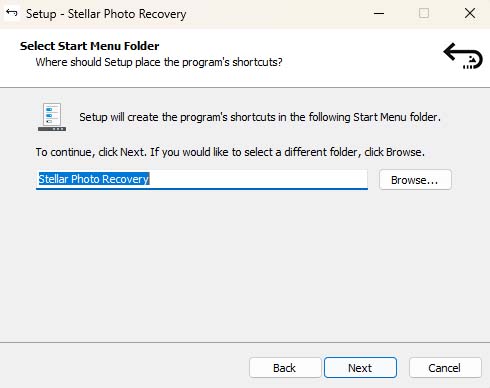
- Click “Next” to create a start menu shortcut.
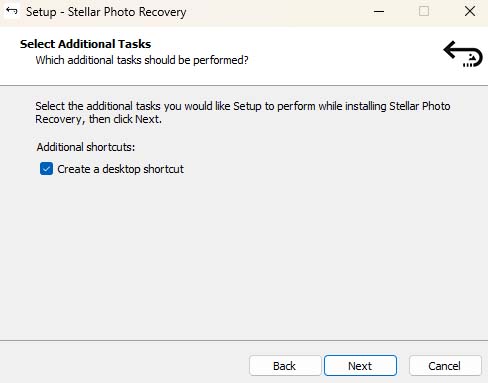
- Click “Next” to create a desktop shortcut.
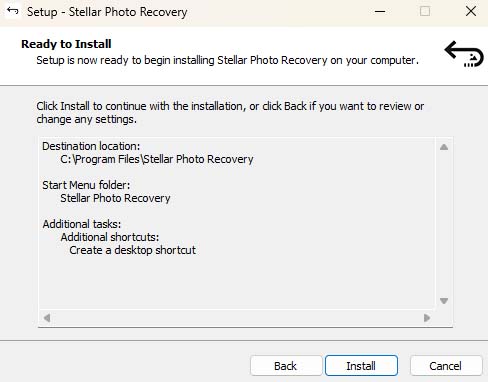
- Click “Install” to begin the installation process.
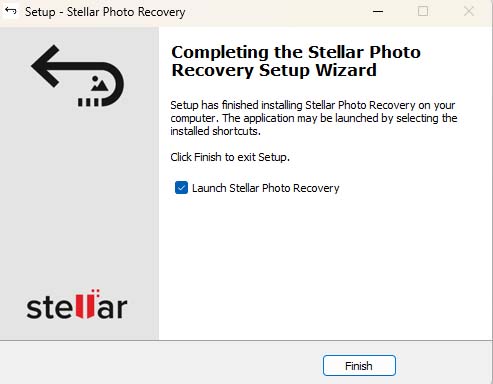
- Click “Finish” to launch the program and close the install wizard.
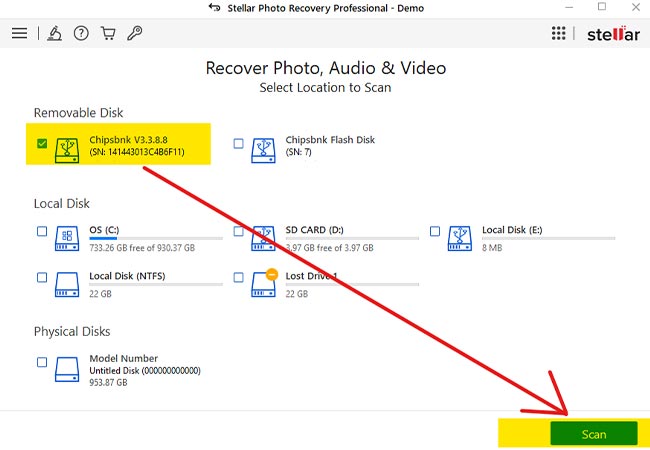
- Select the SD card that you just formatted, and want to recover data from. Then, click the scan button in the bottom right.
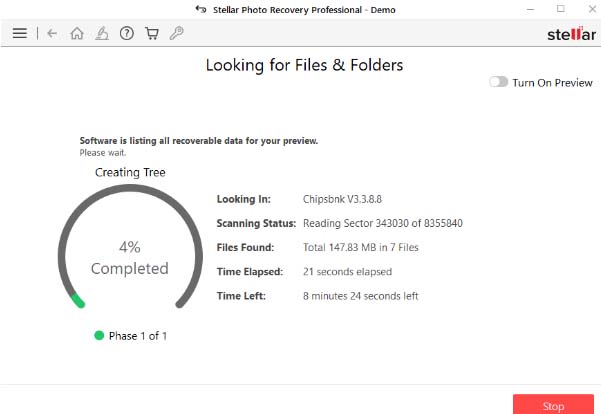
- Wait for the scan to complete. This may take a fair amount of time depending on the file system, and size of the SD card.
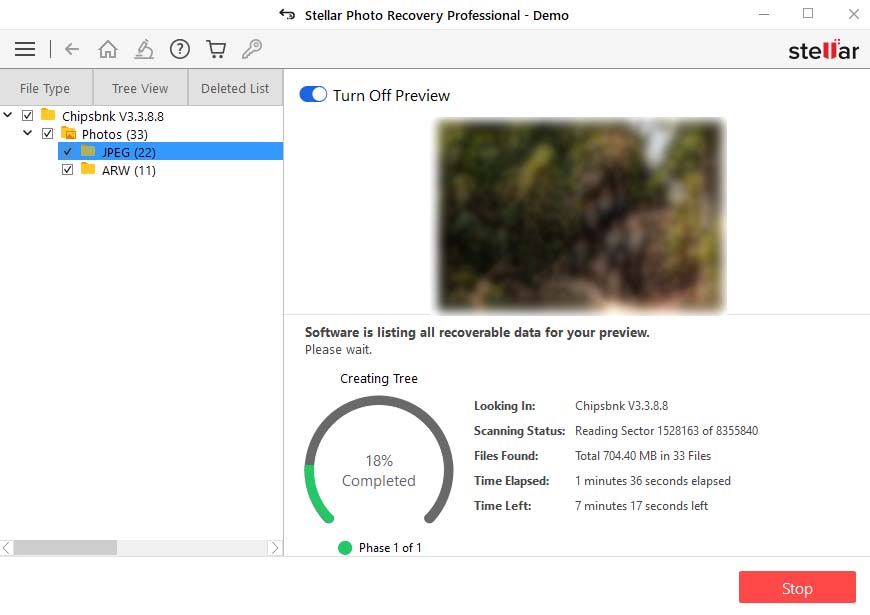
- You can toggle the preview pane view from the button in the top right corner of the “scanning” window.
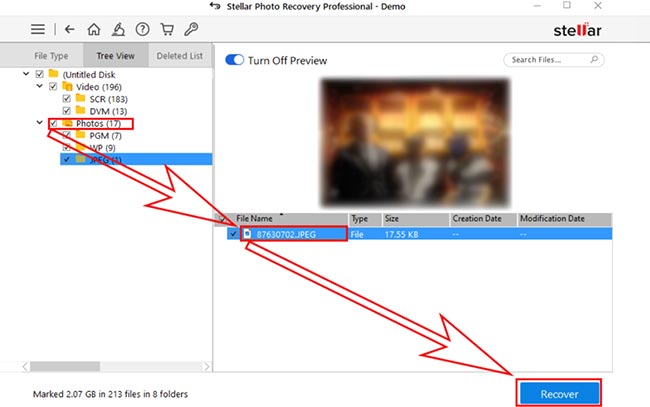
- If you need to export the items that Stellar Photo Recovery can recover for you, then you need to hit the “recover” button in the bottom right hand corner, as shown.
You will then be prompted to enter an “activation key”, which can be purchased at this link.
You can choose from monthly, yearly, or two-yearly options, all at reasonable prices.
Stellar Photo Recovery will then begin exporting the recoverable files to a location that you specify.
Also Read: Get Activation Key of Stellar Photo Recovery Software
Why Stellar?
Experience:
With over 30 years of expertise in data recovery and data care, we have built a strong foundation of knowledge and skill in the field.
Trusted Partnerships:
We have the privilege of serving Fortune 500 companies, including renowned names like HDFC Bank, Infosys, Hindustan Unilever, HCL, Dell, Sony, FedEx, and Genpact.
Customer Base:
Our global family extends to millions of satisfied customers and we’ve been fortunate to have had over 3 million of our software licenses embraced by users worldwide.
Global Leadership:
We are humbled by our recognition as a global leader in data recovery, with our presence extending to 190 countries.
Pan-India presence:
We have branches in 14 major cities, including Ahmedabad, Bengaluru, Chandigarh, Chennai, Coimbatore, Delhi, Gurugram, Hyderabad, Kochi, Mumbai, Kolkata, Noida, Pune, and Vashi.
Things To Remember
Even if you do not have access to a computer system, or if you do not need a particular file system on your SD card, formatting it using an Android phone is always the easiest.
Choosing MS DOS (FAT) while formatting an SD card is only recommended if your SD card is under 32 GB in capacity.
You will not be able to write data to NTFS formatted SD cards on macOS devices, but you can read the data on them on a macOS device.
In addition to the above, if you know that you will only be using Windows computers with the SD card, then NTFS is the best option.
Note that, except for the very high end video cameras, phones, and cameras also do not work with the NTFS system.
Lastly, it is worth noting that Android, by default, will format your SD cards to the FAT32 system, and there is as yet no way to change this. If data recovery software doesn’t work in your case, it’s best to opt for professional SD Card Data Recovery Services. These services offer specialized expertise to retrieve your data, ensuring that no crucial files are lost.
That said, we hope that you found this article useful, and we hope to see you in our next post.
Also Read: An step by step guide for FAT32 SD Card Recovery ?


