Bad sectors in a storage drive may develop due to heat, dust, wear, virus infection, software conflict, etc. A drive with bad sectors can corrupt the existing files and folders on it. Any data written on a bad sector is usually lost. Your computer starts to display poor performance such as getting stuck often, doing any action very slowly, generating errors etc.
You may lose complete data from such damaged hard drives and storage media.
Thus, it is advisable to timely create image and recover data from bad hard drive.
Stellar Data Recovery for Windows
Exclusive Offer- Enjoy Unlimited Data Recovery for 1 Month @ ₹3,999
- Get Instant Key
- Get Service Coupon worth ₹ 1,500
- Free Technical support
Benefits of Creating Disk Image and Bad Disk Recovery
Creating an image of a damaged hard drive or removable media reduces the risk of data loss caused by drive failure. It protects you from a permanent data loss situation. You can retrieve the inaccessible data as well as avoid further data loss due to the deteriorating drive.
How to Create Hard Drive Image to Recover Data from Bad HDD or any Removable Media?
Stellar Windows Data Recovery software has the provision to create image and recover deleted files from bad hard drive. You can generate an image of an entire or a specific range of the hard disk, partition or volume.
The software saves the image as .IMG file from which you can recover data any time later. This .IMG file is of same size as the selected hard disk, partition, or volume.
You can create image of hard drives, RAID drives, pen drives, USB flash drives, SD cards, external hard disks, and other data storage devices.
Note: Make sure that the location where you save the image file has sufficient space.
Step-by-step: Create HDD image, volume, floppy disk image, SD card image or any external media
- Download and run Stellar Data Recovery software.
- From Select What to Recover screen, select the type of data that you want to recover. Click Next.
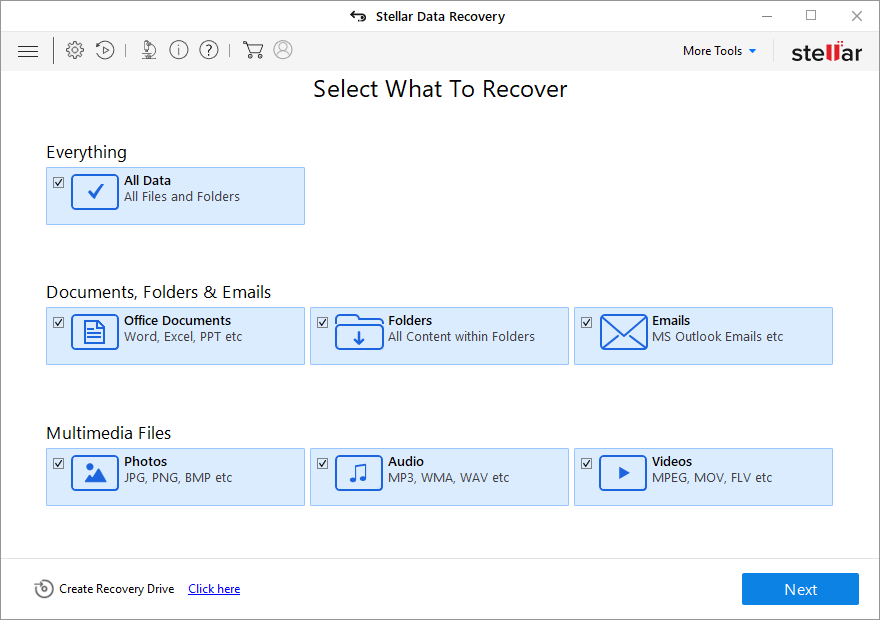
Figure: Select what to recover screen in software
- On Recover From screen, select Recover from Disk Image under Other Locations. Click Scan.
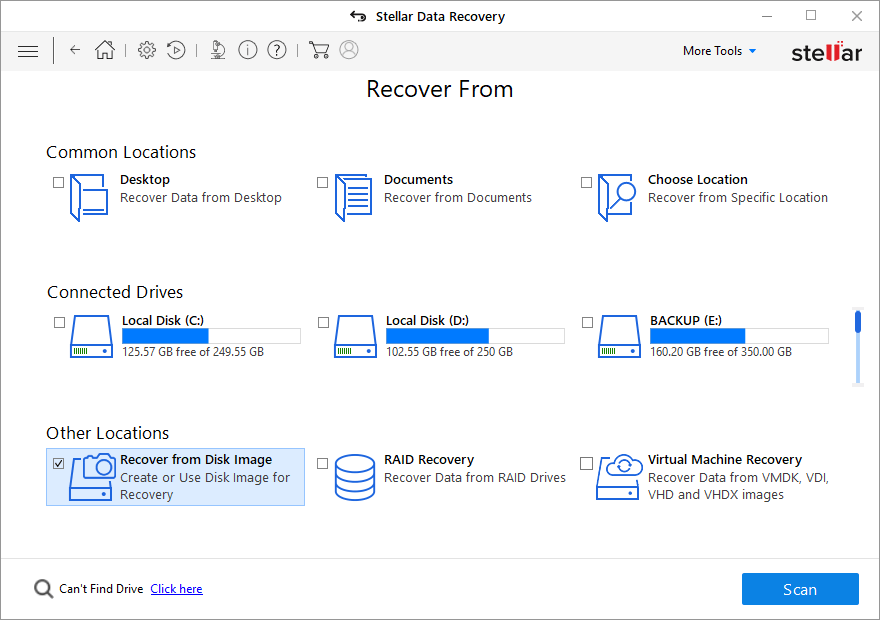
Figure: Recover from Disk Image option
- A dialog box is displayed. Check the Create Image option, and click Next.
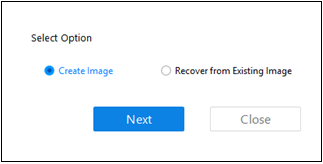
Figure: Options to disk image recovery
- In Create Image screen, select the drive or partition of which you want to create the image.
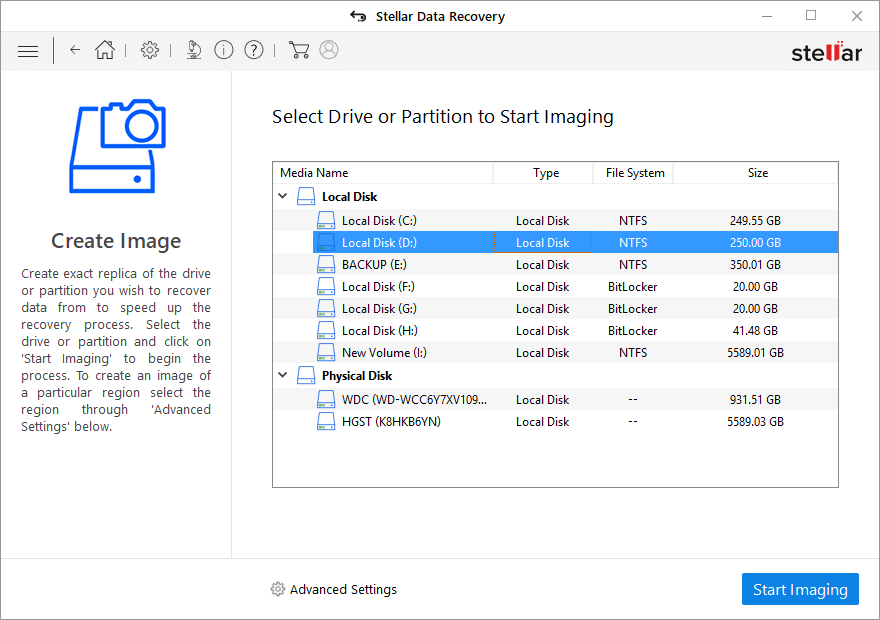
Figure: Select drive or Partition to start imaging process
- Click Start Imaging.
Note (For advanced users): If you want to create image of the specific region on the drive, first click on Advanced Settings icon on top. In the Advanced Settings window, either choose starting and ending sector OR move the slider below to define starting and ending sectors of the image file. Next, click Close and then Start Imaging.
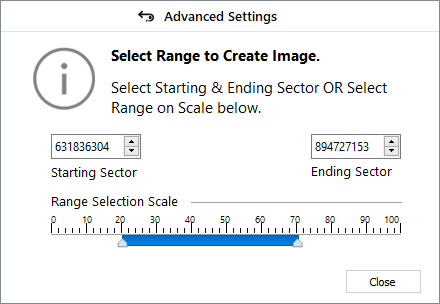
Figure: Advanced Settings box in Create Image
- Create Media Image to Save dialog box appears. Set the destination to save the image file. In the File Name text box, type name and click Save.
- After the disk imaging process completes successfully, the new created image file details appears on the screen.
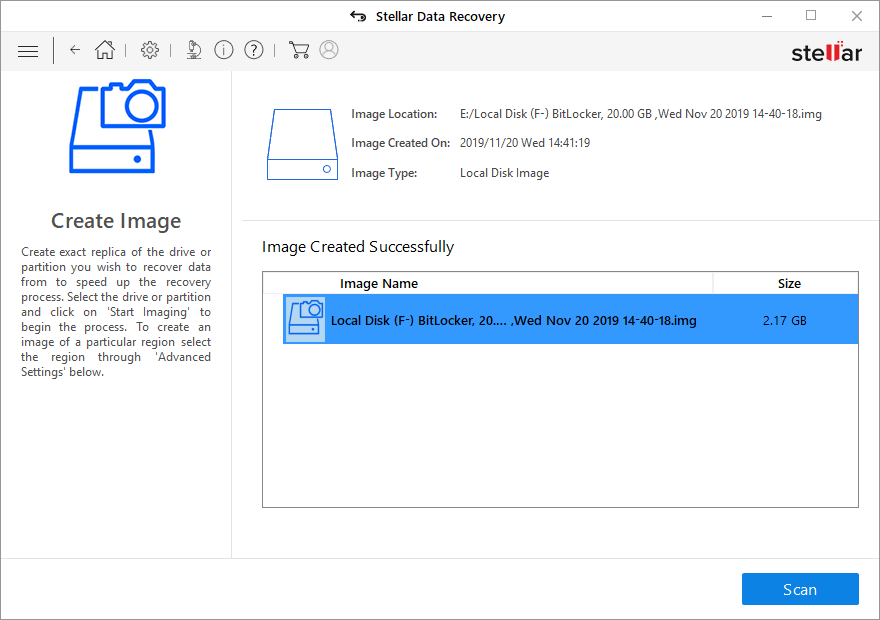
Figure: Created image details displayed in the software
- At this stage, you can either choose to close the software window and recover data from the image at any time later OR further click ‘Scan’ to proceed with disk image recovery.
- To save recovered files from created image, click Scan. The screen displays the scanning process. You can also see the live preview of the found files. There’s also an option to ‘Stop’ the scan at any point.
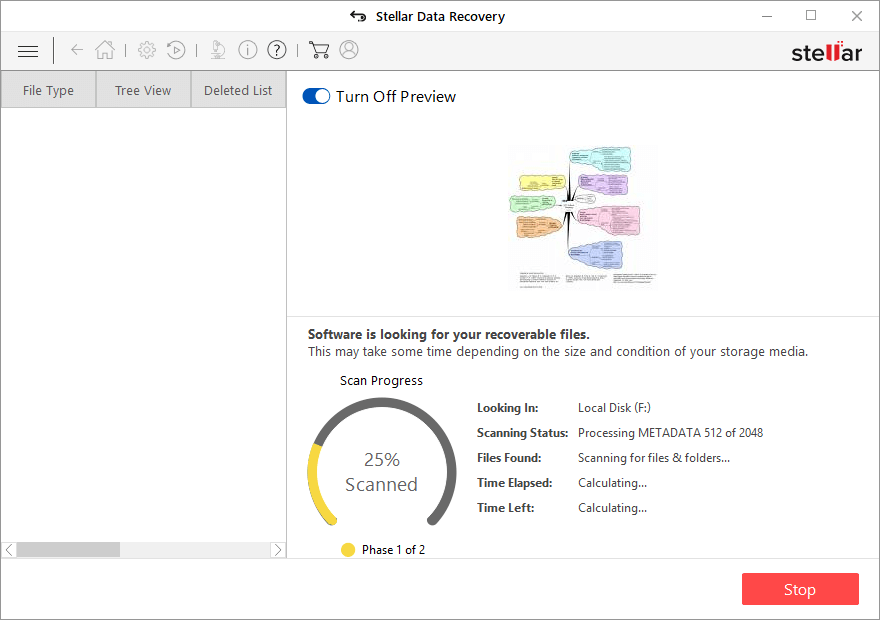
Figure: Scan progress window
- Once the scanning process is completed, details of the files and folder found are displayed in a dialog box. Click Close.
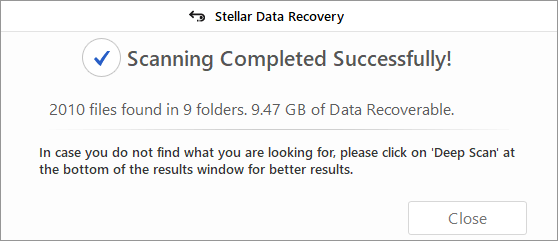
Figure: Scan completed dialog box
- Select the files and folders you want to recover. Click Recover.
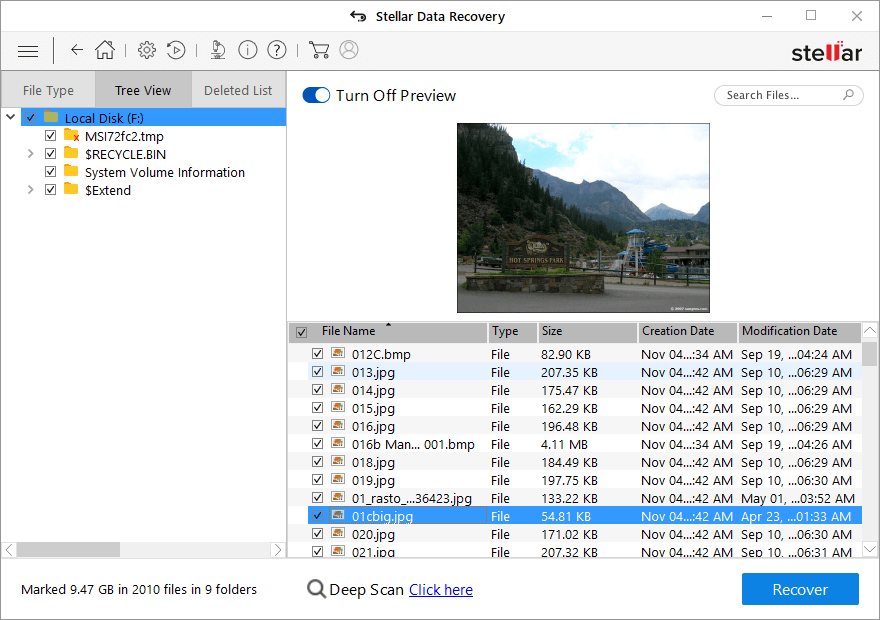
Figure: Recoverable files are displayed after scan
- Recover dialog box appears. Click Browse to select a location to save the recovered data.
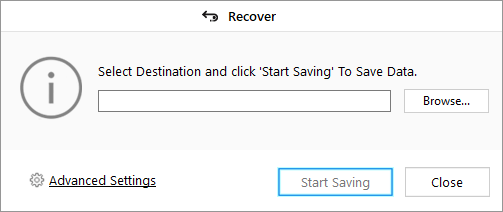
Figure: Save recovered files dialog box
- Next, click Start Saving. The recovered data is saved at your chosen location.
How to Recover Data from Existing Image in the Software?
- Execute steps 1-4 given above and in the dialog box (in Step 4), select the Recover from Existing image option.
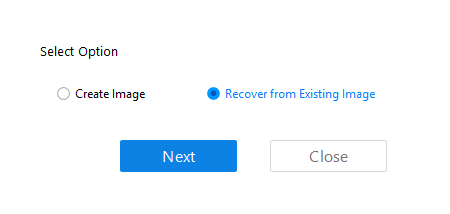
Figure: Recover from existing image
- All the disk images are listed on Recovery from Image screen.
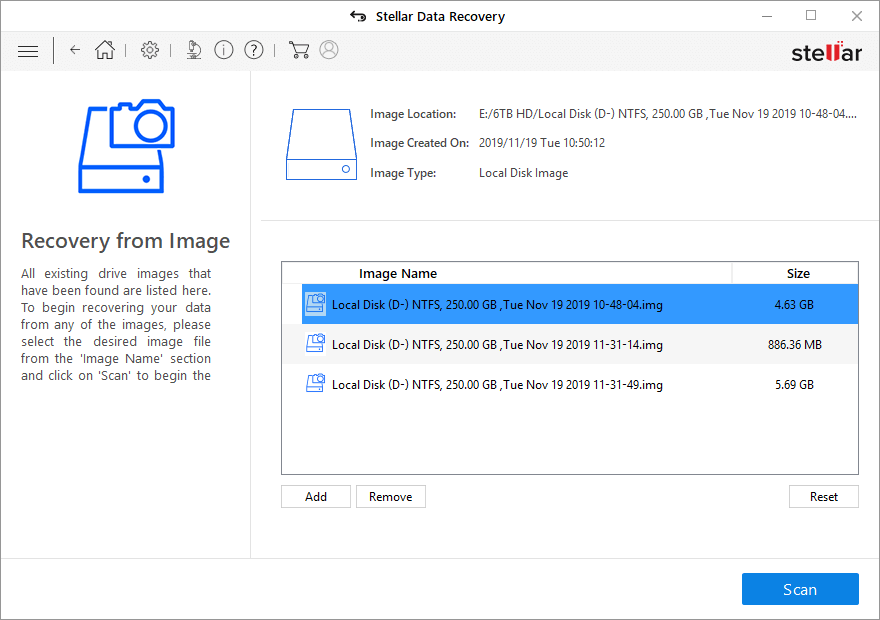
Figure: Created disk images list
- Select the desired image file and click Scan. Next follow the steps 10-13 given above.
This completes the bad hard drive recovery by creating its image by using Stellar Windows Data Recovery software.
FAQ
Disk image is a replica or a copy of the data stored within the disks in your computer. An image drive will contain the contents of your storage media device and provide duplicate structure of such devices.
Disk imaging is a smart feature which helps to restore data from a damaged hard drive. It usually works by copying the entire content stored in partitions, disk details, partition details, & Os partitions by creating a replica of content all the given data will be stored in a network share so that the content of the hard disk can be compressed based on the user's requirements.
Creating a drive image is usually required when the user needs to recover data from a bad hard drive or any damaged hard drive which got affected due to any accidental crash, virus attack or hardware failure.
The two process works together to accomplish the same goal. They create a replica of the drive by copying all hard drive content.
Disk cloning is an exact copy of a entire hard drive, or specific partitions on a hard drive whereas disk imaging copies all content stored on a media device to a single, large file on another drive by creating a large compressed file of your drive to restore the image back onto the existing drive or onto a new one.
Stellar Data Recovery for Windows allows the user to create image of hard drives, RAID drives, damaged pen drives, SD cards with bad sectors, floppy disk drive, external hard disks, USB flash drives, and other data storage devices.
Stellar Windows Data Recovery software is one of the best disk imaging software to create image drive. This to do software is very powerful and reliable software to create disk image and recover disc image files from a bad hard drive. Also, with the help of software users can generate an entire or a specific range of the hard disk image, external disk image, partition image, floppy disk image, SD card image or volume, etc.
About The Author
Content writer and digital marketing expert with 10 years of experience.
 Free Download


 Buy Now

.jpg)
