Forensic imaging copies data from a physical drive or logical volume into an evidence image, allowing investigators to examine the copy while the original remains untouched. It is usually the first technical step in a digital investigation, whether the case involves law enforcement or a corporate incident response team. Every finding that follows depends on how carefully this copy was made.
A small mistake at this stage can weaken an entire case. Writing to the original drive, selecting the wrong disk, or skipping verification can all raise doubt about the evidence and make the results hard to defend. Forensic laboratories, law enforcement teams, and SOC investigators rely on controlled acquisition methods for this reason, using them to protect the source and prove that the copy is accurate.
What Is a Forensic Image?
A forensic image is a sector-by-sector copy of a chosen storage source. Investigators create it to examine data without touching the original evidence. It is not the same as normal file copying.
Within the limits of accessible acquisition, a physical forensic image can capture:
- Allocated files
- Deleted-file remnants
- Unallocated space
- File-system structures
- Partition information
A forensic image is not always a complete replica of every physical part of a device. The following factors can limit what is captured:
- Bad sectors
- Inaccessible areas
- Encryption
- Hardware restrictions
- The acquisition method chosen
Examiners must document these limitations rather than leave them unrecorded.
Physical Drive Imaging vs. Logical Volume Imaging
Physical drive imaging copies the entire accessible disk, including partitions and the space outside them. Logical volume imaging copies only a selected partition or volume. The right choice depends on the scope of the investigation and what the authorisation covers.
| Acquisition Type | What It Captures | Typical Use |
|---|---|---|
|
Physical Drive Imaging |
The accessible addressable sectors of the selected disk, including partition structures and space outside individual volumes. | Full-disk investigation, deleted-data examination, and comprehensive evidence preservation. |
| Logical Volume Imaging | The accessible sectors within a selected partition or volume, including its file system structures and the unallocated space within that volume. | Focused acquisition when a particular partition is relevant, or the investigation scope is limited. |
A logical volume image is not the same as a logical file collection. A file collection extracts only selected files and may leave out sectors and unallocated space. The acquisition report must state clearly which method was used.
What Is the Difference Between E01 and Raw (DD) Forensic Images?
E01 and DD can represent the same source data, but they store it differently.
E01 (Expert Witness Format)
- A structured forensic image format, commonly used in forensic and legal work.
- Stores acquired data in compressed chunks to reduce file size.
- Can include case information, examiner details, acquisition parameters, and hash values, depending on the format variant and software used.
Raw (DD)
- A direct, sector-by-sector copy of the acquired data, with no compression applied.
- Usually saved with a .dd, .img, or .raw extension.
- Carries no built-in metadata header or acquisition report, so these must be documented separately.
- Its plain structure supports interoperability, independent validation, and use across a wide range of forensic tools.
| Feature | E01 (Expert Witness Format) | DD (Raw Format) |
|---|---|---|
| Data Representation | Evidence stored in a structured forensic container. | Sequential raw byte stream of the acquired source. |
| Compression | Supported by common E01 implementations. | No native compression in the raw format. |
| Metadata | Can contain acquisition and case-related metadata. | Requires separate metadata documentation. |
| Segmentation | Commonly supports multiple image segments. | A tool may split the file during acquisition, but splitting is not a native feature of raw DD. |
| Hashing | Acquisition hashes may be stored in the container, depending on implementation. | Hashes are normally stored in an external report or manifest. |
| Main Advantage | Structured evidence storage and convenient metadata management. | Simple, broadly compatible byte-stream representation. |
How to Create a Forensic Image Using Stellar Toolkit for Data Forensics
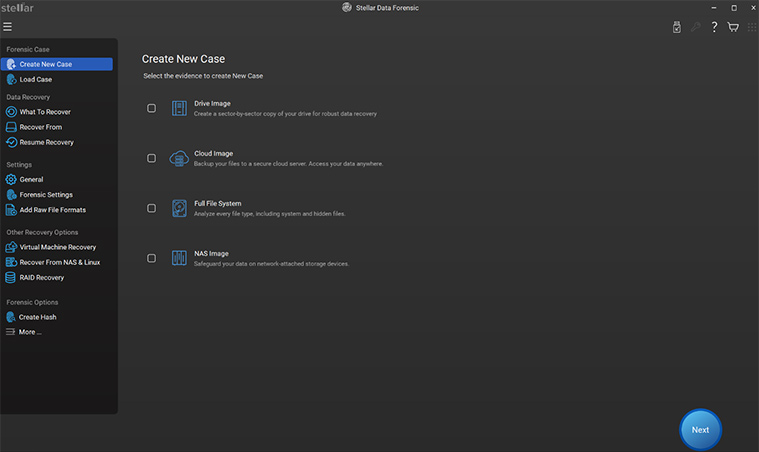
A defensible acquisition depends on a controlled workflow, not only on the image file. Stellar Toolkit for Data Forensics provides an integrated environment for acquiring and examining computer and storage evidence. It supports imaging of physical drives and logical volumes in E01 and DD formats, with multiple imaging modes.
Step 1. Identify and Record the Evidence
- Record the case number.
- Record the examiner name, date, and time.
- Record the device manufacturer, model, serial number, capacity, and physical condition.
- Photograph the device where applicable.
- Note if the device was received powered on, powered off, encrypted, or connected to other systems.
For incident response and SOC investigations, also record:
- The endpoint identity
- The asset owner
- The relevant alert or incident number
- The authorisation for acquisition
Step 2. Keep the Source Unchanged
For a powered-down removable drive, connect the source via a validated hardware write blocker or another validated read-only method.
Verify that the write-protect mechanism works before acquisition starts.
Live systems need a different approach. Shutting down can destroy volatile evidence or make encrypted data inaccessible.
On live systems, use an approved live acquisition procedure and document any unavoidable changes to the source.
Step 3. Select the Acquisition Scope
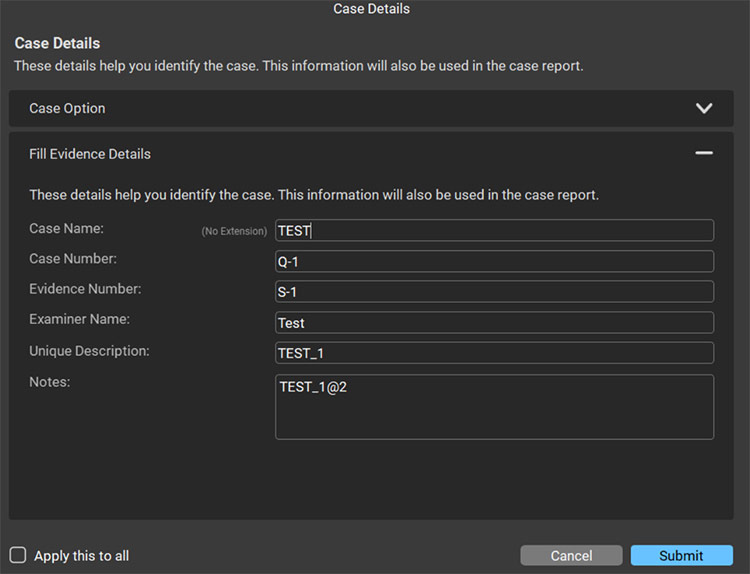
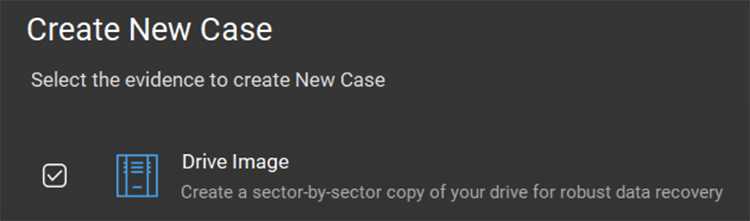
Select physical drive imaging when the investigation requires a complete image of the accessible disk, including partitions and unallocated space.
Choose logical volume imaging when the authorised scope is limited to one volume, or when a focused acquisition suits the operation.
Confirm the correct source using its identifying details.
Selecting the wrong disk can lead to missing evidence. Confusing the destination with the source can lead to serious loss of evidence.
Step 4. Choose E01 or DD and Configure the Output
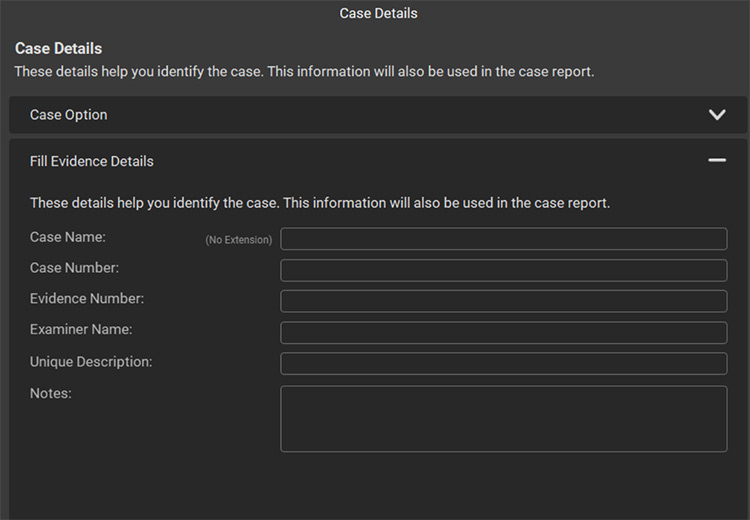
- Select E01 when structured metadata, compression, or segmented evidence files are required.
- Select DD when a straightforward raw image is preferred.
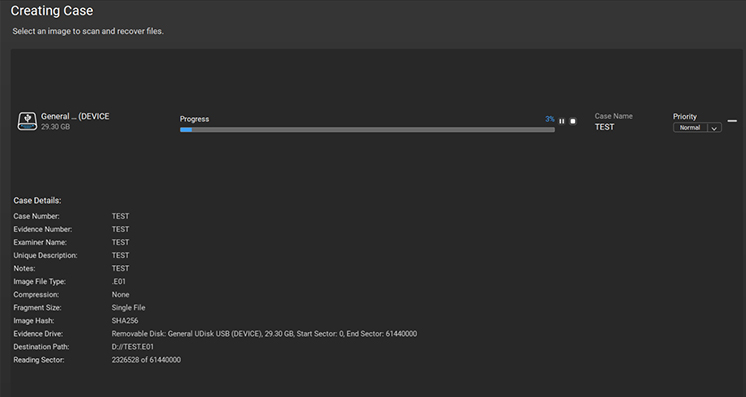
- Configure the destination path, evidence filename, available storage, and any supported compression or fragmentation options.
- Keep the destination separate from the source evidence.
- Record the selected format, acquisition scope, tool version, and relevant settings before starting.
Step 5. Acquire the Evidence and Monitor Errors

- Start the imaging process and monitor progress, read errors, interruptions, and destination capacity.
- Do not assume that a completed progress bar means every sector was acquired.
- Preserve the error information and identify any sectors or ranges that could not be read.
- A partial or error-affected image may still contain valuable evidence, but its limitations must be reported accurately.
Step 6. Verify the Image Using Cryptographic Hashing
- Generate an acquisition hash over the source data stream and compare it with a hash recalculated from the acquired image data.
- Use the same algorithm and ensure both values cover the same byte range.
- For E01, verify the reconstructed, decompressed evidence stream instead of hashing the E01 container files.
- For DD, hash the raw image directly, provided the complete file or correctly ordered segments are included.
Step 7. Preserve the Original and Create a Working Copy
Preserve the original evidence in accordance with organisational policy.
Maintain a master image and use a verified working copy for examination.
Record all transfers, storage locations, and later verification results in the chain-of-custody documentation.
Core Forensic Imaging Features in Stellar Toolkit for Data Forensics
Stellar Toolkit for Data Forensics combines acquisition, hash verification, and evidence analysis into a single program. The features below cover how each stage of the imaging workflow is supported.
Physical Disk and Logical Volume Acquisition
- Investigators can select a physical storage device or an individual logical volume as the acquisition source.
- The strategy can be adapted to the case, whether the aim is to preserve the entire disk or to analyse a single partition.
- E01 and DD imaging is supported in normal, compressed, fragmented, and fragmented-compressed modes, where applicable to the selected format.
Imaging in Computer and Storage Environments
- Designed for acquiring and examining Windows and macOS systems and supported storage environments.
- Extended forensic capability covers disk images, virtual machines, and supported file systems.
- Confirm the exact version, supported operating system build, chipset, encryption state, and acquisition mode before deploying the tool in a case.
Hash Generation and Validation
- Supports MD4, MD5, SHA-256, SHA-512, Keccak-256, and Keccak-512, with dynamic hash generation and an HTML-based view.
- Examiners can generate and record hash values as part of the evidence workflow.
- SHA-256 or SHA-512 is usually preferred for modern integrity verification.
- MD5 can be retained for legacy forensic workflows, but should not be the only integrity check when stronger algorithms are available.
Evidence Analysis and Reporting
- Loads and analyses supported image formats such as E01, DD, EX01, BIN, AFF4-L, AFF, ZIP, and TAR, as well as other supported evidence sources.
- Offers evidence analysis, file searching, tagging, and reporting.
How Hash Verification Preserves Evidence Integrity
A cryptographic hash is a fixed-length digest computed from data. A small change in the input usually produces a different digest. This makes hashing a reliable way to detect changes between two copies of the same data.
Hashing has limits. A matching hash does not prove any of the following:
- The source was authentic before acquisition.
- Every inaccessible sector was captured.
- The acquisition tool worked correctly.
- The evidence is legally admissible.
Source protection, tool validation, acquisition records, documented procedures, and the broader chain of custody establish these points.
Wrapping Up: Building a Defensible Forensic Imaging Workflow
A forensic image protects evidence only when the process behind it is controlled. A sound acquisition depends on the following:
- The right acquisition scope
- Reliable write protection
- Validated imaging software
- Cryptographic verification
- Complete documentation
E01 and DD both meet this goal, and the choice depends on the case. E01 suits work that needs metadata, compression, and segmented files. DD suits work that needs a simple raw image with broad tool compatibility. On live systems, encryption, volatile data, and continued changes to the disk must also be considered. No acquisition is entirely free of modification, so the aim is to minimise changes and record each one.
Stellar Toolkit for Data Forensics brings physical and logical imaging, E01 and DD support, hash generation, and evidence reporting into one workflow. Forensic laboratories, law enforcement teams, and SOC investigators can use it to preserve digital evidence for repeatable analysis.
Ready to build a repeatable imaging workflow? Explore the Stellar Toolkit for Data Forensics and see how it handles acquisition, verification, and reporting in a single program.
Forensic imaging is only one part of a broader digital investigation. The following resources explore related topics such as drive encryption, forensic carving, digital evidence structures, write blockers, and hidden storage areas.
FAQs
Neither format is universally better. E01 offers structured metadata, compression, and segmentation. DD offers a simple raw byte stream with broad compatibility. The right choice depends on investigative requirements, tool compatibility, storage, and organisational policy.
Yes. A logical volume image can capture the accessible sectors of a selected partition. It must be clearly identified as a volume acquisition, not as a complete physical disk image.
No. A matching hash supports data-integrity verification. Admissibility depends on applicable law, acquisition procedures, examiner competence, documentation, and other evidentiary requirements.
Yes. Stellar Toolkit for Data Forensics supports physical drive and logical volume imaging in E01 and DD, along with hashing and evidence examination. Check the installed version for exact acquisition settings.
SHA-256 or SHA-512 is usually preferred for modern integrity verification. MD5 can be kept for compatibility with legacy workflows, but it should not be the only integrity mechanism when stronger algorithms are available.


About The Author

Digital Forensic Specialist & Analyst