The external hard drive may get corrupt due to virus infection, unsafe ejection, interruption during transferring files, etc. In such a case, you may lose all the files or data backed up on the Time Machine external drive.
If you’re facing similar issues and unable to access the files on Time Machine disk, follow the methods given in this post that can help you to fix the corrupt Time Machine drive and restore the data.
Time Machine Backup Failed
Mac OS user, who are using Catalina or Mojave, have reported issues with Time machine. Regular backups are reliable method to prevent data loss. But when Time machine is faulty and the data is not backed up, users may require an option to get the data back.
[NOTE]: The best and easiest way to recover data from corrupt Time Machine hard drive is to use an automated data recovery tool such as Stellar Data Recovery for Mac. This tool can recover data even from severely corrupt Time Machine drive, without having the need to repair the drive. The articles provides solutions to recover data from corrupted time machine hard drive.
Quick Fixes for Accessing/Restoring Files from Inaccessible, Error Throwing Time Machine Drive
- Disconnect the Time Machine disk, restart the Mac, and connect the disk again to see if you’re able to access the disk/files
- Check if your external Time Machine hard drive is properly connected to the USB, FireWire, or Thunderbolt port on your Mac
- Check and update your Mac system, if it’s not up-to-date
- If you're using a USB hub or a similar device, try connecting the Time Machine hard drive directly to your Mac
- Check with the drive manufacturer (if using third party drive as a Time Machine backup drive) if the drive's firmware is up-to-date
If these quick fixes don’t work, follow the methods given below to access and restore files from the hard drive.
Also, read about how to perform mac trash recovery?
Methods to Recover Files from Corrupt Time Machine Hard Drive
Mac systems have built-in utilities which can help repair corrupt disks. You can use these utilities to repair the corrupt Time Machine hard drive. Once you’re able to fix the issues on drive, you can access and restore files from it.
[IMPORTANT]: Turn OFF Time Machine before using any of the following methods. Once you’re able to fix the drive, you can turn ON the Time Machine and restore files from the repaired disk.
Method 1: Use Disk Utility
You can use the GUI-based Disk Utility on Mac to fix disk related problems.
Step 1: Connect the Time Machine backup hard drive to your Mac
Step 2: Launch Disk Utility from the Utilities folder, located in the Applications folder
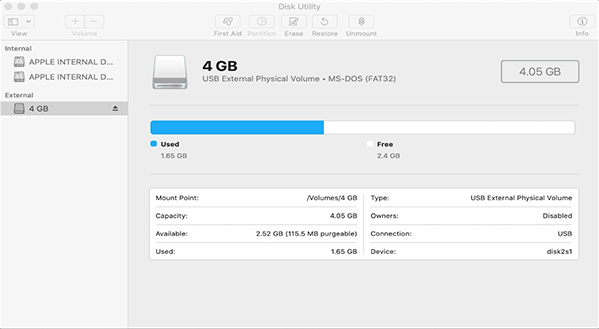
Step 3: In the Disk Utility window, locate the Time Machine hard drive
[NOTE]: If you see that the drive is grayed out, marked as untitled (Untitled means unmounted on Mac computer), mount it as instructed in step 4, else skip to step 5.
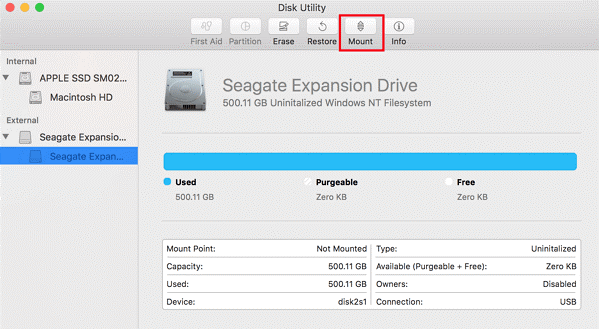
Step 4: Select the drive and click the Mount button from the bar at the top
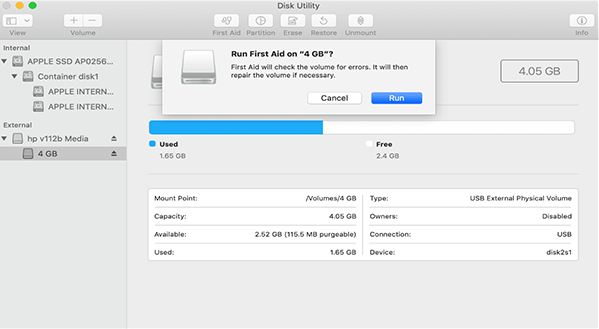
Step 5: Select the Time Machine drive, choose First Aid, and click Run button
This would start checking the disk for issues and fix corruption.
Step 6: After the completion of repair process, disconnect and reconnect the drive
If you’re able to access the backup drive, restore the files from it.
In case you’re unable to repair the corrupt disk by using Disk Utility, follow the next method.
Method 2: Use DiskUtil Command
Diskutil command can be used for different purposes. To repair disk by using diskutil command, you need to use repairvolume parameter. Here are the steps to do so.
Step 1: With Time Machine drive connected to your Mac, open Terminal (/Applications/Utilities/Terminal.app)
Step 2: Type cd /Volumes on the terminal window and hit Return
[NOTE]: We used this command to switch to the Volumes directory as all the disks that are attached to the Mac are located within the Volumes directory in Terminal.
The Terminal window looks similar to this:
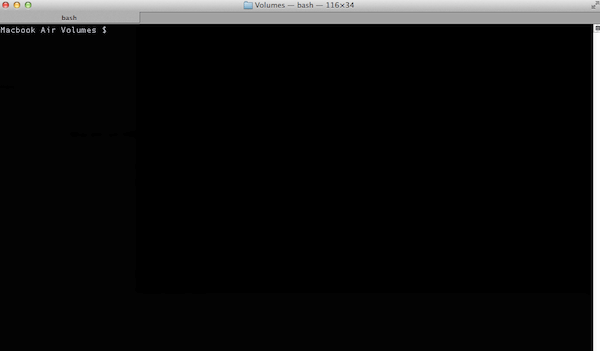
Step 3: Type ls and hit Return
Running ls command lists all the disks attached to your Mac including the Time Machine backup drive.

Step 4: From the list, identify your Time Machine disk
Step 5: Run diskutil command with the following syntax:
diskutil repairvolume /Volumes/[drive name]/ and hit Return
For instance, if you identified the name of Time Machine hard drive as TimeMachineDisk, then the command would be:
diskutil repairvolume /Volumes/TimeMachineDisk/
To run the command, hit return after typing the complete command including the drive name.
Running this command will start repairing the corrupt drive.
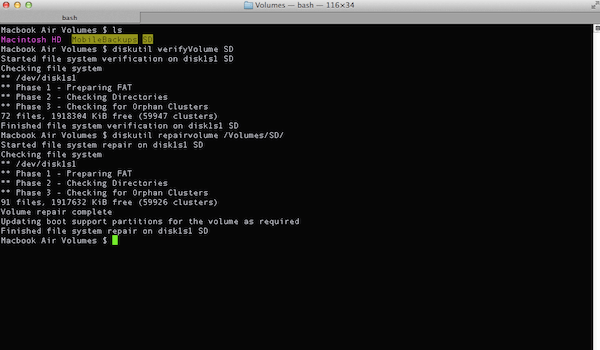
Step 6: After the command is successfully executed, remove the backup drive safely and connect it back to your Mac. Check if the drive is repaired and you’re able to restore the data.
If the issue remains unresolved, head to the next method.
Method 3: Run FSCK Command
FSCK is another command line utility to fix drive corruption or other drive related problems. To run this command, you’d first need to know the File System and disk identifier or Device Identifier of the Time Machine drive. Follow the given steps:
Step 1: With external drive connected to your Mac, open Terminal (/Applications/Utilities/Terminal.app)
Step 2: Enter diskutil list command on terminal window and hit Return
You’d be able to see a detailed list of all the connected drives, showing their respective Device Identifier and File System (HFS+, APFS, etc.).

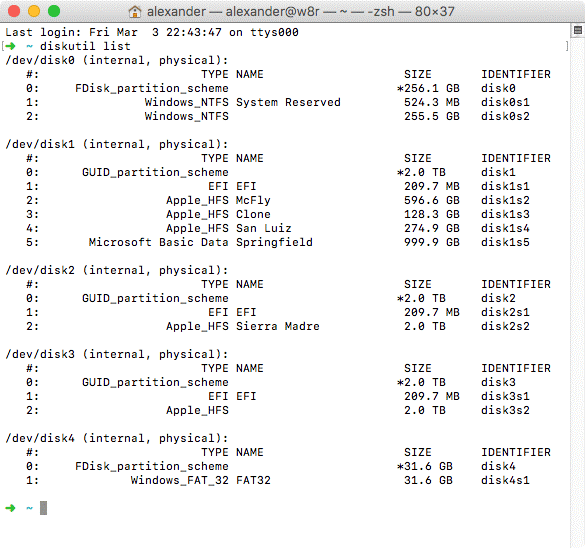
Step 3: Locate your Time Machine backup drive from the list, and find its Device Identifier and File System. Device Identifier looks like /dev/disk1 and the File System would be HFS, APFS, etc.
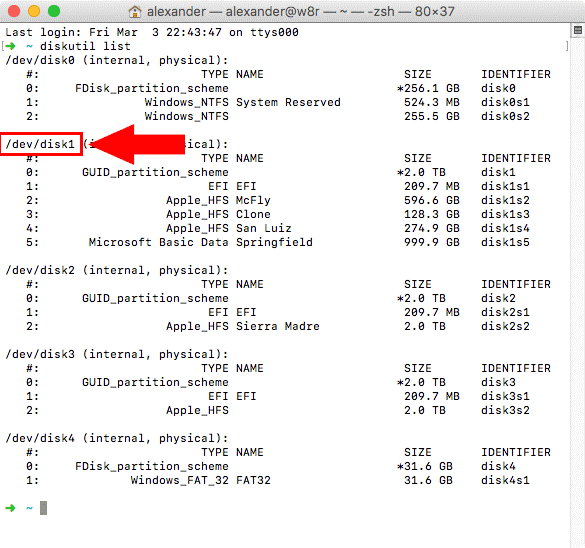
Step 4: Keep a note of the File System and Device Identifier of the drive as this would be required while running the FSCK command
Step 5: Enter Single User mode. To do so, restart the system and immediately press Command+S keys while it restarts
A command line screen will open.
Step 6: Use the following syntax to run FSCK command:
/sbin/fsck_
Replace /dev/disk1.
For example, if the File System = HFS and Disk Identifier = /dev/disk1, the complete command would be:
/sbin/fsck_hfs -fy /dev/disk1
After typing the complete command, hit Return key to run the command.

Step 7: Disconnect your Time Machine drive after the command is executed successfully, and connect it back to see if you’re able to access and restore the files from Time Machine backup disk
If none of the above methods works, you need to use an effective Mac data recovery tool such as Stellar Data Recovery for Mac to recover data from corrupt Time Machine hard drive.
[Ultimate Solution]: Use Stellar Mac Data Recovery Tool
Stellar Data Recovery Software for Mac can recover all types of files from corrupt, inaccessible, error throwing, or unmountable Time Machine hard drives.
To recover your crucial backed up files by using this software, you can simply plug in your corrupt drive, launch the software on your Mac, and follow the wizard to recover data from the disk.
Steps to recover files from corrupt Time Machine hard drive by using Stellar Mac Data Recovery software:
Step 1: Connect the corrupt Time Machine backup drive to your Mac
Step 2: Download and install the software, and launch it
Step 3: From the main interface, choose “Recover Everything”, and click Next
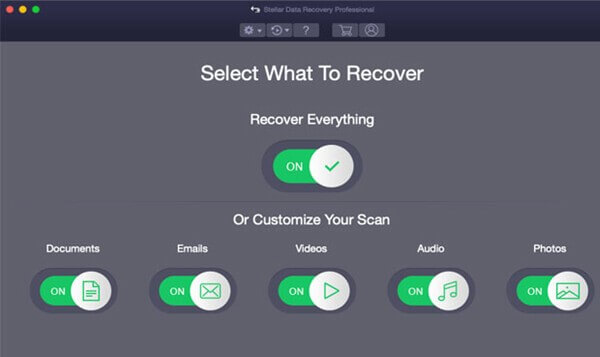
Choosing “Recover Everything” commands the software to look for and recover all types of files including documents, emails, videos, audios, photos, etc.
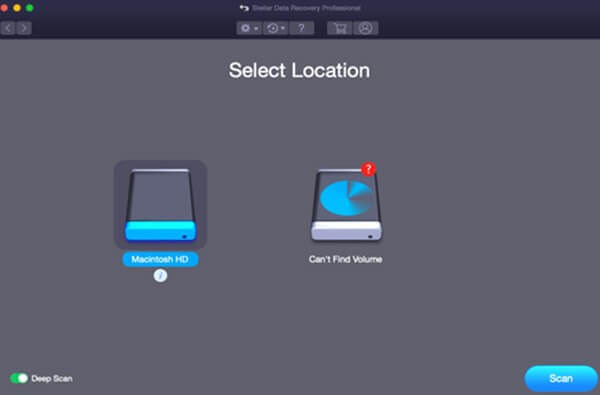
Step 4: Select your corrupt Time Machine hard drive, toggle ON Deep Scan switch, and click Scan
“ Deep Scan” feature of the software searches the files
based on their signatures. Thus, scanning the drive with Deep Scan mode turned ON can recover files, even from corrupt or formatted hard drive.
Step 5: When the Scanning process completes, click OK
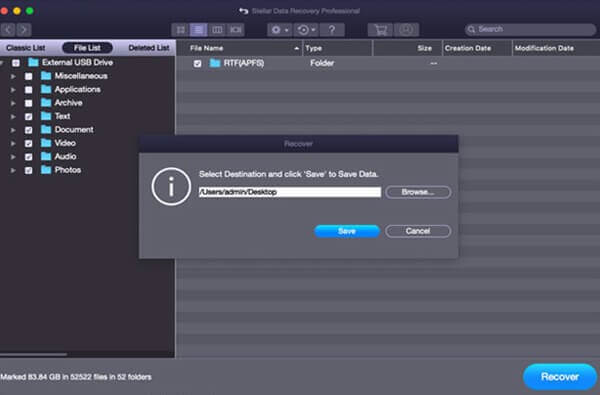
It will lists all the recoverable files on the hard drive.
[NOTE]: You can preview any file on the scanned corrupted Time Machine disk by clicking the desired folder and then double-clicking the file on the right pane.

Step 6: Select the files you want to save, and click Recover
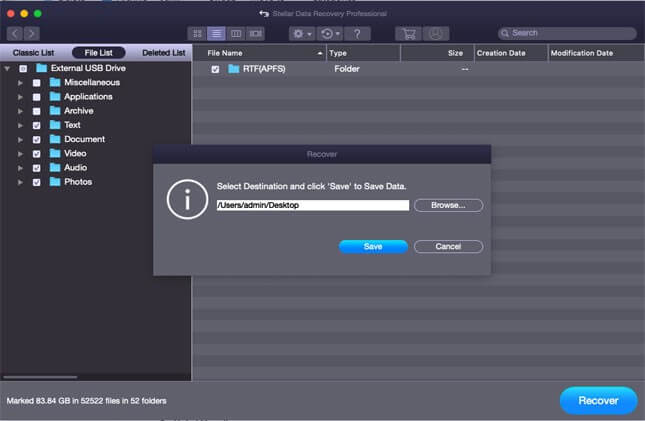
Step 7: When prompted, click Browse to assign a save location for the recovered files
[NOTE]: Don’t save the recovered files on the corrupt drive.
Step 8: Click Save to initiate the saving process
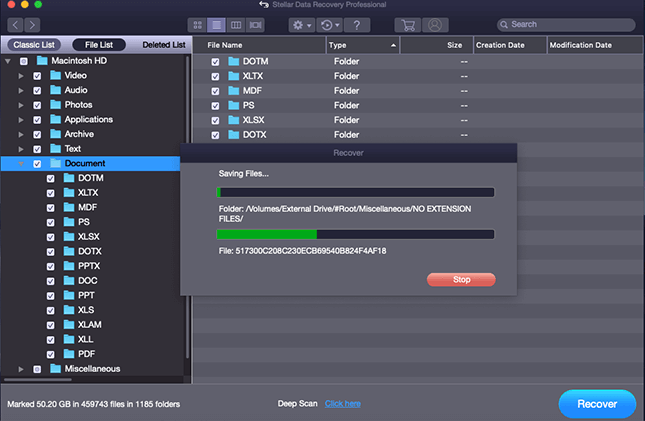
This will save the recovered files at your selected location.
After saving the recovered data, you can reformat the corrupt Time Machine hard drive to fix its corruption.
About The Author

Content writer and digital marketing expert with 10 years of experience.
 Free Download


