The Step-by-Step Guide on How to Use Time Machine on Mac
Time Machine works both on local storage devices and external disks. Read on to know how to use Time Machine on Mac.
- Connect an external storage disk to your Mac System
- If macOS prompts you to use the connected drive as a backup, check the “Encrypt Backup Disk” box, then click “Use as Backup Disk”.
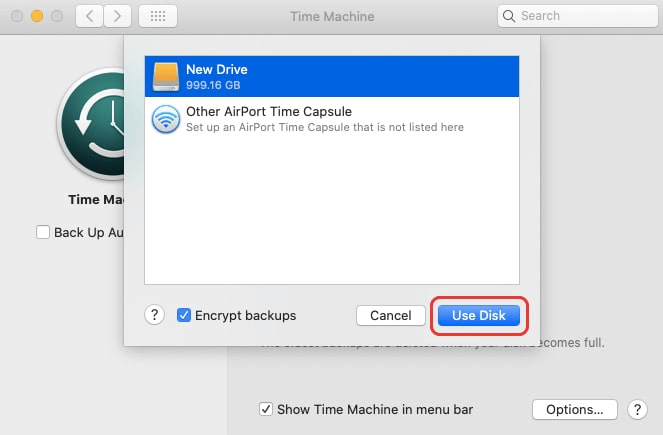
- If macOS doesn’t prompt you, go to the Apple menu. Then navigate to “System Preferences” then “Time Machine”. Then choose the “Select Backup Disk” option. Then follow the instructions in step 2.
- macOS will prompt you to erase the disk if it’s not in the right format. Click “Erase”
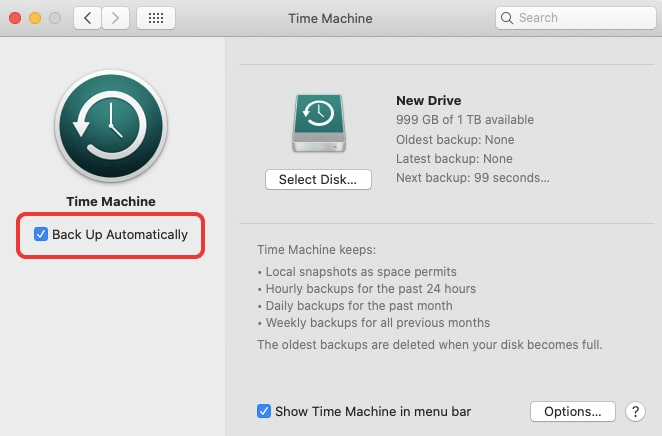
- Check the “Backup Automatically” box to automate your backup. By default, Time Machine will back up your entire Mac system. If you want to exclude some drives, you can through the “Options” menu.
How to Recover Files From Time Machine?
- Connect the backed-up drive to the macOS. Now select “Time Machine” then “Enter Time Machine” from the backup.
- With the “TimeLine” or “Up/Down” arrow button, navigate to backups. Find the file you want to recover, then click “Restore”.
How to Recover All Personal Files From Time Machine?
- Connect the backed-up drive to your macOS. Then press the “Command + Space” to open Spotlight. Type “Migration Assistant” to open the application then click “Continue”.
- You will now see “From a Mac”, “Time Machine location”, or “Startup Disk” options. Select the disk your files are in. Then follow the wizard’s instructions to recover all of your files.
Using Time Machine Data Recovery for OS Recovery
It is also possible to use Time Machine to recover an older OS version. This feature is supported on macOS 10.5 and later versions. Read to know how to use Time Machine on Mac for OS recovery.
- Put your Mac system in recovery mode. To do this, press and hold the “Command+R” key. Release them when you see the Apple logo. Next select “Restore” from a Time Machine Backup then click “Next”.
- After selecting the Time Machine backup drive, click “Continue”
- Then choose the version you want to restore by date.
- Click “Restore” to start the restoration process. Once it’s finished, restart your system to install the changes.
Where Time Machine May Fail You?
All said Time Machine is not a foolproof solution. Just when you need it most, Time Machine backup can fail you. Here’s how, and what to do when it does.
Error Messages
1. Error Code 45:
Meaning: Backup couldn’t be completed.
Solution: If the Time Machine Drive is connected, quit the application and disconnect it from your Mac system. Reconnect the drive and run Time Machine again.
2. Error Code 404 :
Meaning: Backup to the drive couldn’t be completed.
Solution: Enter this terminal command:
clear; printf '\e[3J' && log show --predicate 'subsystem == "com.apple.TimeMachine"' --info --last 48h | grep -F 'eMac' | grep -Fv 'etat' | awk -F']' '{print substr($0,1,19), $NF}'
This will show you the log status of Time Machine. Follow the required steps to fix the 404 error.
3. Error Code 112:
Meaning: Failure of Time Machine backup to the Time Capsule.
Solution: Press and hold the “Option Key”. Then click the “Time Machine” icon from the Menu Bar and click the “Verify Backup” key.
Situations When Time Machine Recovery Stops Working
Restoration failure can occur due to many reasons. Here are some of those reasons.
- If there is a power issue when the backup is happening, there could be a recovery failure.
- If the backed-up device isn’t connected properly, your Mac system won’t be able to find it.
- The backed-up file you want to access could be locked or inaccessible.
- If you’ve incorrectly configured the Time Machine drive or if there is an error when you configure the device, the backup won’t happen properly. This will cause issues when recovering your files.
When Time Machine Backup Fails
Just like how it’s possible to accidentally delete files from your Mac system, it is equally possible to delete files from the Time Machine backup drive as well. Here are some situations where your Time Machine backup may cause recovery problems.
- Time Machine backup disk gets corrupted.
- If the backup device gets full, then it won’t back up new files. Or, older files get automatically deleted in order to back up new files.
If any of these situations occur, you’ll have to use software to recover your data.
How to Recover Data Without Time Machine Backup?
Luckily, if Time Machine does fail, you can still recover your files with Stellar Data Recovery for Mac.
Stellar is a powerful DIY data recovery tool. The tool is compatible with macOS Ventura 13.0, macOS Monterey and versions earlier than that. Here’s what the Stellar Data Recovery Tool can do.
- Recover data from crashed systems or systems that won’t boot.
- Recover data from corrupted USB, partition loss, and unrecognized drives.
- Support APFS, HFS, HFS+, ex-FAT & NTFS drive
- Recover all file formats like documents, photos, videos, emails, and more.
- Recover data from MacBook®, iMac® Mac Pro, and more.
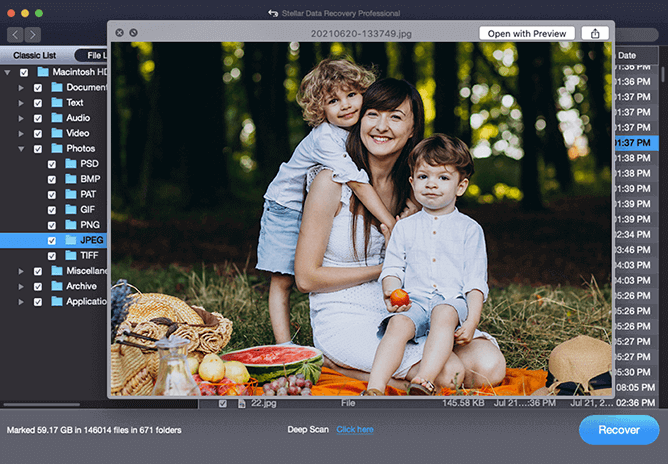
Here’s how to recover data on Mac using Stellar Data Recovery.
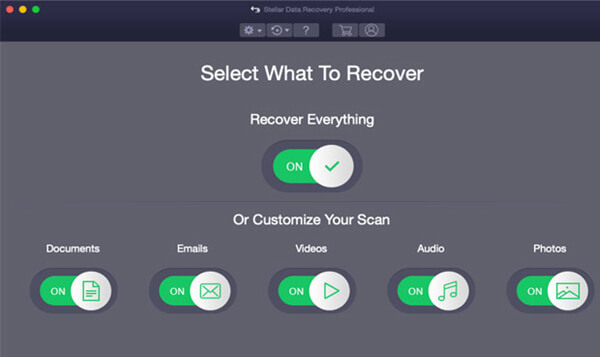
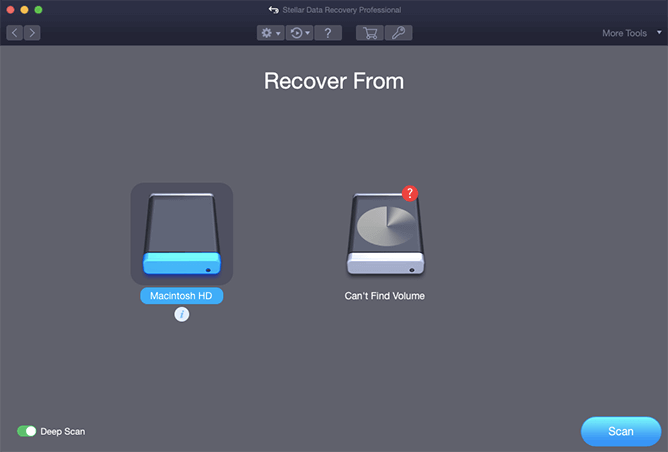
3. Select the file location. Stellar will then scan your device for deleted files.
4. Preview the files then select the files you want to recover.
5. Click “Recover” then select the destination you want to recover the files to. Your files are now saved from the doom of deletion.
If the Time Machine fails you, then worry not. You have a host of options like Stellar Data Recovery to save your files.


About The Author

Content writer and digital marketing expert with 10 years of experience.