-

Written By Girish Gola
-

Approved By Vishal Sharma
-
Updated On
-
Min Reading 6 Min
Secure Boot is a built-in feature to manage your system’s security.
It ensures that your device boots only from software that it recognizes and defines as safe. So it won’t allow your computer to open apps or programs that the Original Equipment Manufacturer (OEM) recognizes as unsafe.
However, Secure Boot can inadvertently block software that you actually want to run on your computer. These include software that can potentially overwrite your data, format a partition, replace the OS, or make major changes to the OS.
How Secure Boot Interferes with BitRaser?
Secure Boot often prevents software from running when you boot your computer. BitRaser Drive Eraser is one such software that may not work if you have Secure Boot enabled. That’s quite natural.
However, when you deliberately want a software like BitRaser to erase all your data securely, you need to bypass Secure Boot. Keeping that in mind, read ahead to know how to disable secure boot.
Step-by-Step Guide to Disable Secure Boot in Windows 10
Before you disable Secure Boot, check the list of trusted software and drivers for your PC. You can check this on your manufacturer’s website or in the Windows Updates. If you’ve confirmed that it is necessary, proceed with the following steps to disable Secure Boot in BIOS.
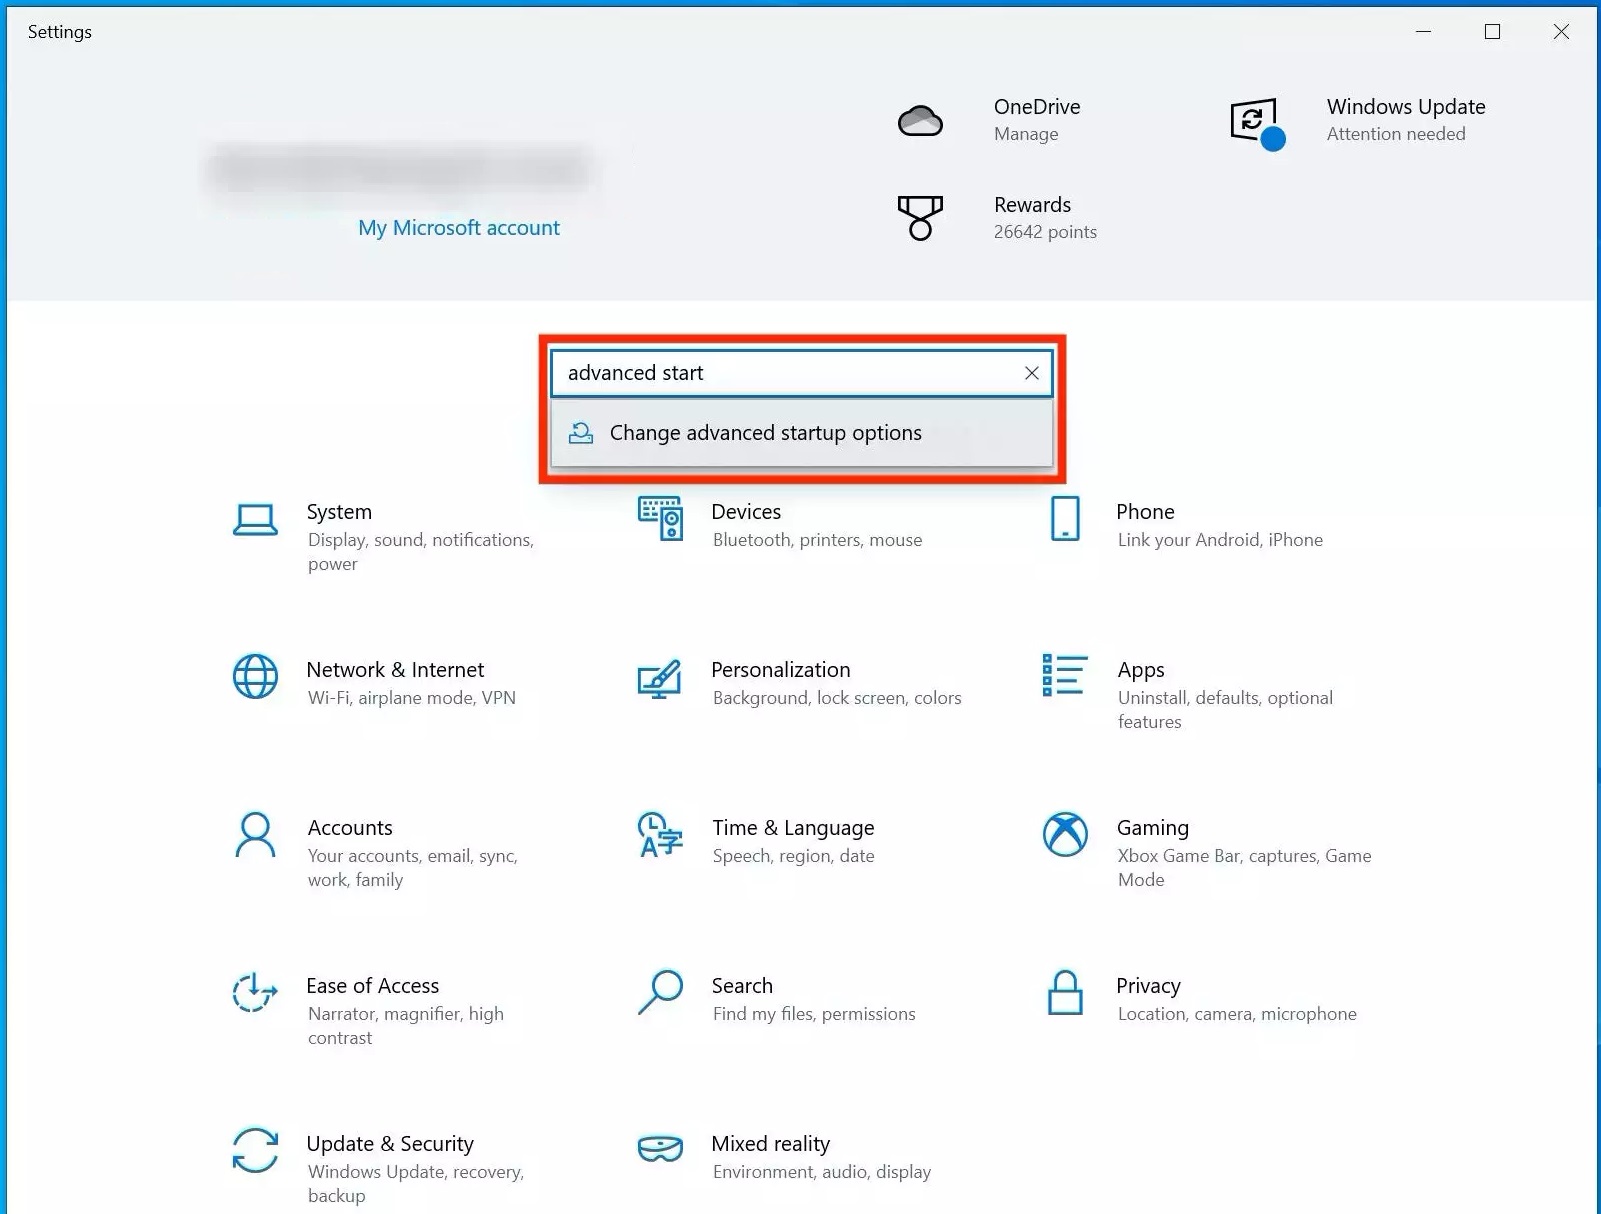
- Click the “Start” button, then click “Settings”.
- In the search box, type “Advanced Start”. You will see an option called “Advanced Startup Options”, click that.
- Then, navigate to the “Recovery Page”. Here, find the “Advanced Startup” selection and click “Restart Now”.
- Your computer will restart and take you to a page called “Choose an Option”. Here, click “Troubleshoot”.
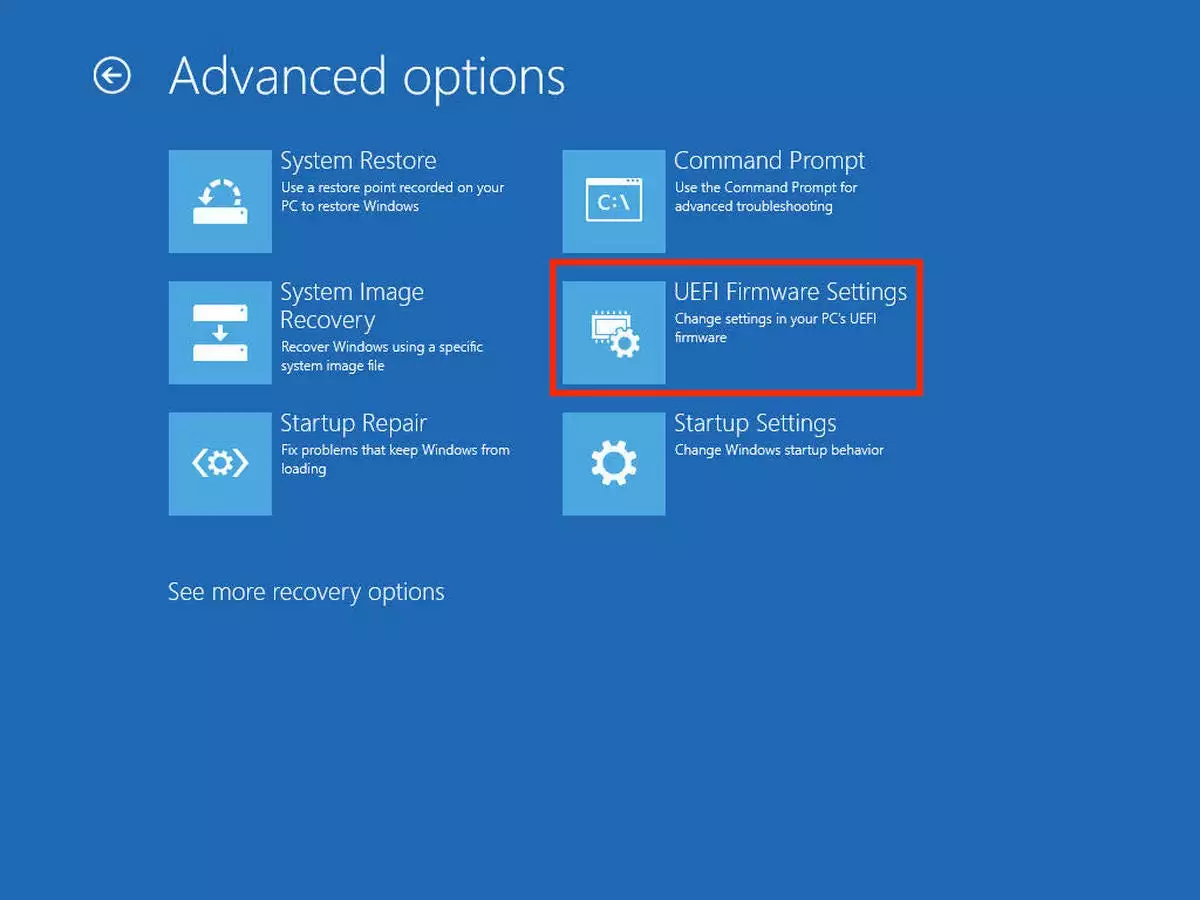
- Then, click the “Advanced Options” button.
- Here, select the “UEFI Firmware Settings” button. This will make your computer restart and then take you to the UEFI interface.
- Now comes the tricky part. The UEFI page isn’t the same for all Windows users. So you will have to do some digging to find the “Secure Boot” option in this tab. The option is usually located in the “Boot Options” page.
- After you locate the “Secure Boot” option, change it from “Enabled” to “Disabled”
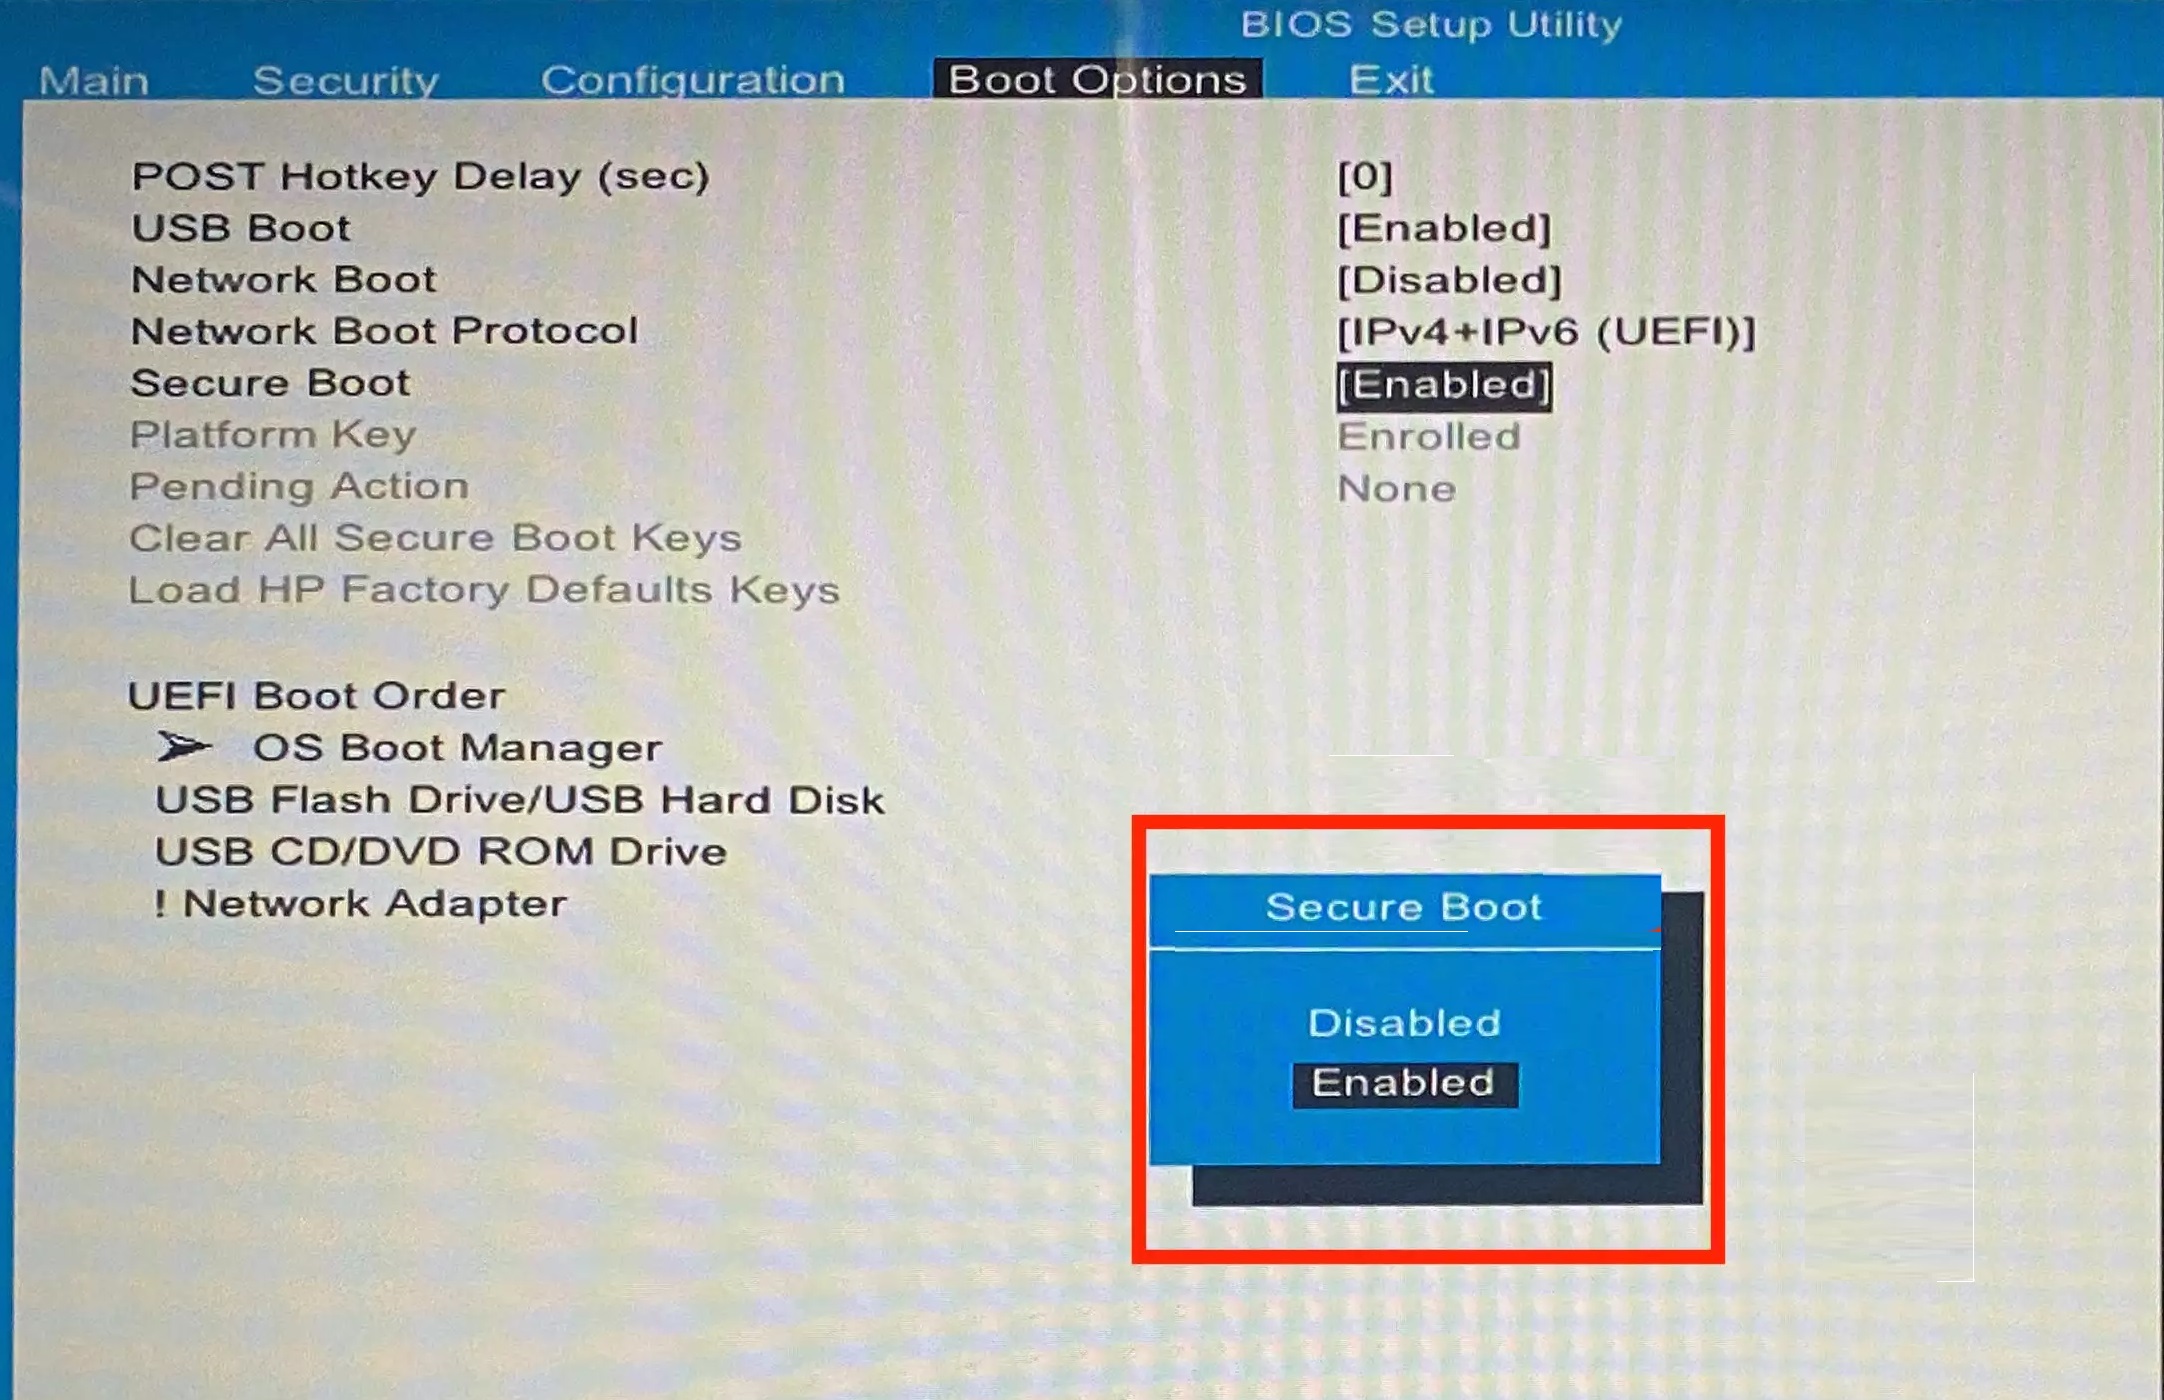
Go to the “Exit” menu and select “Save Changes and Exit”. Then, restart your PC for the changes to be updated in the system.
Step-by-Step Guide to Disable Secure Boot in Mac
Here’s how you do this.
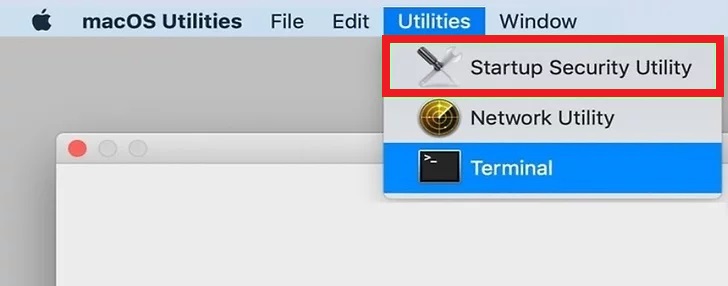
- On your keyboard, press the Command + R keys. Keep them pressed, and turn the computer on.
- The macOS Utilities dialog box opens. Choose Startup Security Utility.
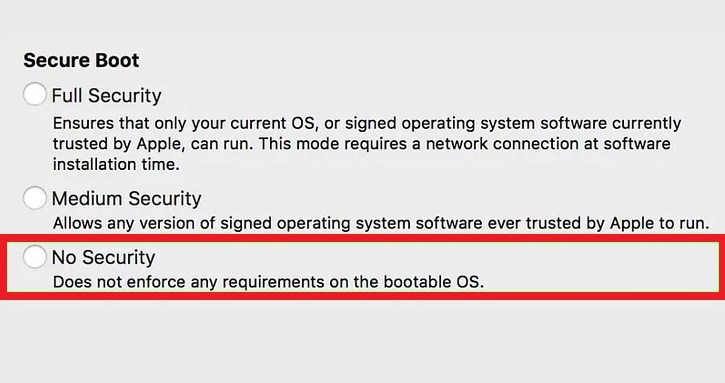
- From the next screen (after you’ve keyed in the admin username and password), choose No Security.
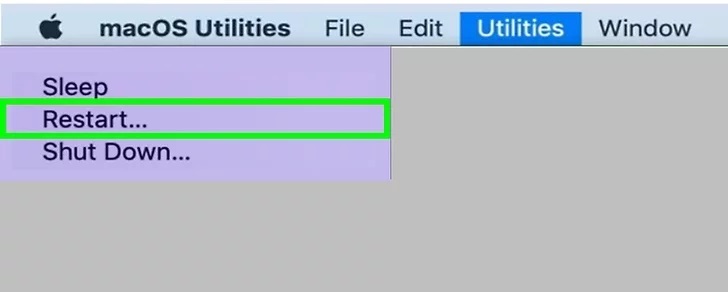
- From the Apple menu, choose Restart.
A Word of Advice Before Disabling Secure Boot
It’s a good idea to install a secondary malware protection system before you disable Secure Boot. This will reinstate some level of protection for your system.
Install only software or hardware that you trust completely when Secure Boot is disabled in Windows. After you finish installing the hardware or software to your system, re-enable Secure Boot. This will help ensure that your PC stays protected.
Re-enabling Secure Boot is often not just a matter of flipping a switch. You may need to restore your computer to Factory Settings to re-activate Secure Boot.
You will have to navigate to the BIOS (Basic Input Output System) menu to disable Secure Boot. Be cautious when you’re on this menu, especially if you’re not very tech-savvy. The BIOS menu is meant for advanced users. And one wrong move could prevent your PC from functioning properly.
Now that you’ve disabled Secure Boot in Windows, you can use BitRaser, or any other external software, as needed. But remember to proceed with caution.
FAQs
You can check whether Secure Boot is enabled by navigating to the BIOS menu. Use the same steps mentioned above to reach the BIOS menu. The final page will indicate whether Secure Boot is enabled or disabled.
It is technically ok to disable Secure Boot in Windows. But doing so does leave your PC at risk for malware. That is why it is advised to only disable Secure Boot if absolutely necessary.
Disabling Secure Boot doesn’t affect your computer’s performance in any noticeable way. Your PC will simply stop checking if you’re running a digitally signed operating system after you disable Secure Boot.
The biggest downside to Secure Boot is that it doesn’t accept all trusted software. It can make mistakes in granting signatures or loading formulas. It can also allow bootloaders that ignore Secure Boot to open. This can introduce malware to your system.
Secure Boot may be located in different locations in BIOS depending on your computer’s configurations. You will have to look it up on your manufacturer’s website to exactly locate the Secure Boot option.