-

Written By Girish Gola
-

Approved By Vishal Sharma
-
Updated On
-
Min Reading 7 Min
As a business, you want to comply with the global standards of data destruction and data erasure. This not only prevents data theft from decommissioned drives, but also prevents the risk of penalties under data protection laws.
Read this guide to know how to format a hard drive with USB. We’ll accomplish this using BitRaser Drive Eraser software.
We’ll first tell you how to download and install the software from Cloud. Then we’ll take you through the process of creating Bootable USB media. Finally, we’ll take you through how to format hard drive from a bootable USB.
Stage 1: Download BitRaser Drive Eraser ISO Image File from BitRaser Cloud
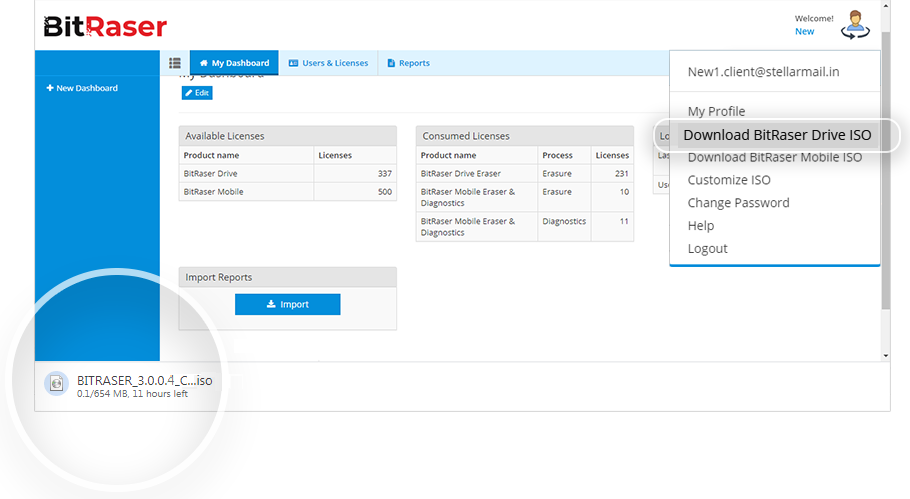
Step 1: Login to your cloud account with the credentials you received via email
Step 2: Click on the “User Profile” icon. This will expand a drop-down menu. Select “Download BitRaser Drive ISO” from the menu.
Stage 2: Burn BitRaser Drive Eraser ISO to Create a Bootable USB Media
Step 1: Enter https://rufus.ie in your search bar to download Rufus. That is an open-source application that can create bootable USB flash drives.
Step 2: Install Rufus, then connect the USB to your system,
Step 3: Launch Rufus, then click “Start”. This will initiate the bootable USB media creation process.
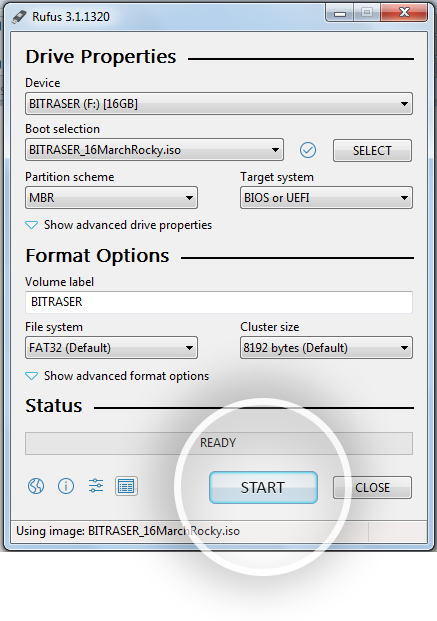
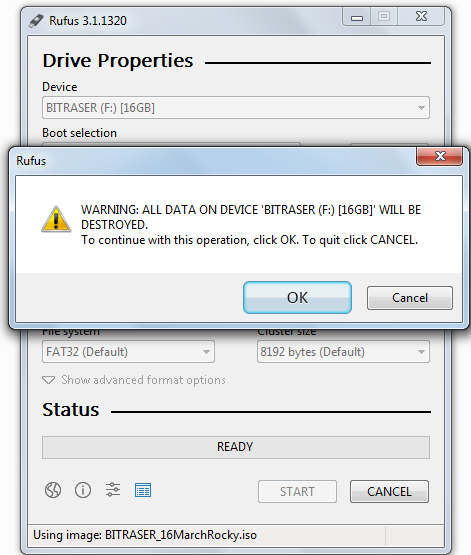
Step 4: A pop-up box will appear, click “Yes”. Then, in the next pop-up, click “Ok”. This will burn the BitRaser Drive Eraser ISO file on the USB.
Stage 1: Wiping the PC with BitRaser Bootable USB
Step 1: Connect the bootable USB to the PC you want to wipe.
Step 2: Turn on the PC, then enter the Boot Menu. You can do this with the function keys specific to your PC's make and model.
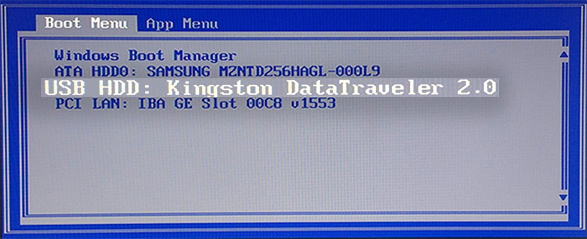
Step 3: Click the “USB Device” option, then click “Enter”
The following BitRaser Dual Boot Menu will open after your PC boots.
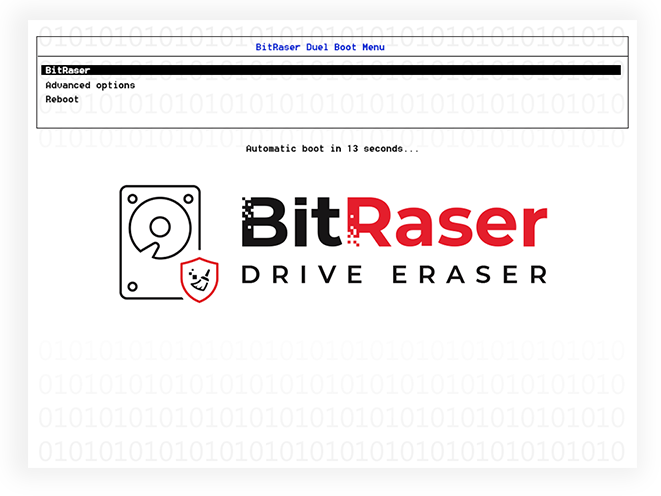
Step 4: Select BitRaser. Then press “Enter” to initialise the BitRaser Drive Eraser.
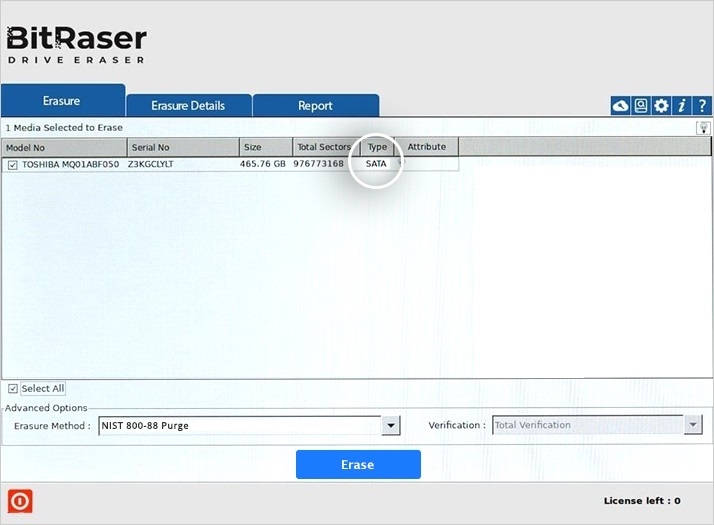
The BitRaser home screen will appear after the drive initialises. All the drives connected to your PC will be listed.
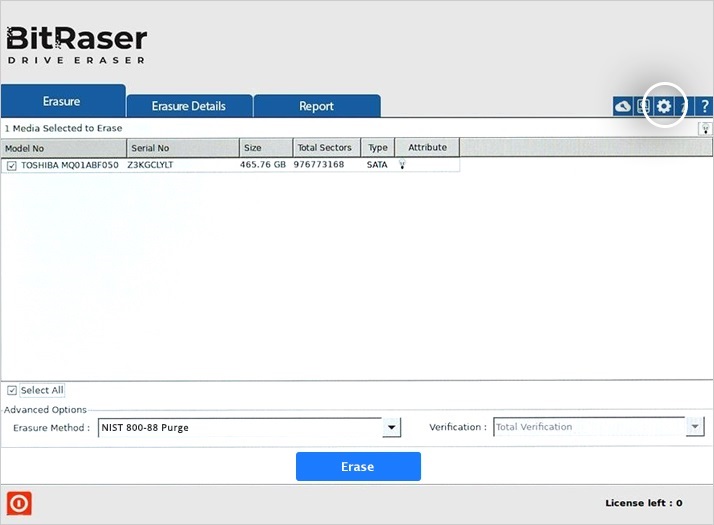
Connect your PC to the internet and log in to BitRaser cloud to acquire licenses to wipe the PC. Here’s how to do that.
1. Click the “Settings” icon on the BitRaser Home Screen
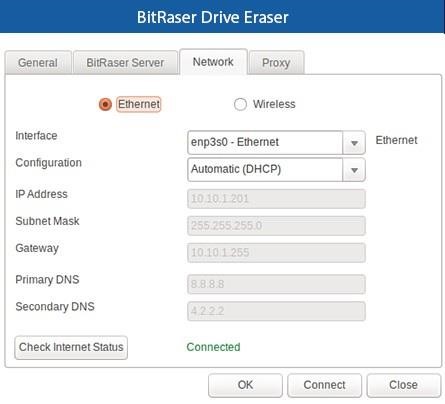
2. Navigate to the “Network” tab.
Ethernet:
- Select the Ethernet Radio button
- Select “Automatic (DHCP)” under “Configuration”
- Click “Connect”
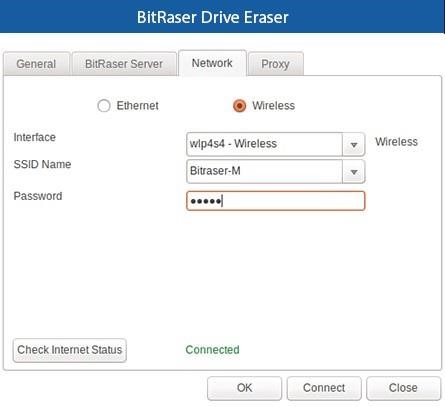
WiFi:
- Select the Wireless Radio button
- Choose your network’s name under “SSID”
- Enter the password, then click “Connect”
3. Navigate to the “BitRaser Server” tab in the Settings window. Here, enter your BitRaser user name and password. Then click “Connect”.
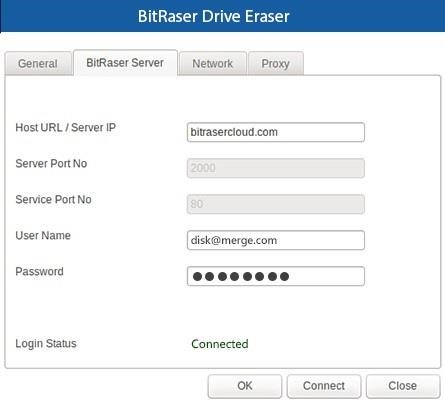
The BitRaser software will automatically acquire licences from your cloud account.
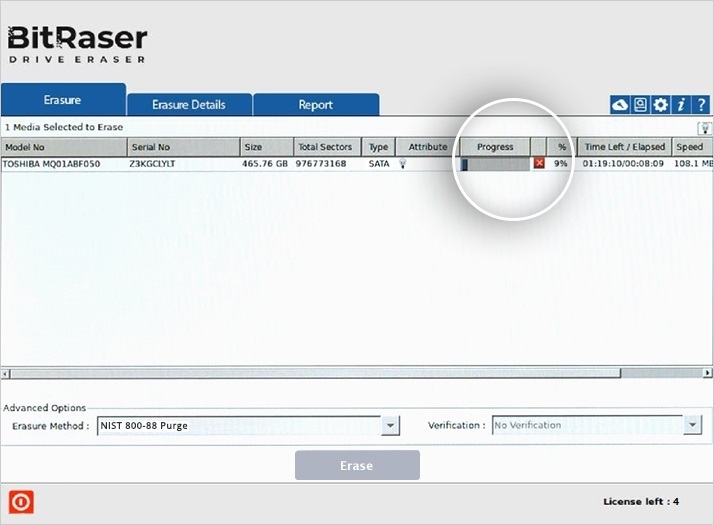
4. Click the checkbox for all the drives you want to wipe. You can also select the erasure method from the dropdown menu at the bottom of the screen. Then, click “Erase”
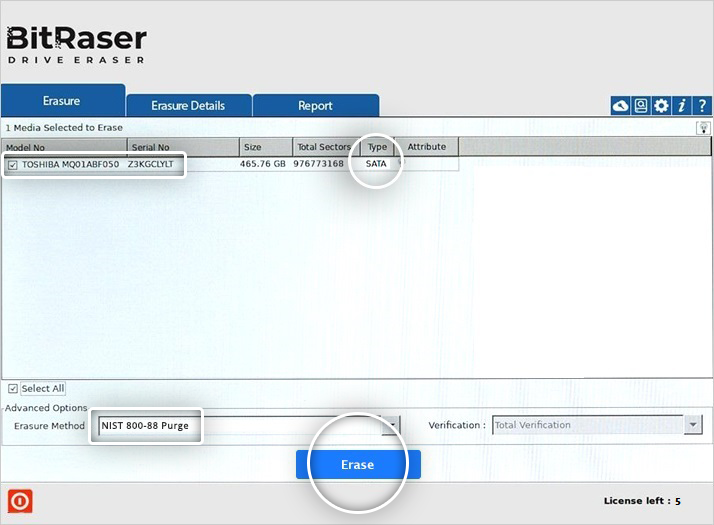
5. You will be asked to confirm the erasure one last time. Click “Yes”. You can track the progress of the erasure on the BitRaser window.
Once your PC drive is wiped, the software will generate a digitally signed report confirming the erasure. The report will get saved on your BitRaser cloud account.
Why Is Complete Erasure Even Needed?
Your private data should remain private. Even if you click “Shift+Del”, there are some ways to recover the deleted data. For example, you can use the Stellar Data Recovery software to recover data deleted using such methods.
This is why complete drive erasure is encouraged. Here are some more reasons.
- It is a legal requirement. Especially for businesses, you cannot recycle a drive without assuring it’s been wiped.
- It helps build trust with your clientele.
- A cost-effective way to manage asset disposal.
Why Trust BitRaser To Format Hard Drives with USB?
- It complies with international standards of data erasure.
BitRaser complies with 24 international standards including NIST 800-88, DoD 3 & 7 Passes, and HMG.
- BitRaser provides certified data erasure
The software supports many drive types like SATA, PATA, SDD, HDD, and more.
- Generates auditable reports
Once erasure is complete, the software automatically generates audit trails reports. You can customise the report and save it in multiple formats.
- It is cloud-integrated
This provides flexibility to users and makes license distribution much more straightforward. The certificate of erasure is also saved on the cloud. So you can access it whenever you need it.
- No license expiry
Your BitRaser license doesn’t expire until you actually use the tool. This flexibility lets you purchase your licenses knowing that they won’t expire before you use the tool.
- Parallel processing for data erasure
With BitRaser, you can wipe data from up to 32 drives in parallel, which makes it ideal for businesses.
The quickest and more effective way to wipe a hard drive with USB is using BitRaser. Download the software now so you wipe its data with ease.
FAQs
When you are about to format hard drive with a bootable USB, you will need to burn the eraser software on the USB. The bootable USB should have at least 2 GB of available space. It should be a blank drive.
Downloading and installing the BitRaser drive erasure should take about 5 minutes. Creating the bootable USB media will take another 5 minutes. Wiping the PC is the longest step. Depending on the volume to be wiped, it can take anywhere between 10-15 minutes. So you could wipe your PC in 20-25 minutes.